Organizations can be created and set up using the Master Tour Setup Wizard. This tool will not only allow you to add the Organization, but will also walk you through setting up Organization Logos, a Tour Name, Tour Dates, and Events.
This article covers:
- How to Add a New Organization
- How to Add Logos in the Setup Wizard
- How to Add the Tour Name and Date Range in the Setup Wizard
- How to Add Events in the Setup Wizard
How to Add a New Organization
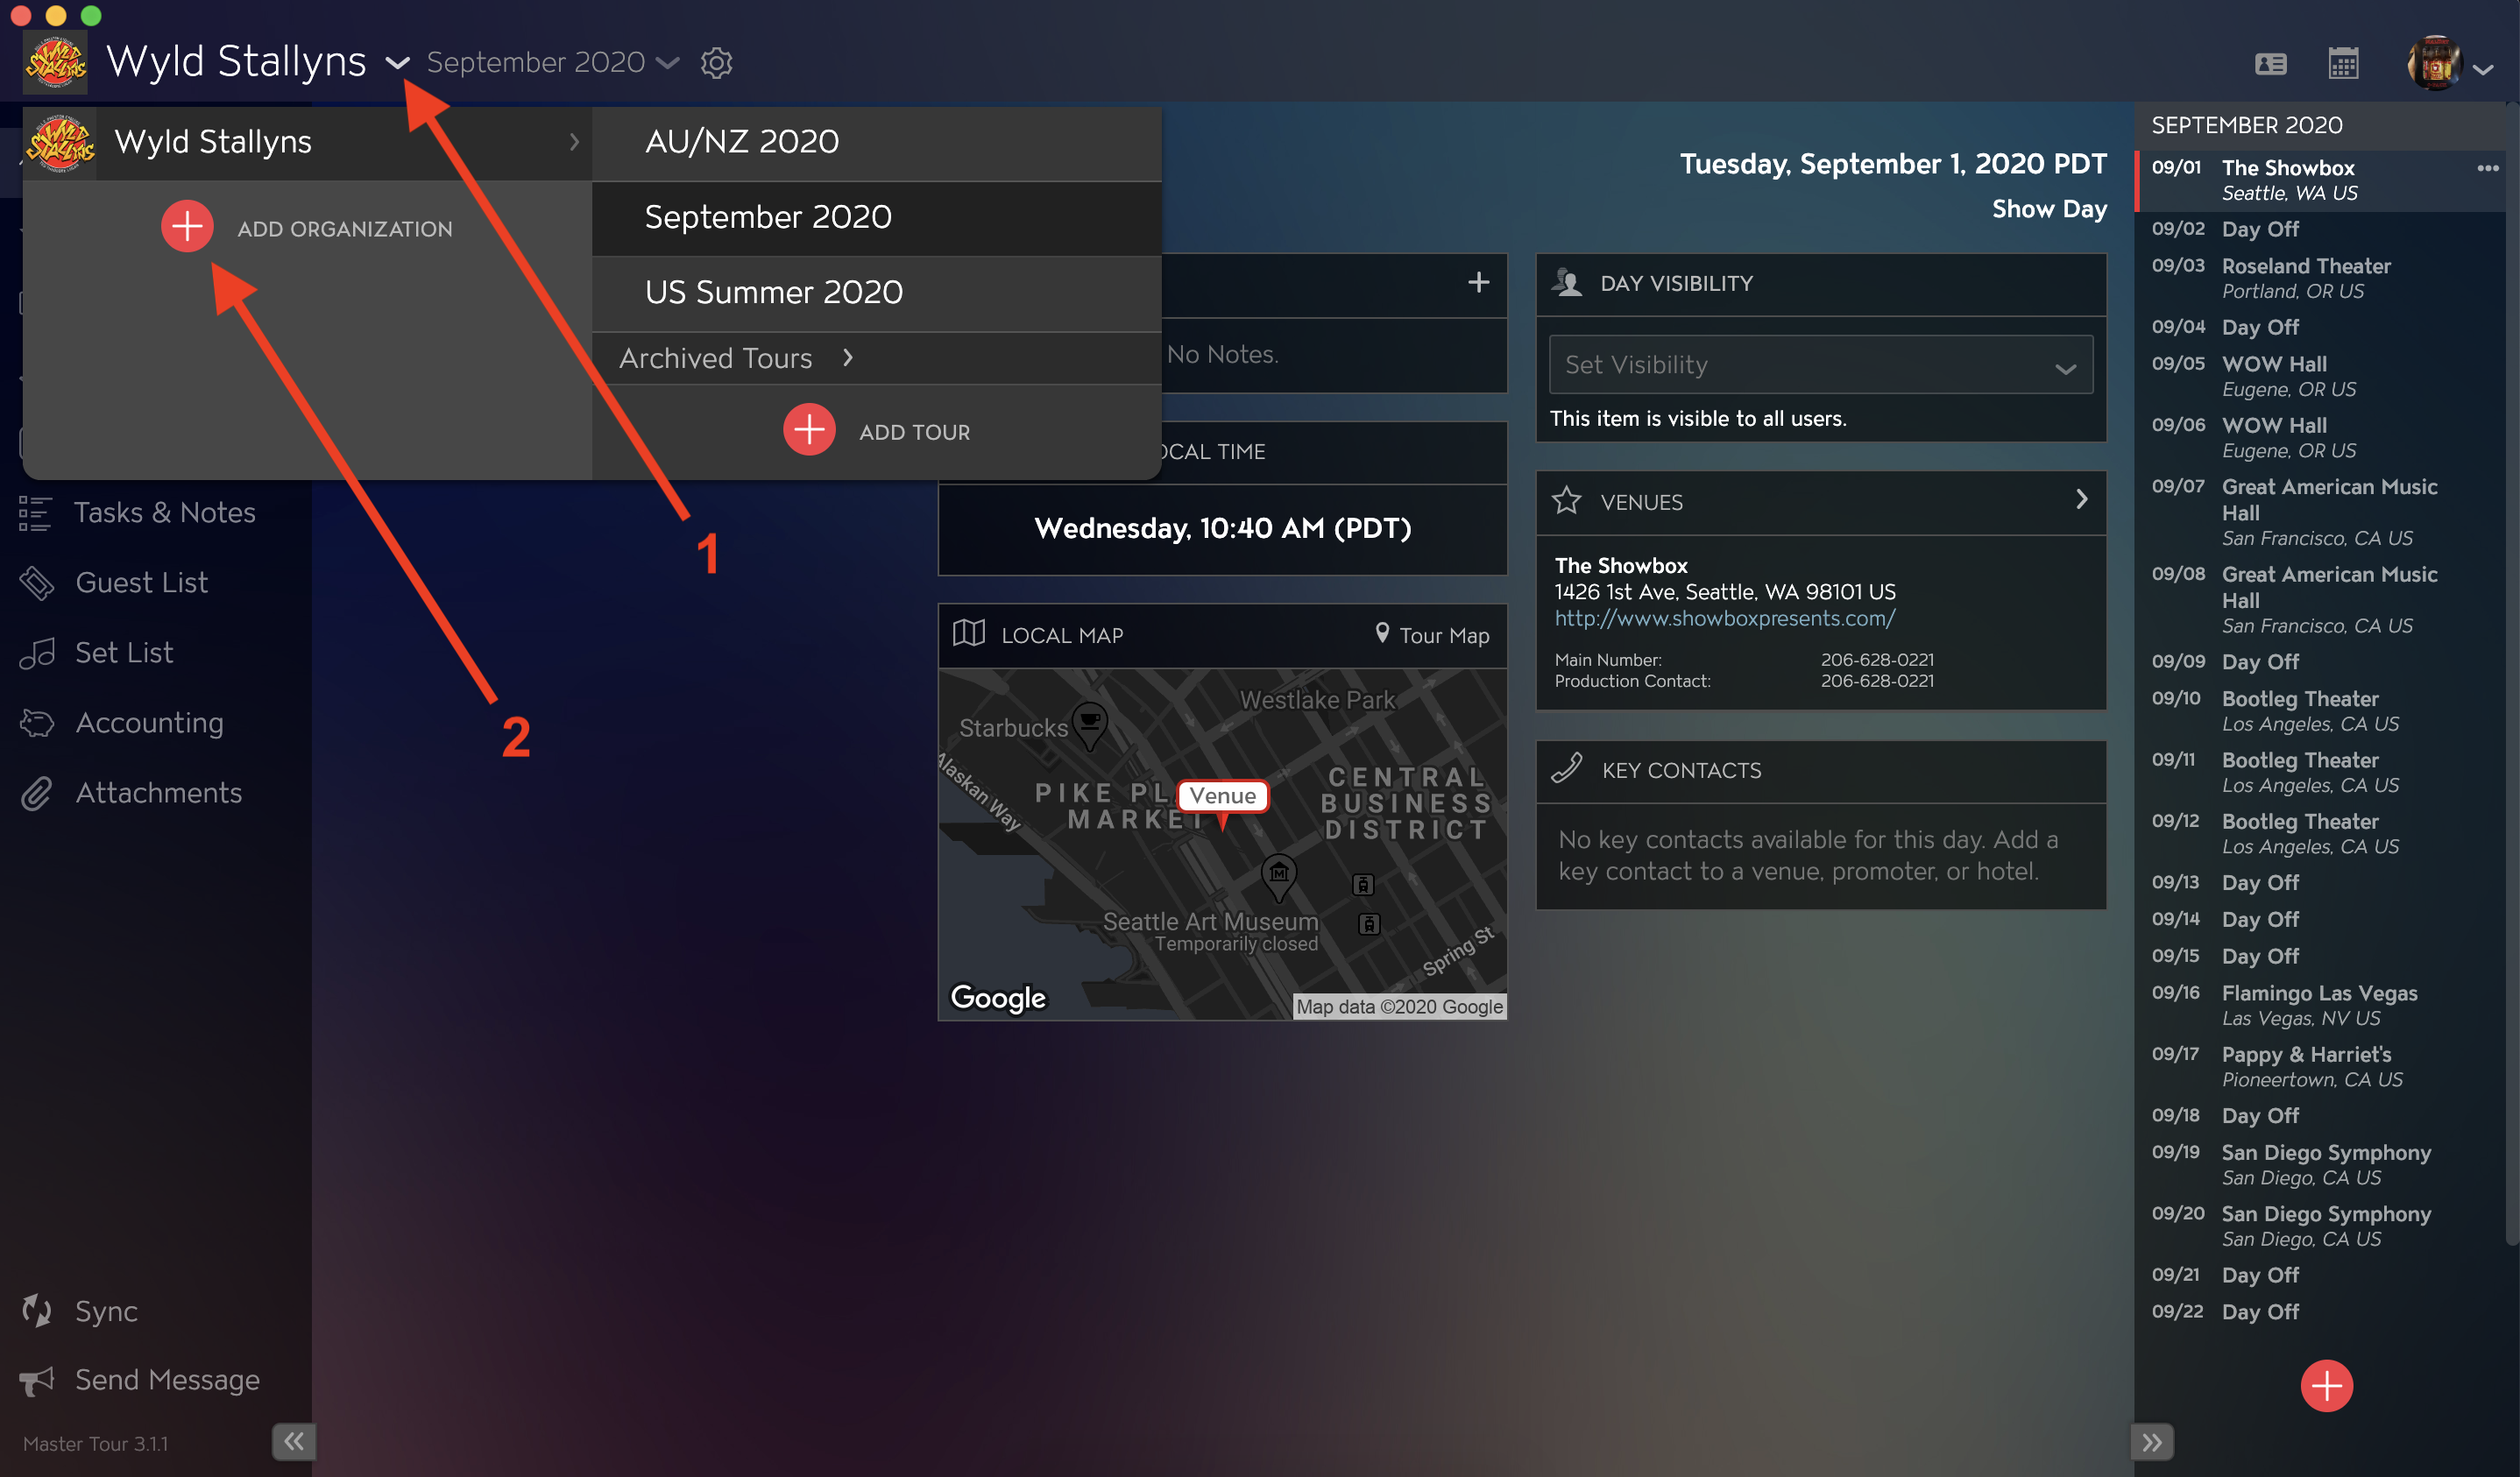
- Click on the Organization selector menu in the upper-left of the application.
- Click the Add Organization button within the dropdown menu.
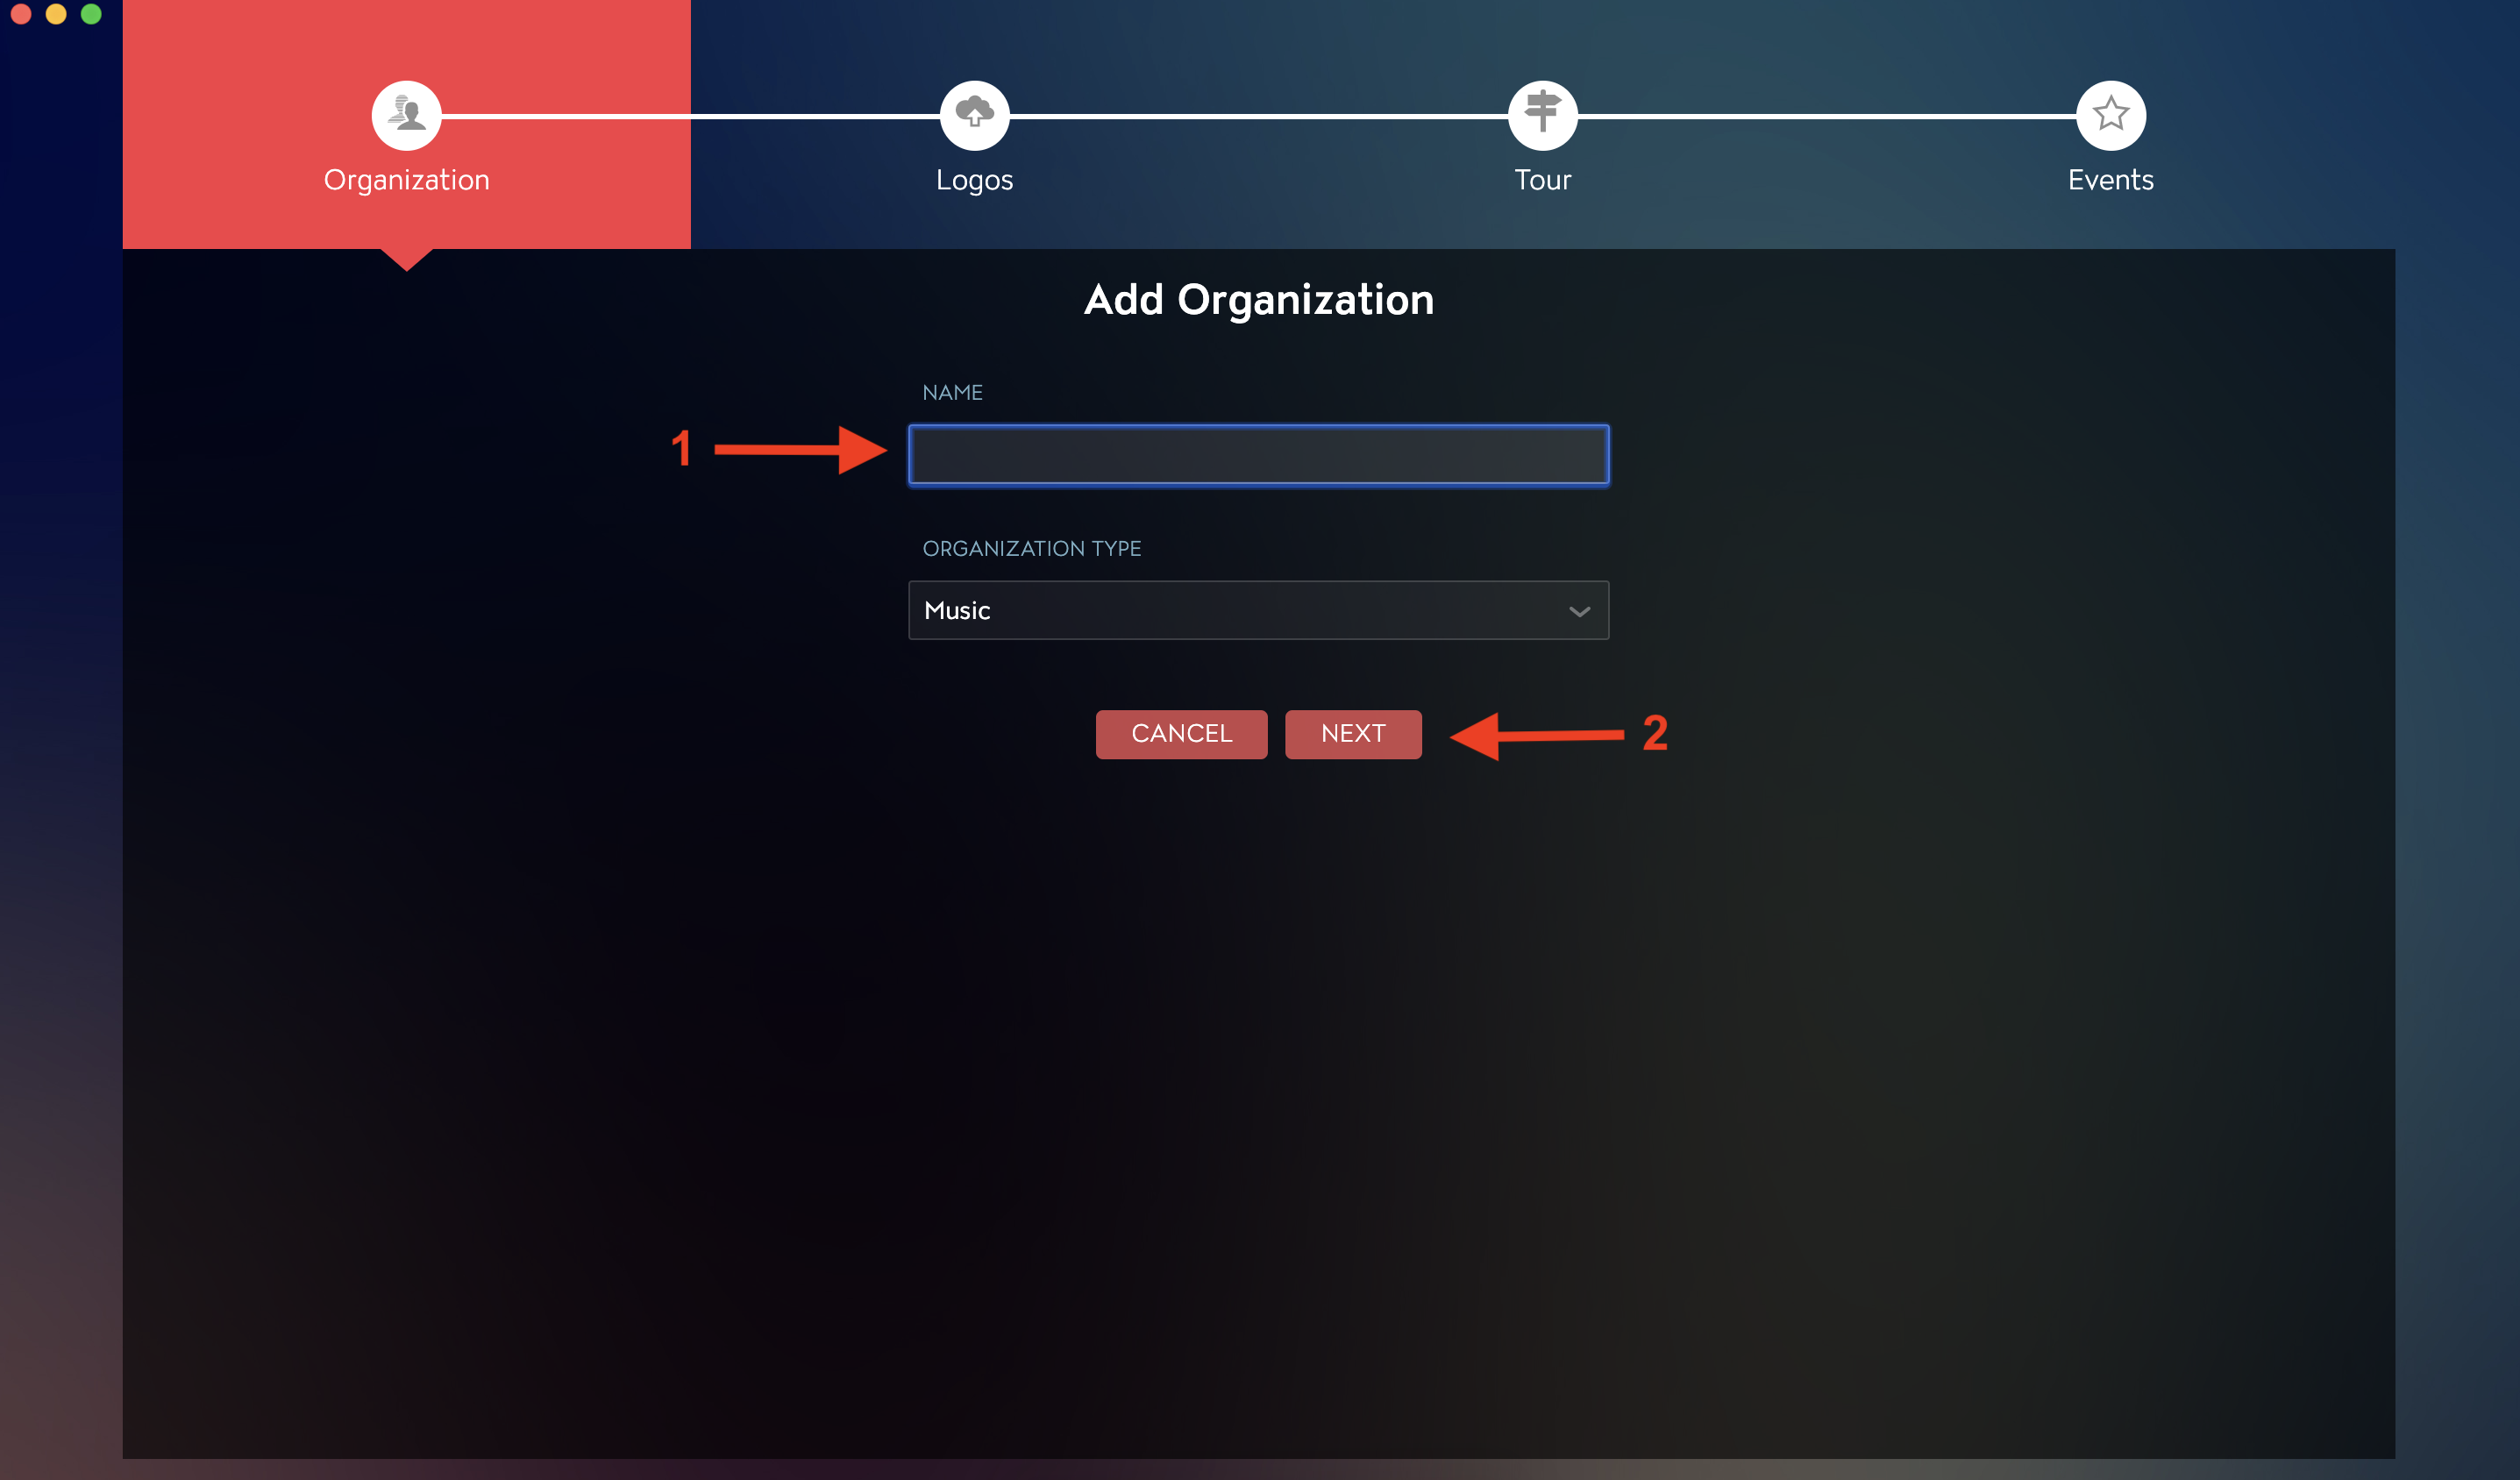
Within the Setup Wizard:
- Enter a name for your Organization in the Name field.
- Click the Next button.
How to Add Logos in the Setup Wizard
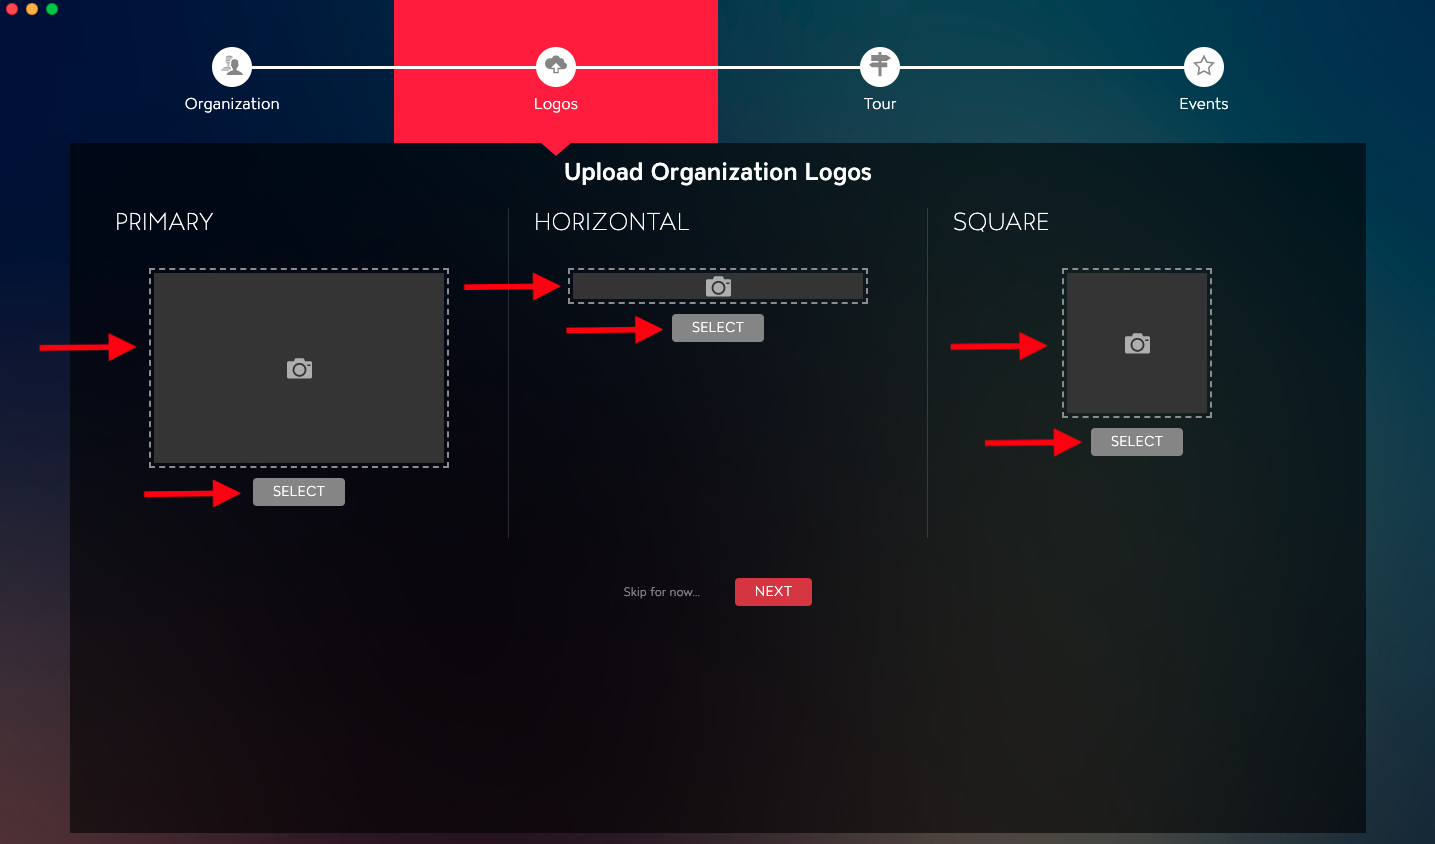
Next, you can upload Logos for the Organization. There are three styles of Logos in Master Tour: Primary, Horizontal, and Square.
If you do not want to add Logos at this time, you can click on the Skip for now link to the left of the Next button.
To add Logos, drag and drop an image into the field with the Camera icon or click the Select button to choose an image file from your computer.
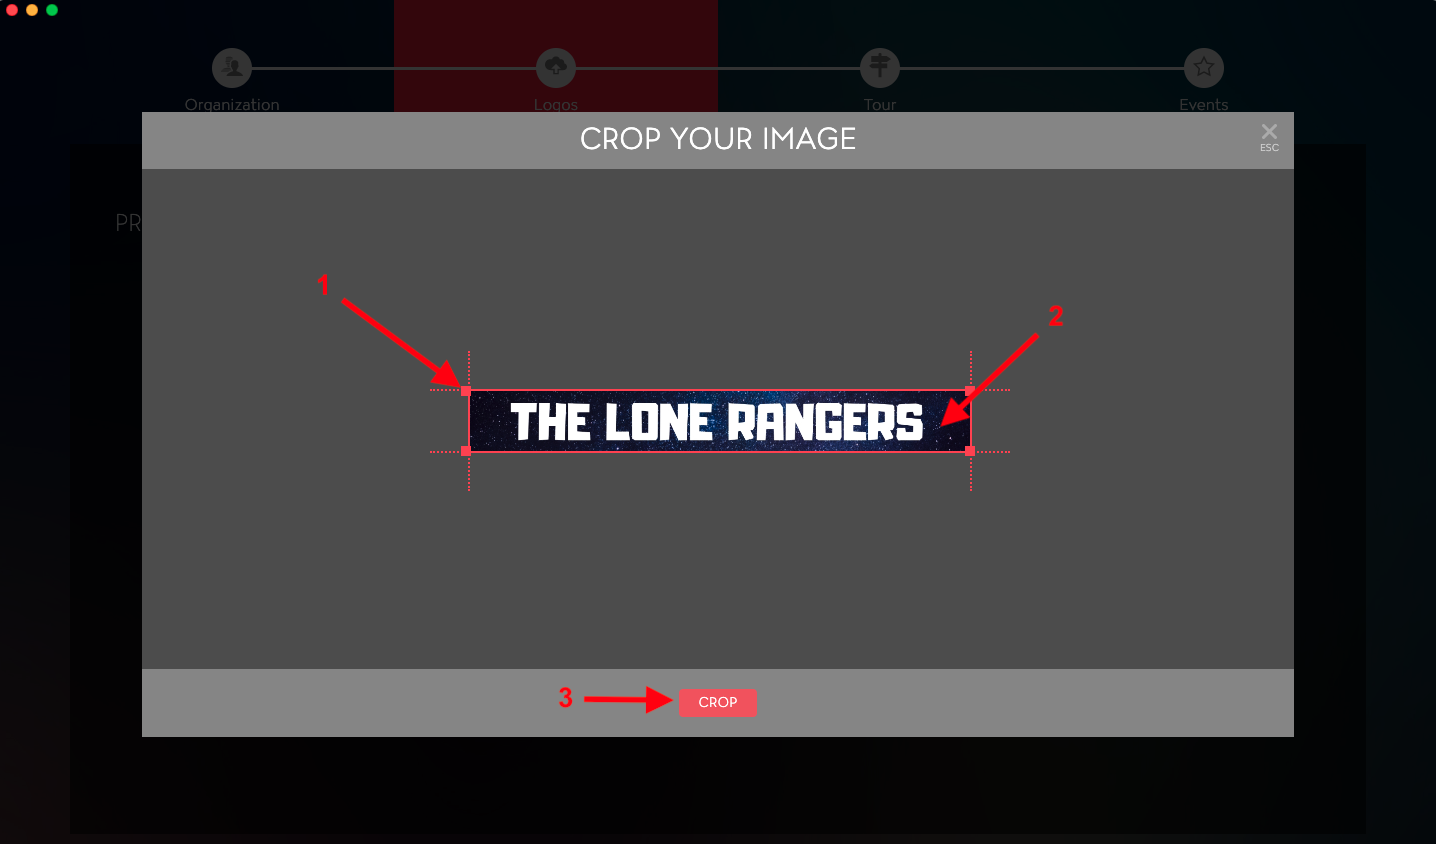
Depending on the size of the Logo, you may be directed to the Crop Your Image window. To crop your image:
- Click and hold on the corner boxes to drag and resize the Logo.
- Click and hold on the Logo image to drag and reposition the Logo.
- Click the Crop button to save your changes.
Once you have added Logo images, click on the Next button to proceed.

How to Add the Tour Name and Date Range in the Setup Wizard
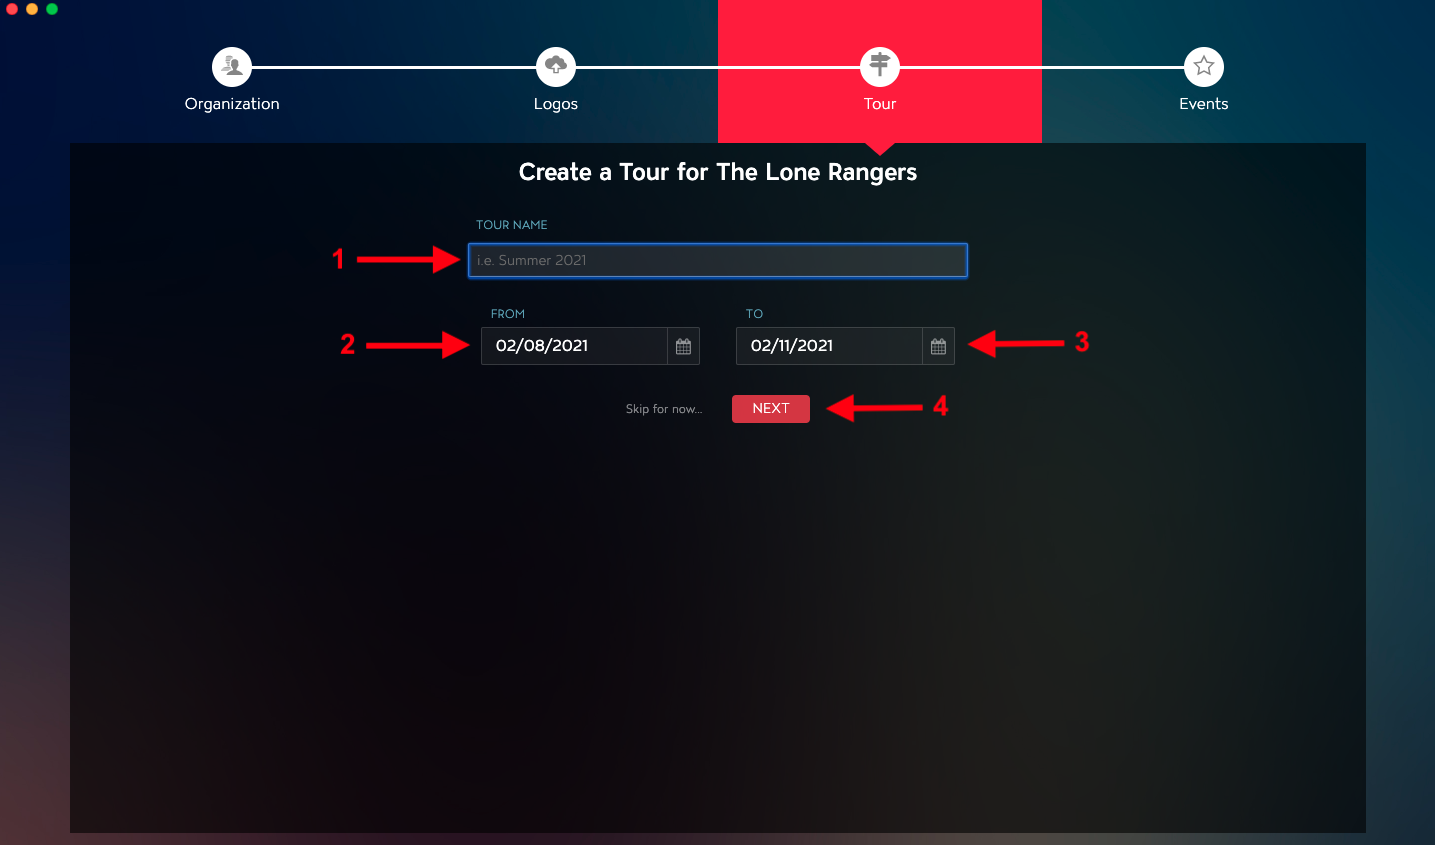
Next, you can enter your Tour Name and select a range of Dates to create. Note that you can always add additional Dates to your Tour at any later time. You can also modify your Tour Name at any time in the future.
If you do not want to add a Tour at this time, you can click on the Skip for now link to the left of the Next button.
- Enter a name for the Tour in the Tour Name field.
- Select a tour start date using the From calendar date selector.
- Select a tour end date using the To calendar date selector.
- Click the Next button.
How to Add Events in the Setup Wizard
Next, you can setup Events for the Tour. If you do not want to add Events at this time, you can click on the Skip for now link to the right of the Next button.
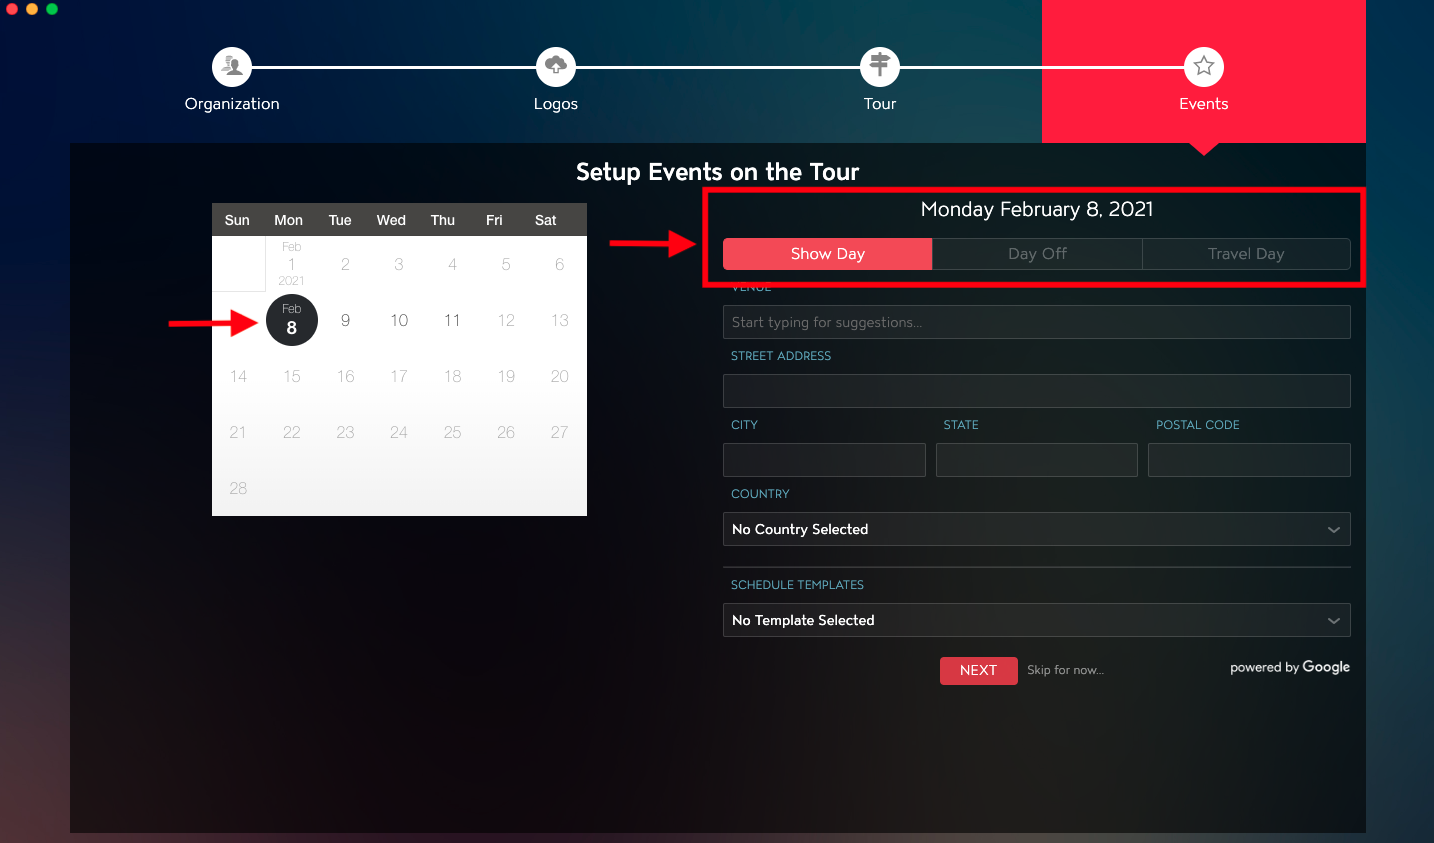
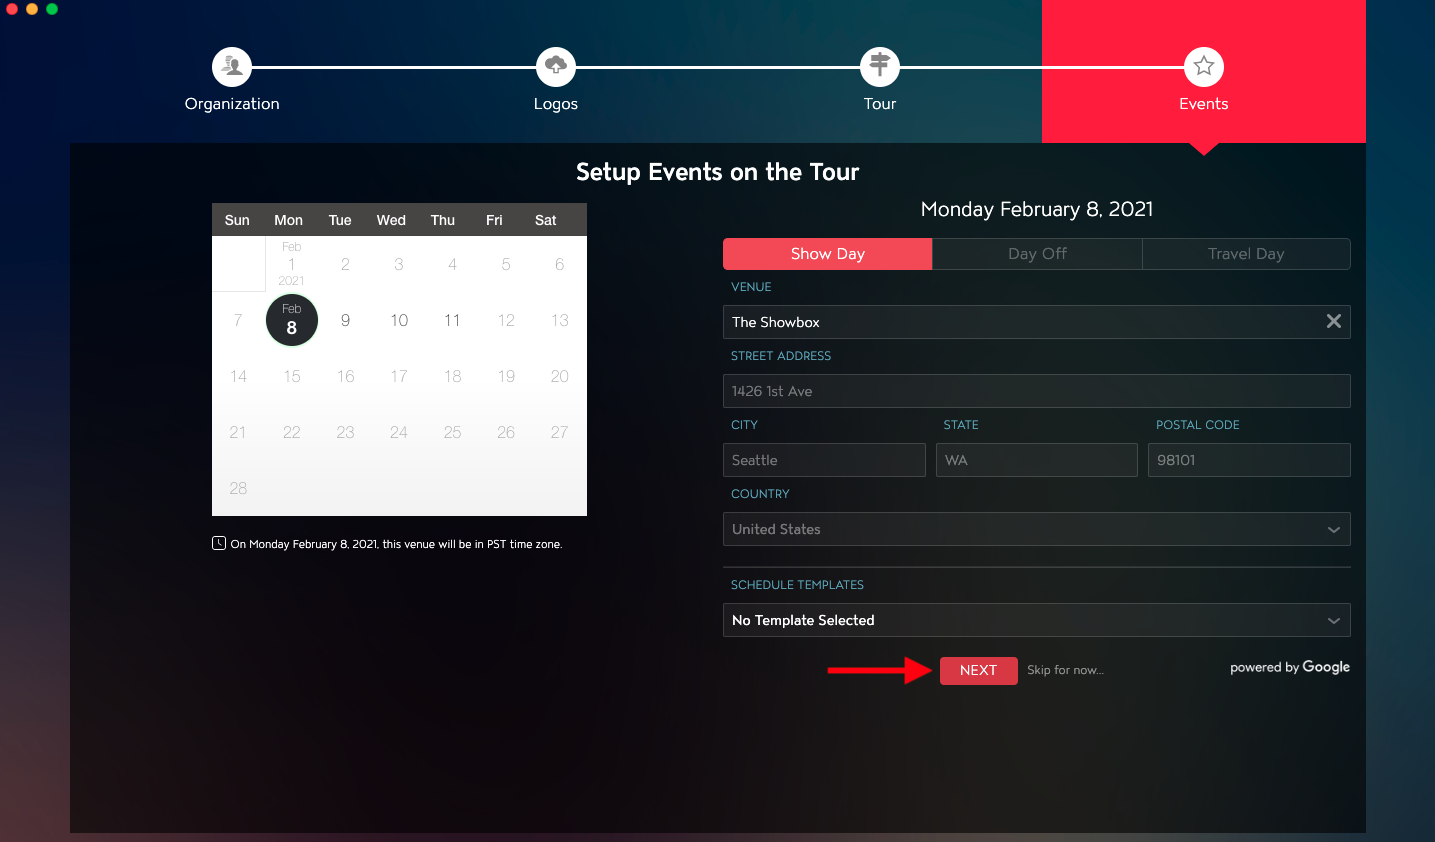
For the first date, you will want to set the Day Type. There are three primary Day Types that you can choose from, Show Day, Day Off, and Travel Day. Show Days are used to indicate days with Events. Days Off are used to indicate days that are a day off for your Artist and Crew. Travel Days are used to indicate days dedicated to Travel for your Tour.
You will see a calendar in the left column that indicates the date that you are currently working on. In the right column of the application, you will see the date as well as buttons for Show Day, Day Off, and Travel Day. From here, you can select the Day Type.
Show Day
To add a venue to Show Days, you can begin typing in the Venue field to search the Master Tour Venue database and utilize the details that our system has for each Venue. Click on the Venue from the list of results to apply it to the Date you have created. If your Venue doesn't exist in our database, Master Tour will search that Venue name on Google and offer the option of using the Name, Address, Phone Number, and URL that Google has on record. Master Tour venue records are indicated by the Master Tour logo to the right of their name, and venue records pulled from Google will display the Google logo, indicating their origin. If your Venue cannot be found in Master Tour’s venue database and isn't on Google, you can create a new venue record and enter the details that you currently have.
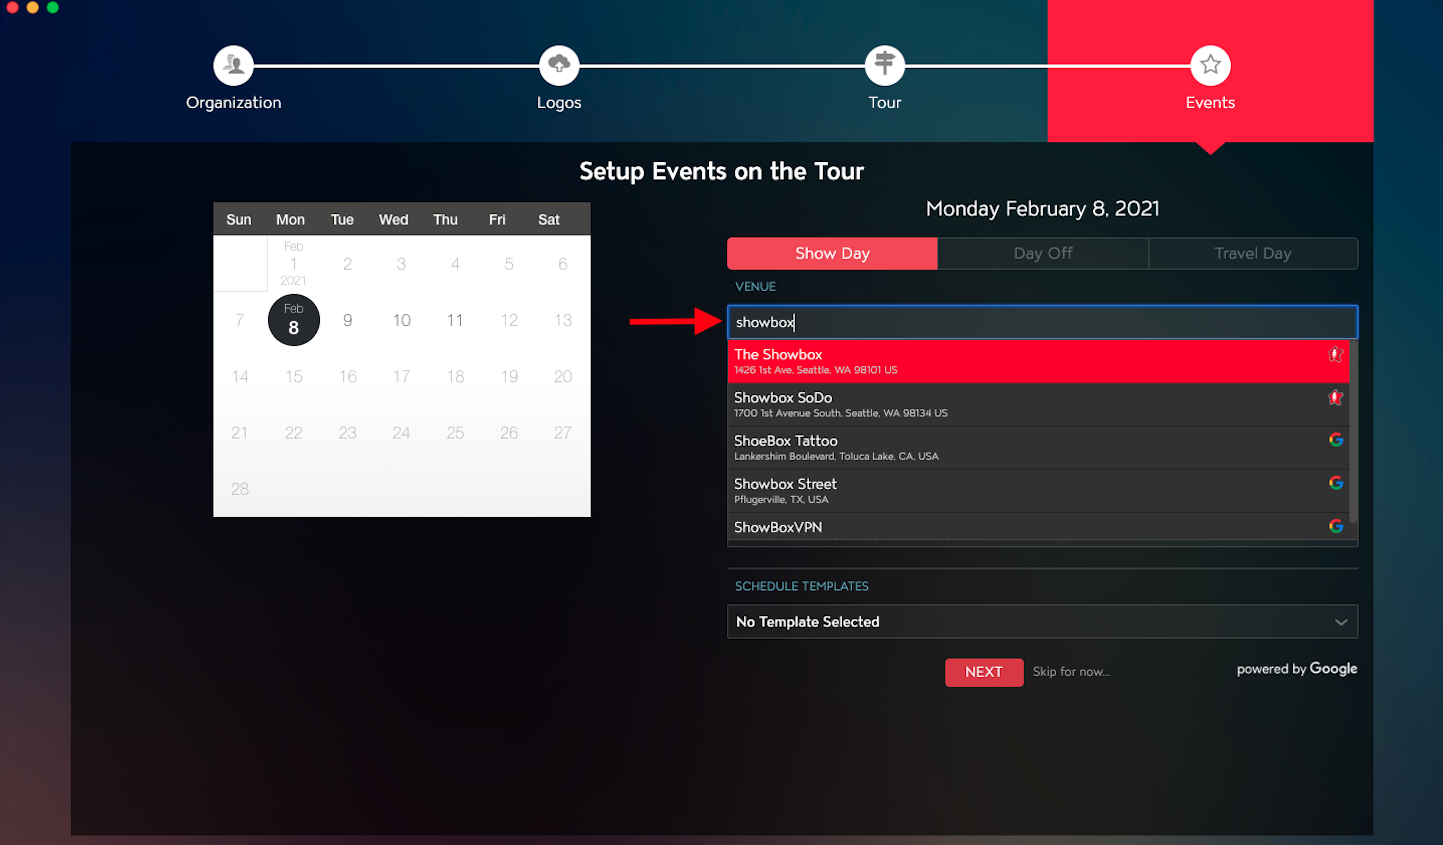
Once you have selected the Venue for your Show Day, click the Next button to advance to the next date or click the Finish button if you are at the end of your range of dates.
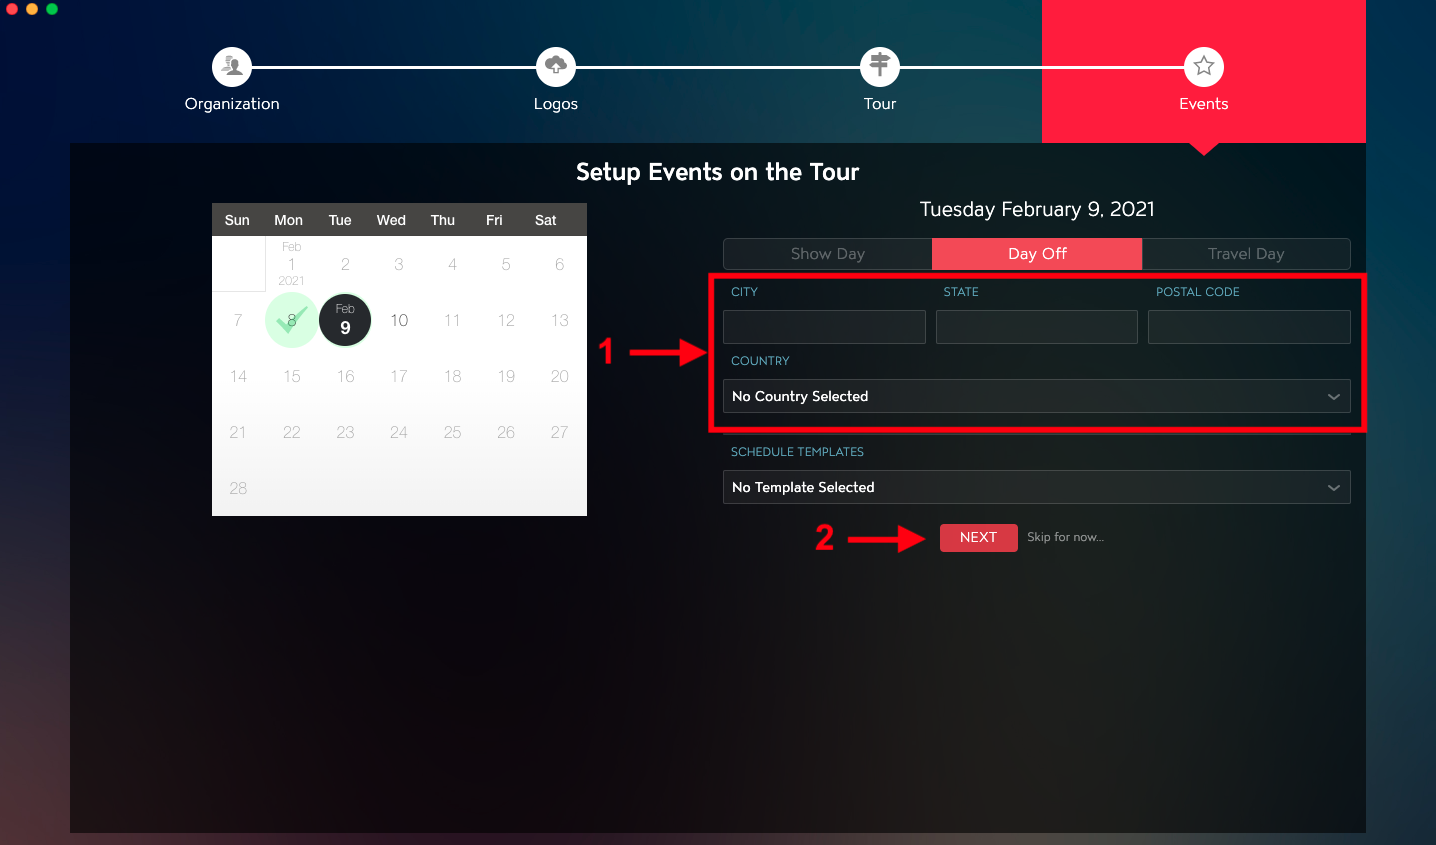
Day Off
Selecting Day Off will allow you to enter the city, state, and country information for that date. Master Tour will automatically look up your date's Time Zone as well if these details are filled in.
- Populate the City, State, Postal Code, and Country fields.
- Click the Next button to move to your next Tour Date - or click the Finish button if you are at the end of your range of dates.
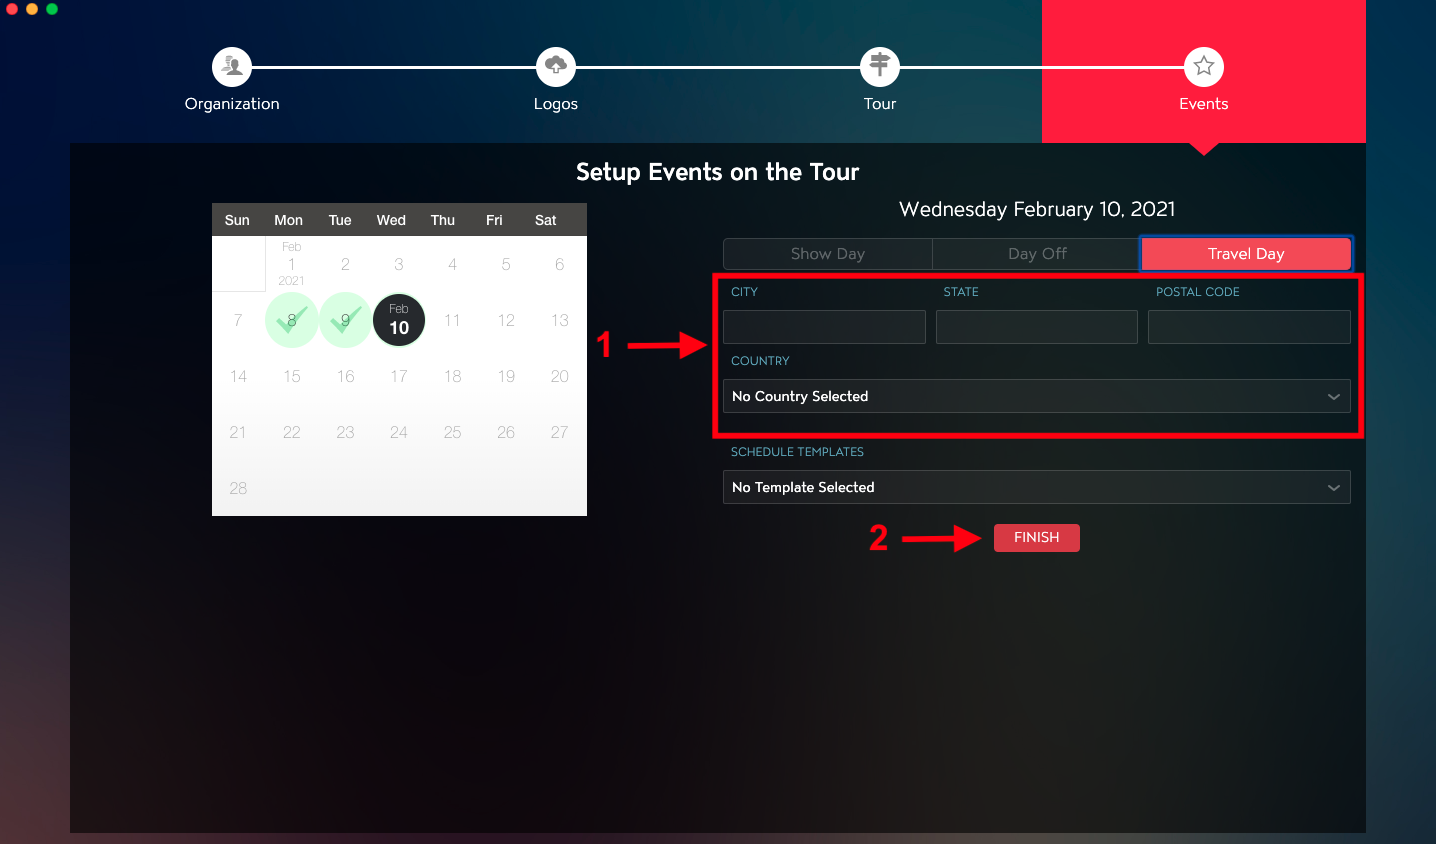
Travel Day
Selecting Travel Day as your day type will allow you to enter the city, state, and country information for that date. Master Tour will automatically look up your date's Time Zone as well if these details are filled in. If your Travel Day occurs across multiple Time Zones, you can choose which location you would like to be that date's primary Time Zone, and you can always set different Time Zones for your Travel Items' Start and End times.
- Populate the City, State, Postal Code, and Country fields.
- Click the Next button to move to your next Tour Date - or click the Finish button if you are at the end of your range of dates.
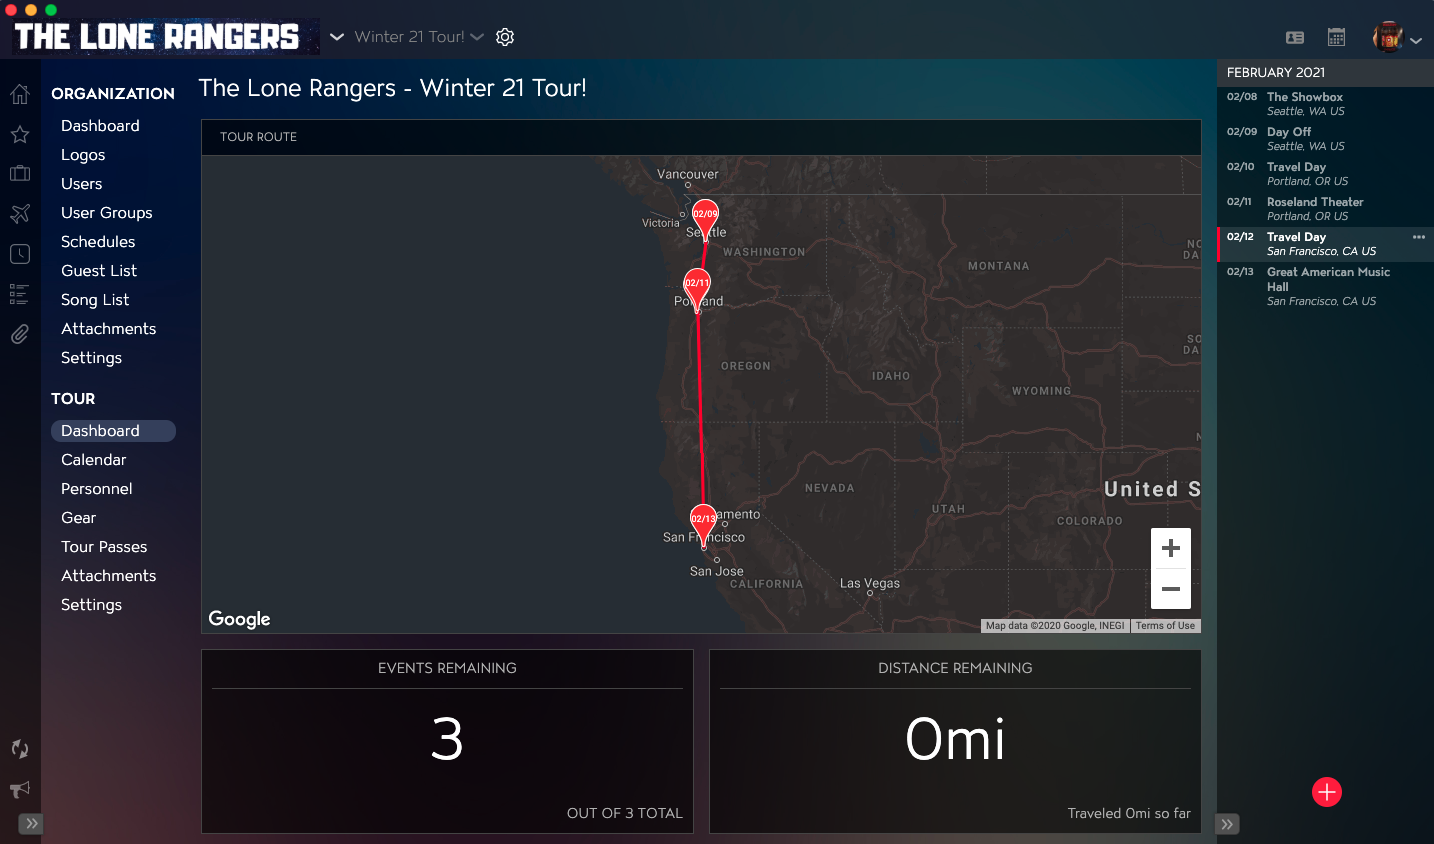
Once you have set up your tour dates, you will be directed to the Tour Overview Dashboard.