Master Tour allows you to create Print Reports of Tour info from scratch or several existing and custom Print Templates. If you haven't read the article on Adding, Copying, and Deleting Print Templates, please check that out before this article.
This article covers how to:
Drag and Drop Print Blocks to a Row or Column
Add Merge Fields to a Print Block
Style Merge Fields and Other Text
Use Week at a Glance Print Block
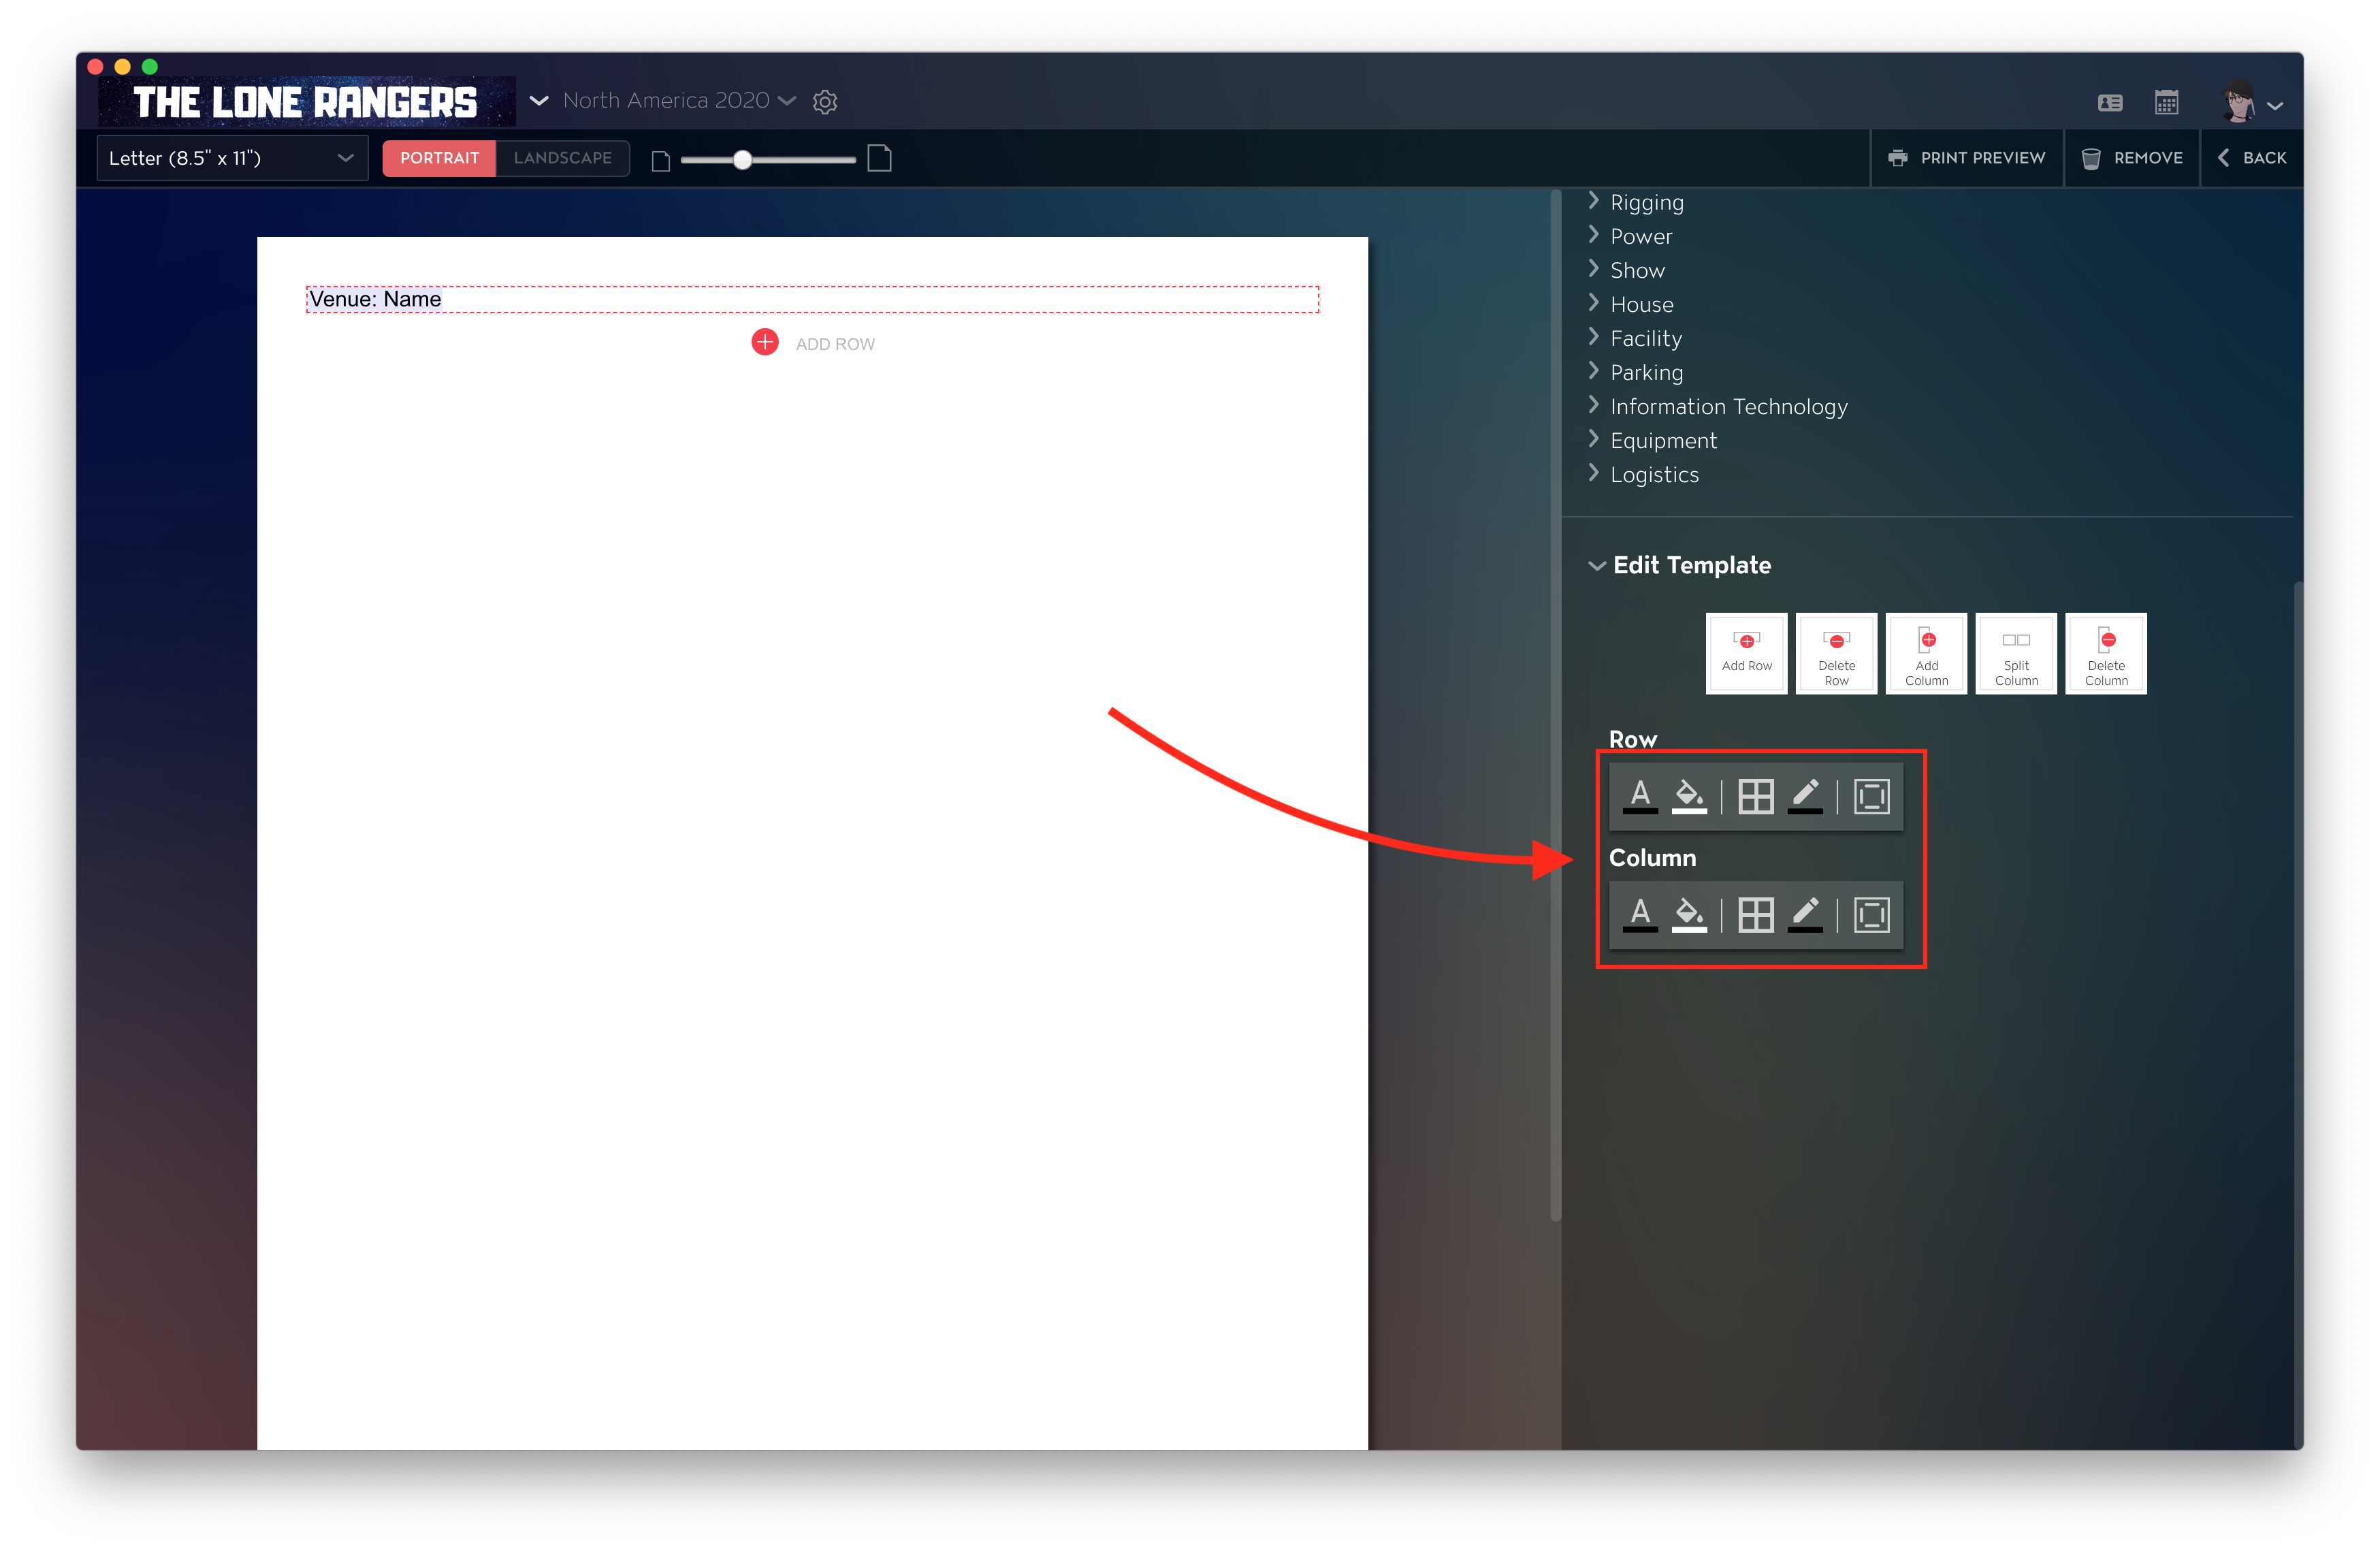
Add Rows and Columns
When in the Template editor, you can add a new Row by clicking on the "Add Row" icon listed at the bottom of the page you're editing.
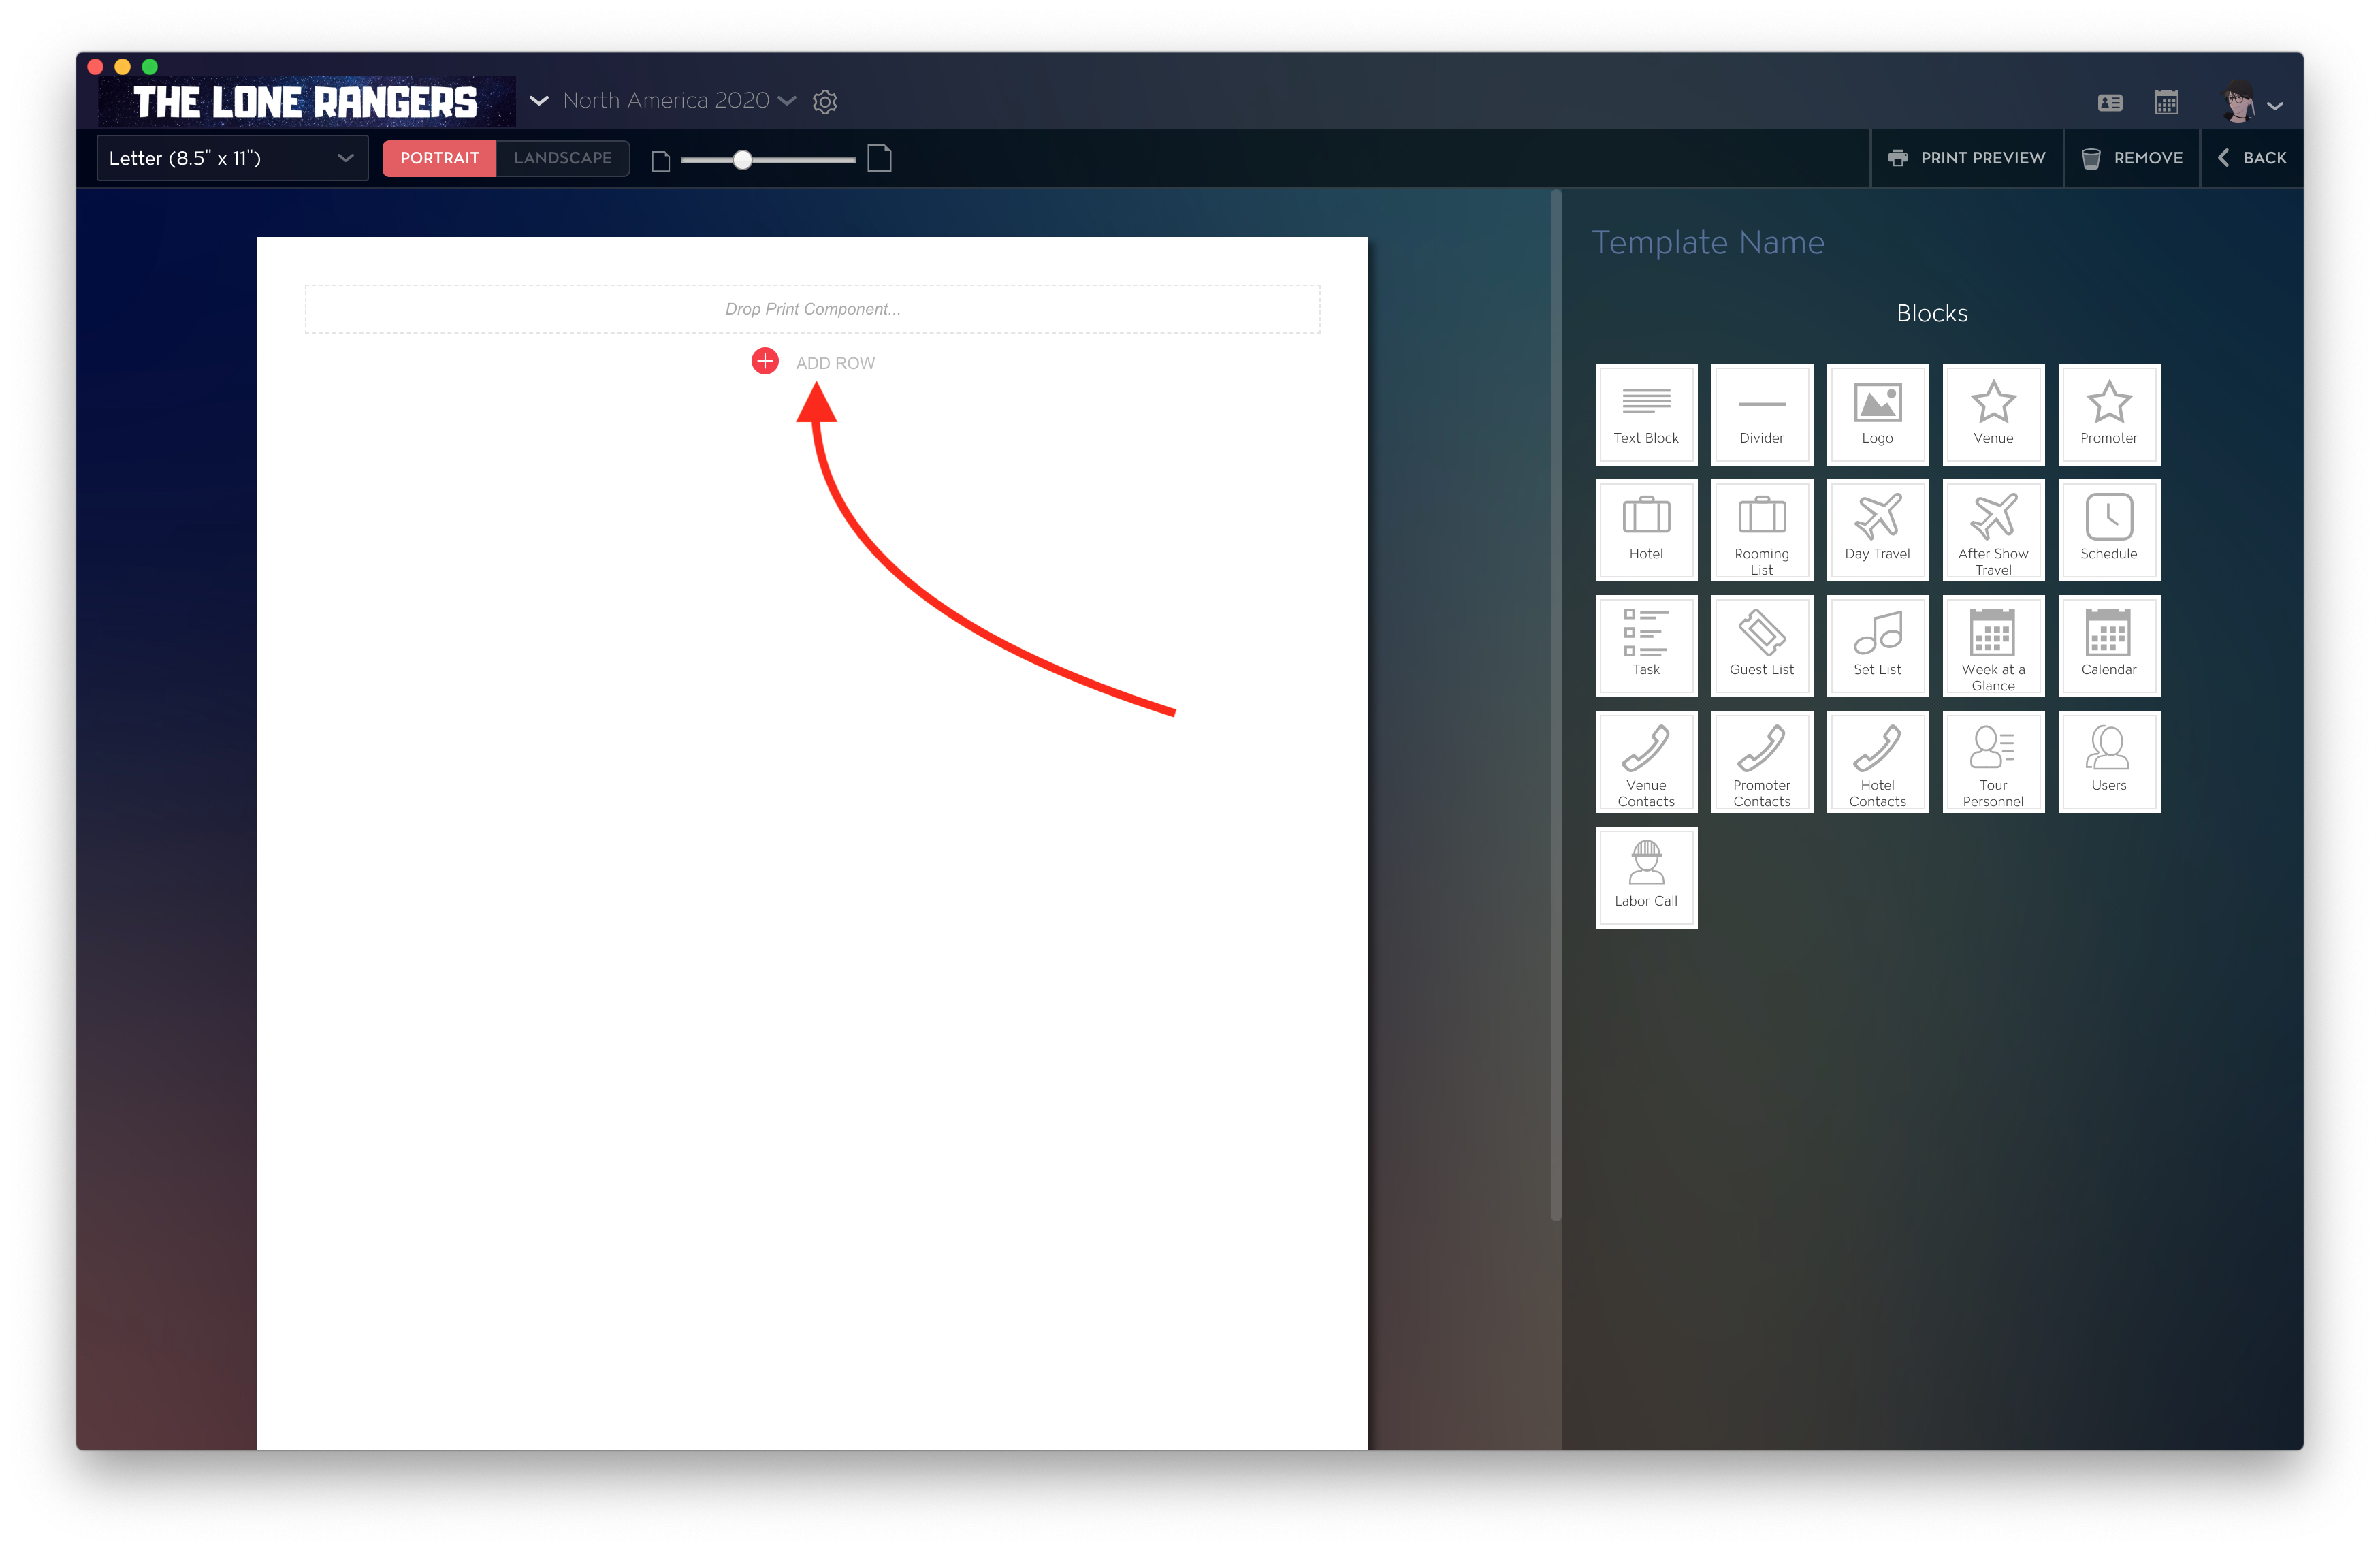
Once a new Row has been added, you can now add new Columns and more.
To add a new Column to a Row, click on part of your Row, then click on the "Add Column" button on the right-hand side to add a new Column on the left. "Split Column" will add a new Column to the right of your currently-selected Column.
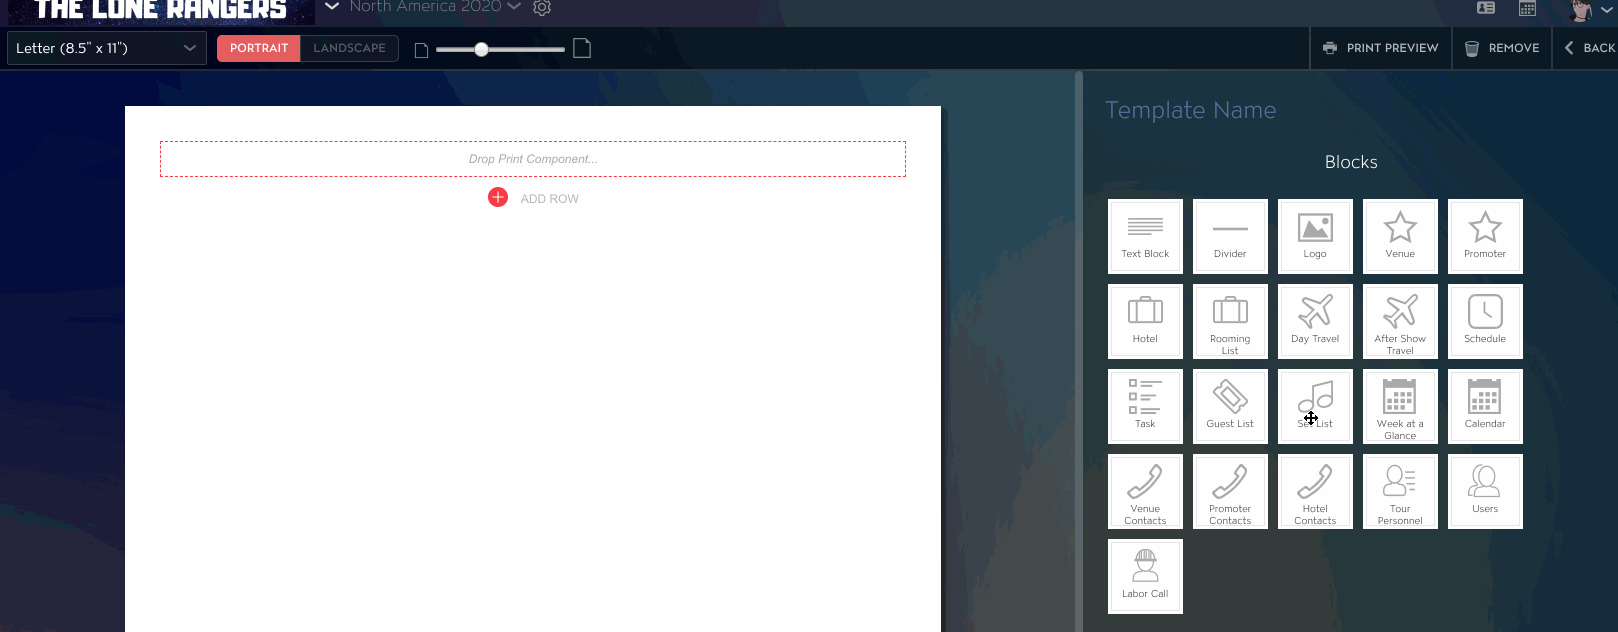
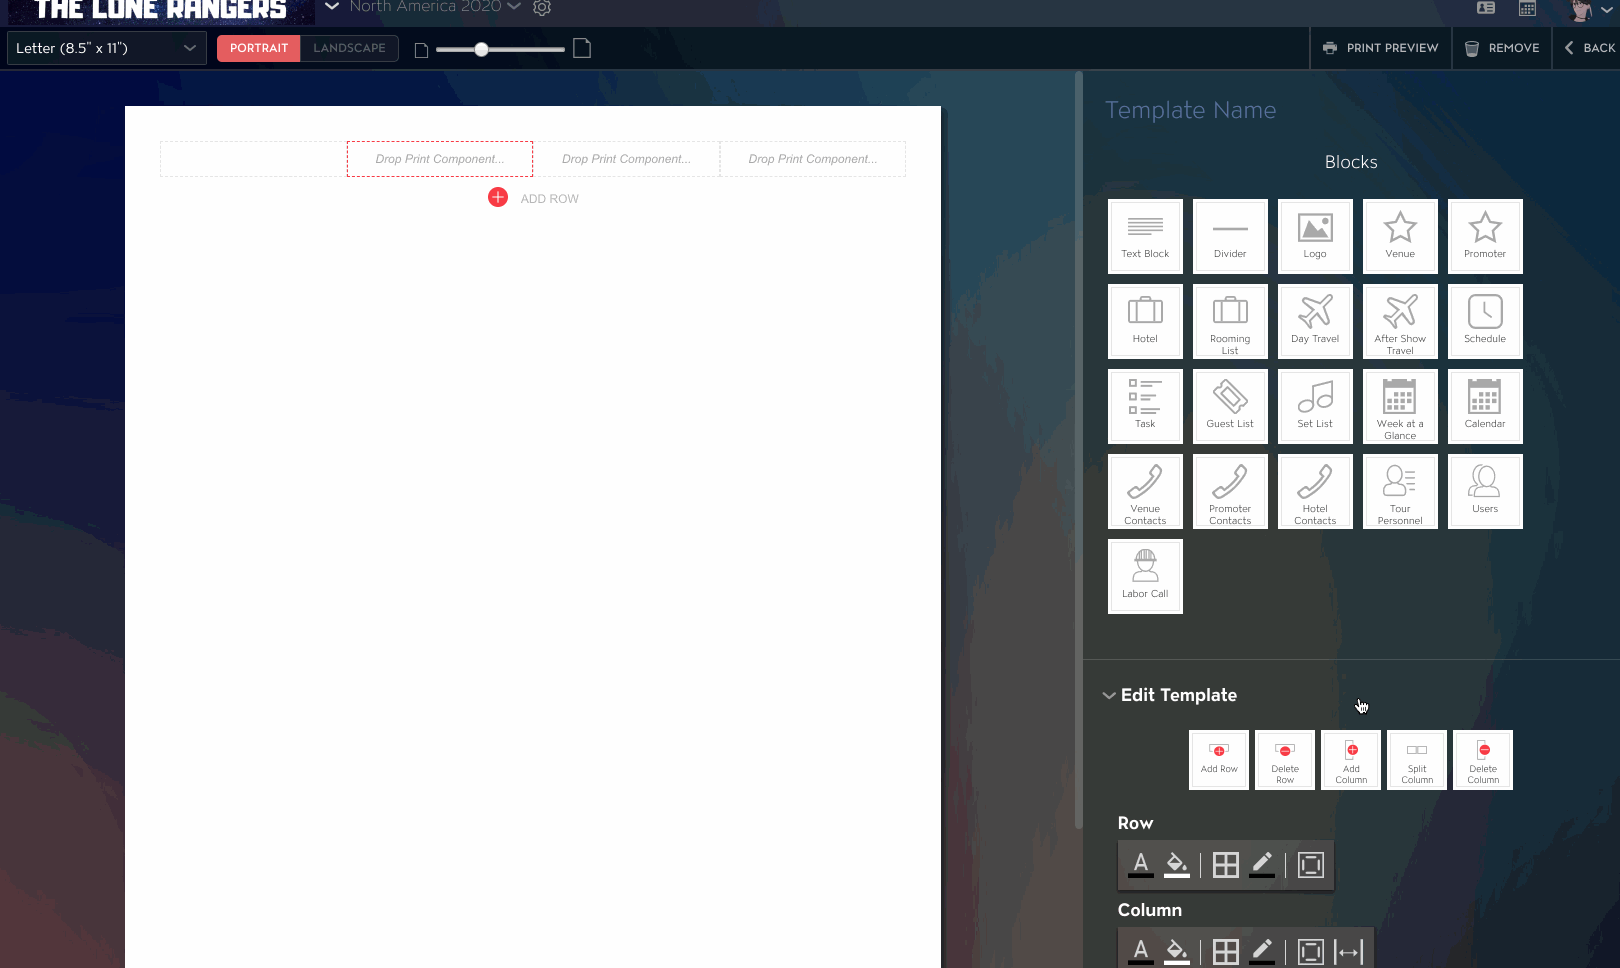
Drag and Drop Print Blocks to a Row or Column
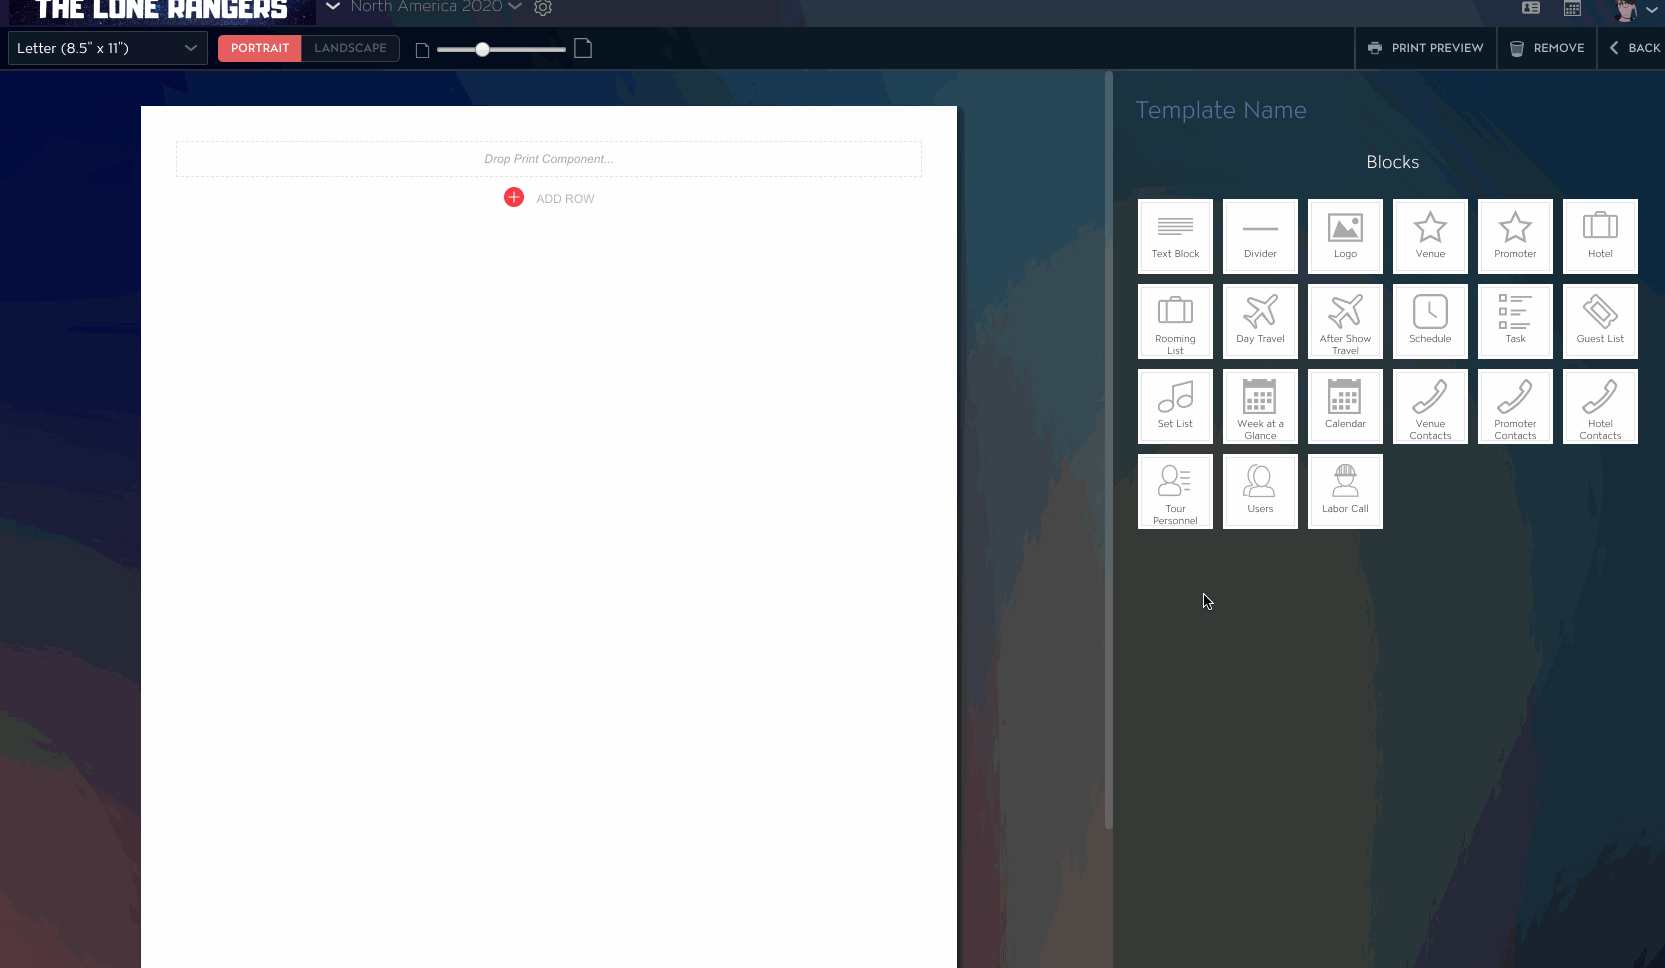
Master Tour 3 has different Print Blocks for the listed categories you need info on. To add one of these in simply click and drag on the desired block, and place it onto your newly made Row or Column.
Add Merge Fields to a Print Block
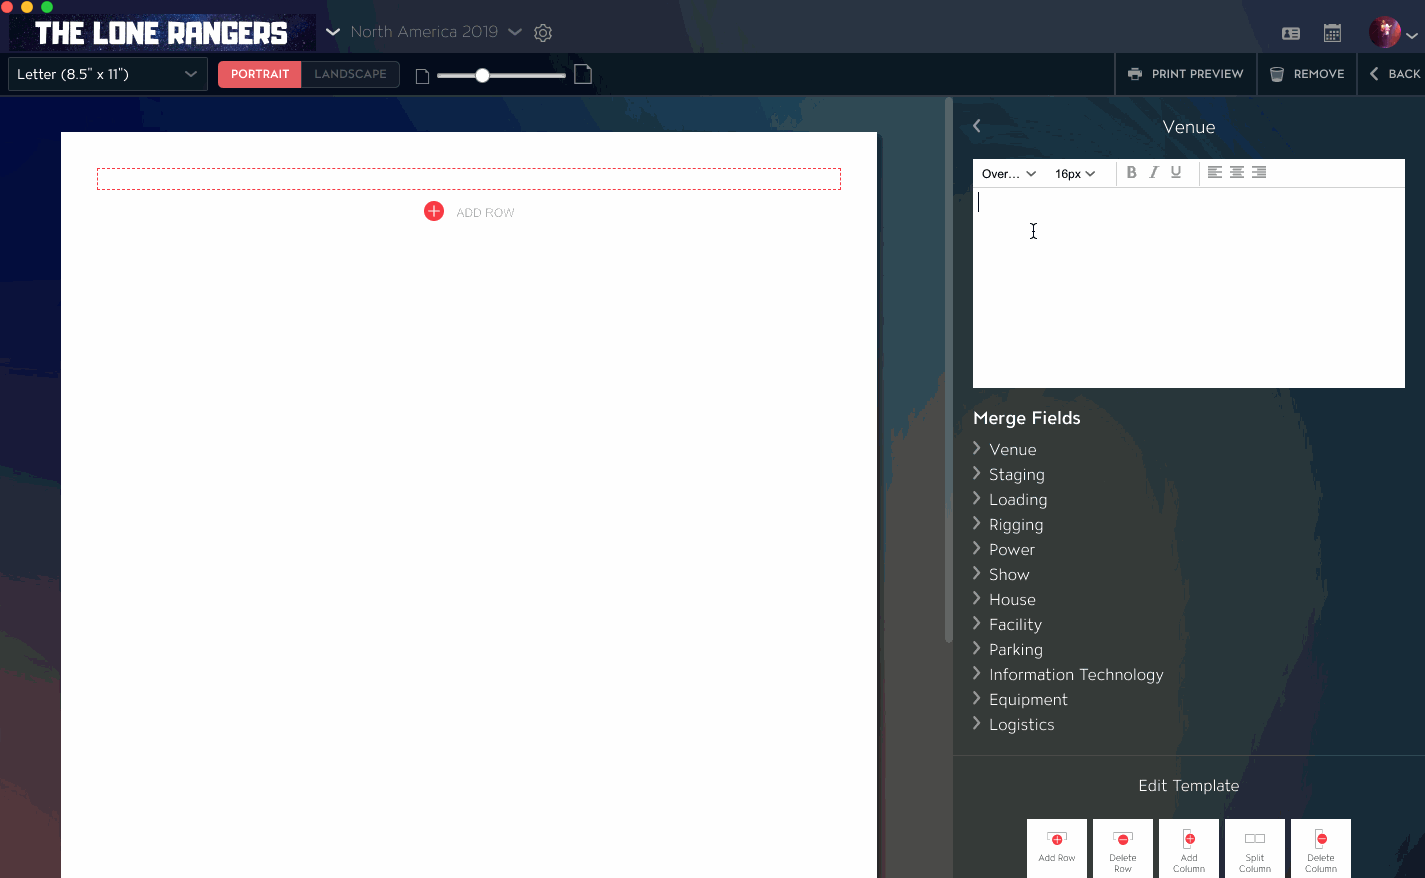
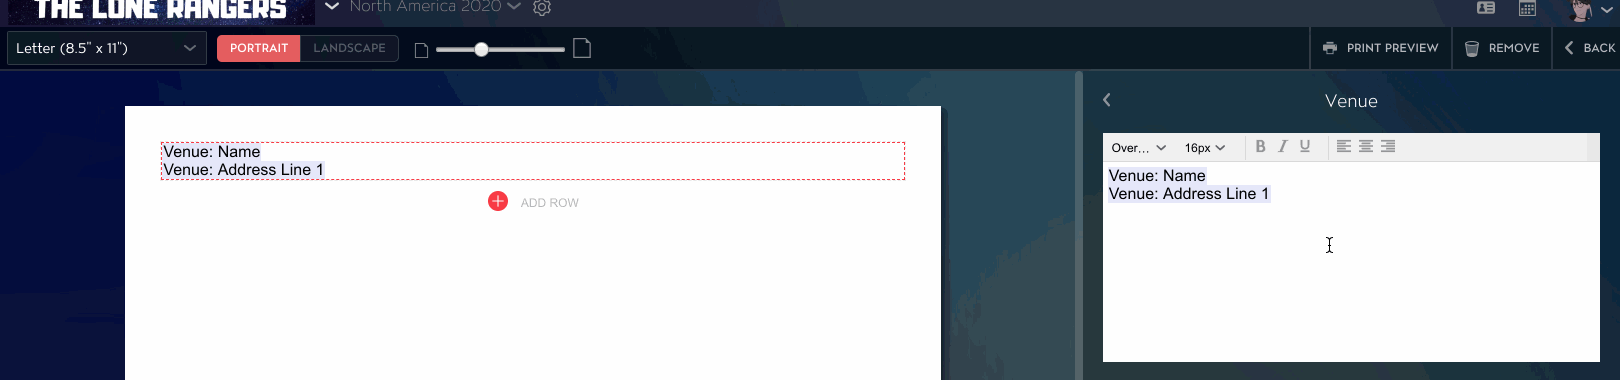
Once a print block of your choice has been added, you will see a list of Merge Fields you can add to your template on the right-hand side.
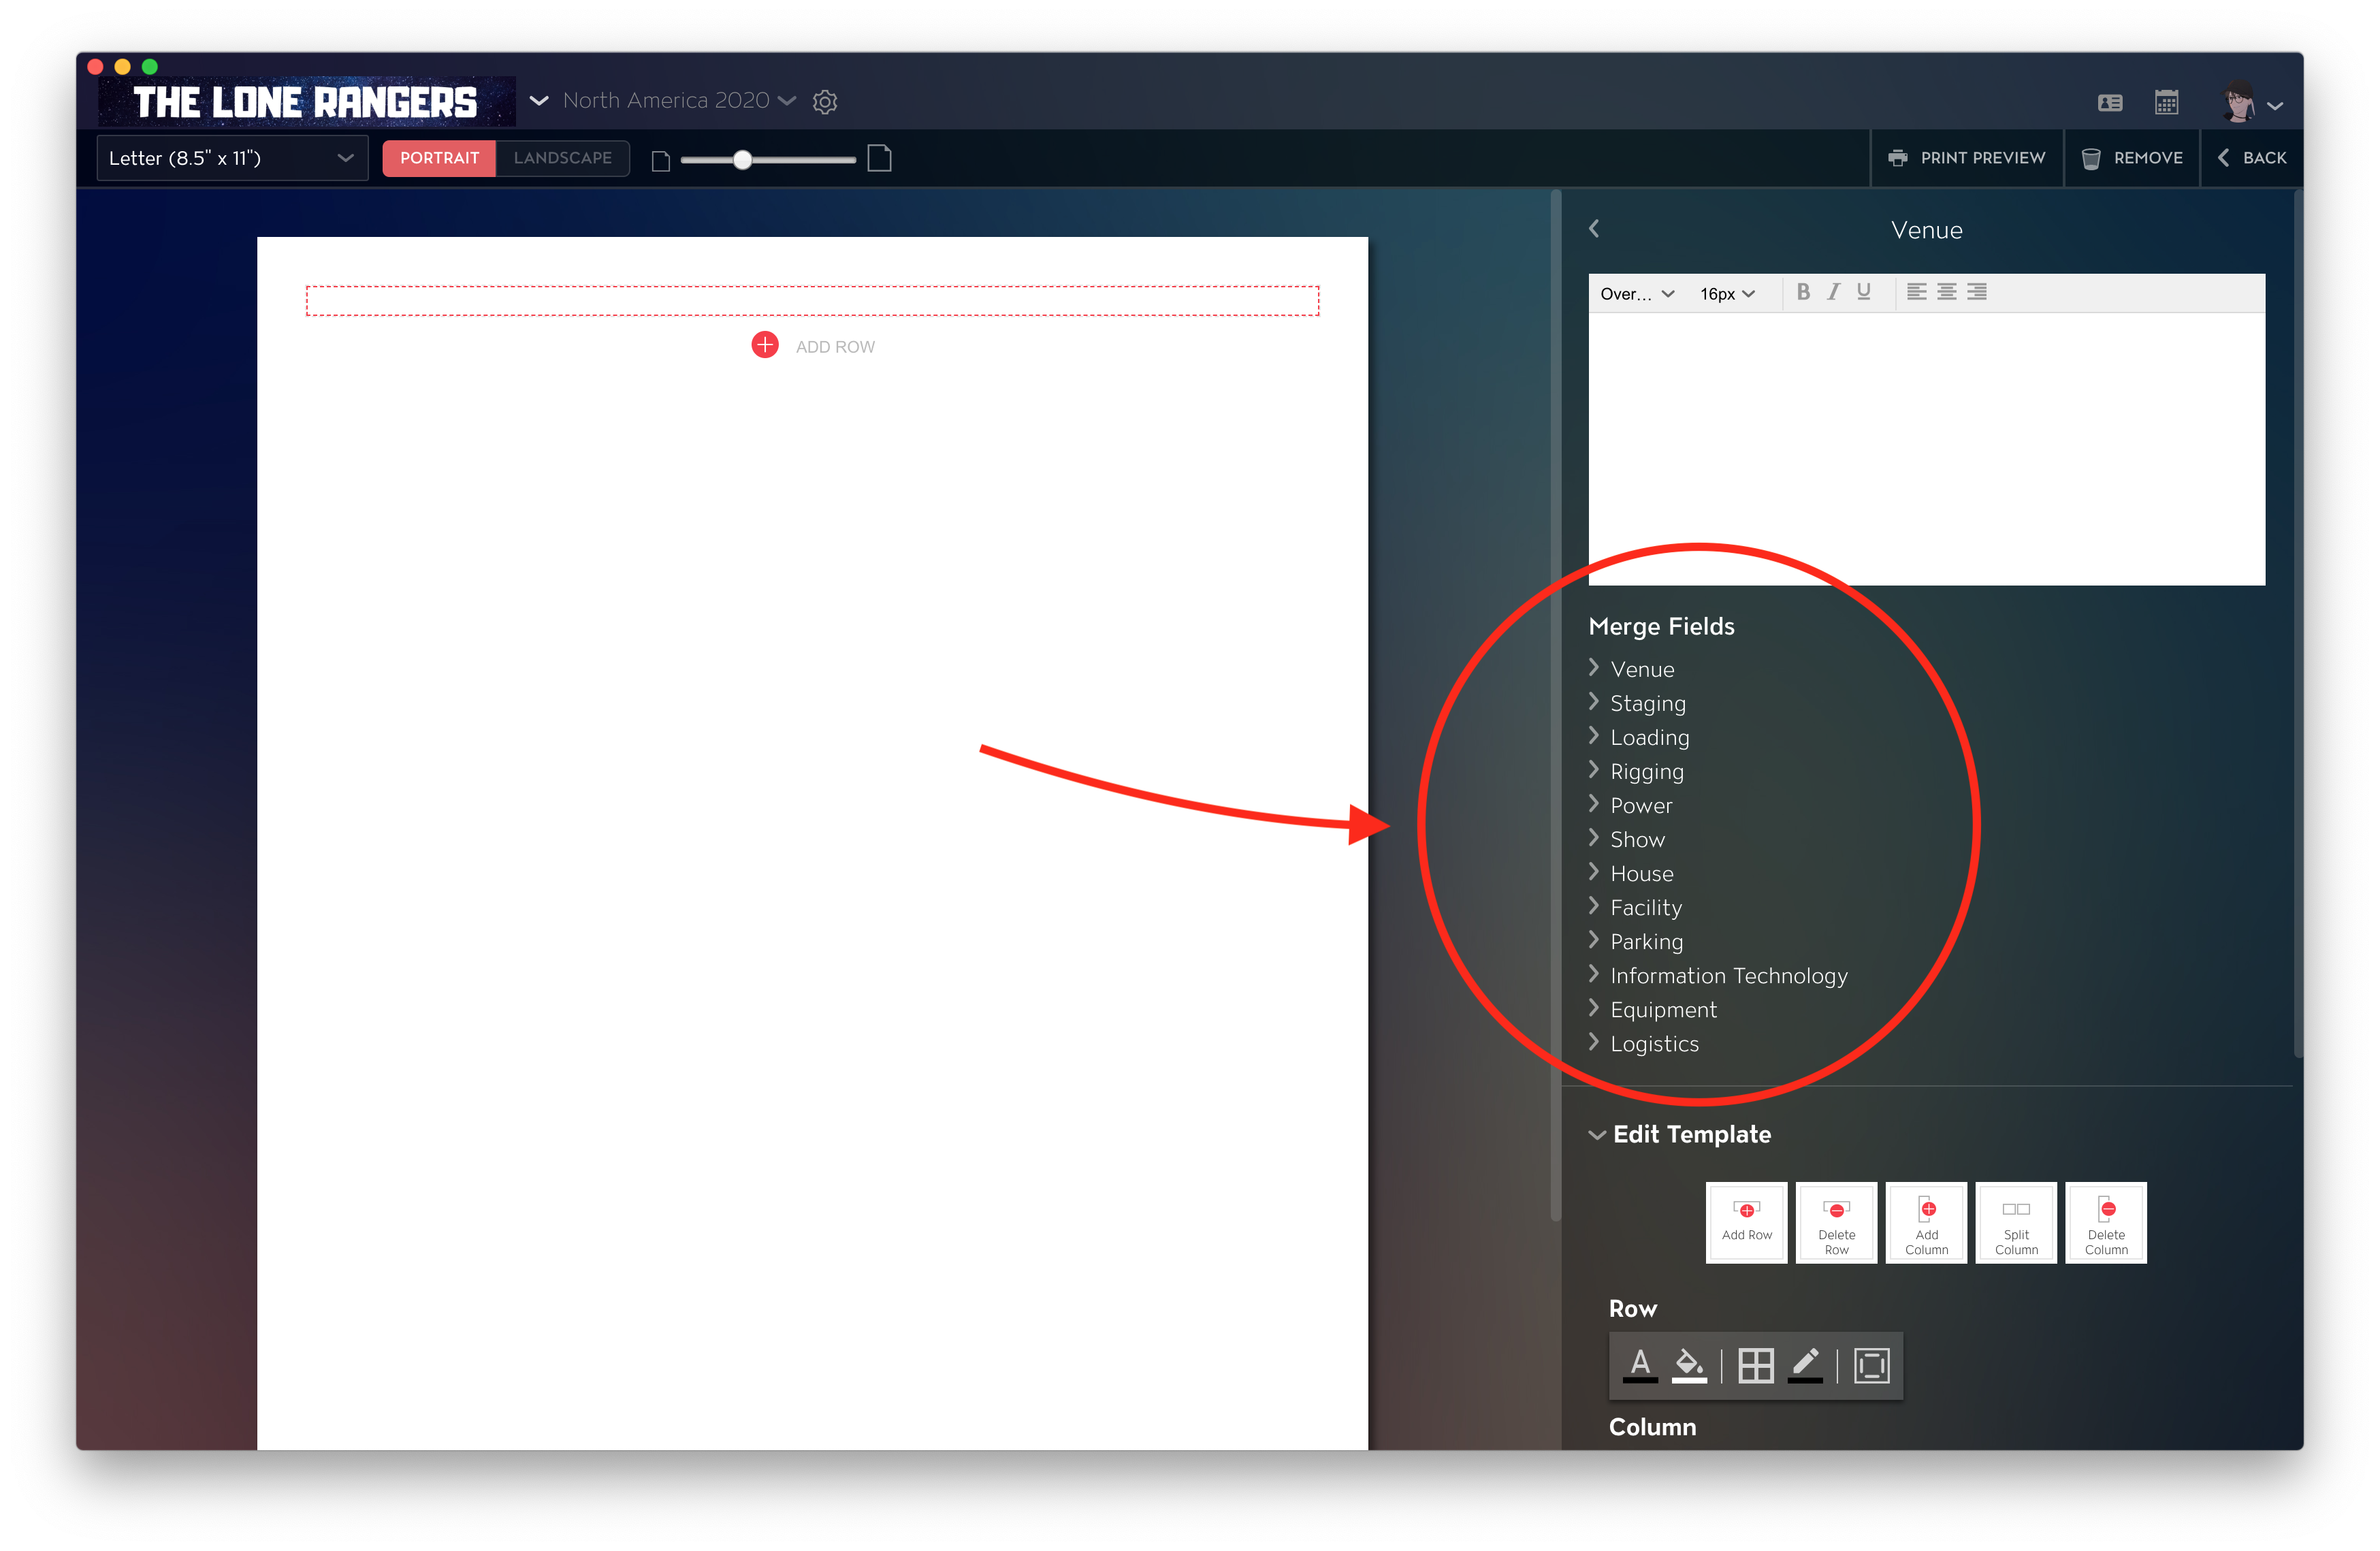
Just click on any of these dropdowns to see available Merge Fields, then click on a Merge Field to add it to your Print Block.
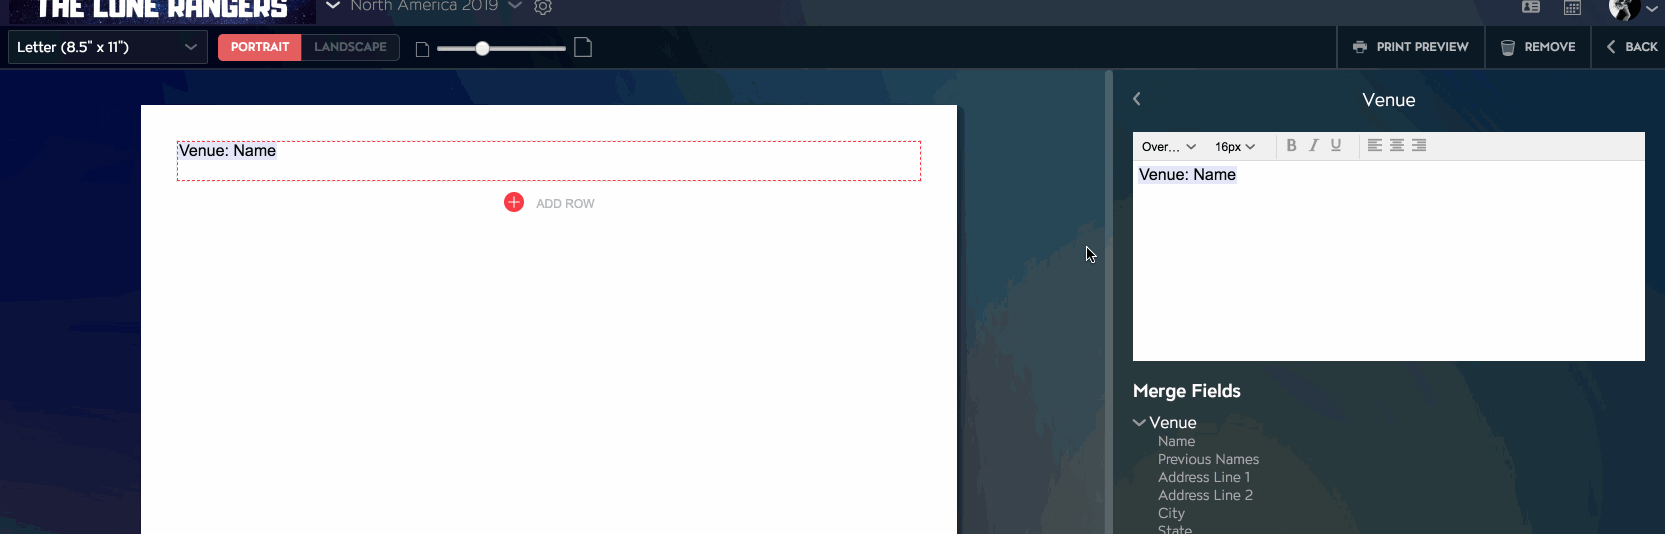
After adding a Merge Field, you can see it highlighted in light blue with the label of what type of information it's retrieving. You can also type in your text without using Merge Fields, which will just appear as regular text without the blue highlight in your Print Block:
Style Merge Fields and Other Text
To style or align your Merge Fields and other text, you can select that text in the Print Block Edit section on the right and change Font, Font Size, Font Style, and Alignment using the toolbar at the top of the Print Block Edit section:
Edit and Style Print Blocks
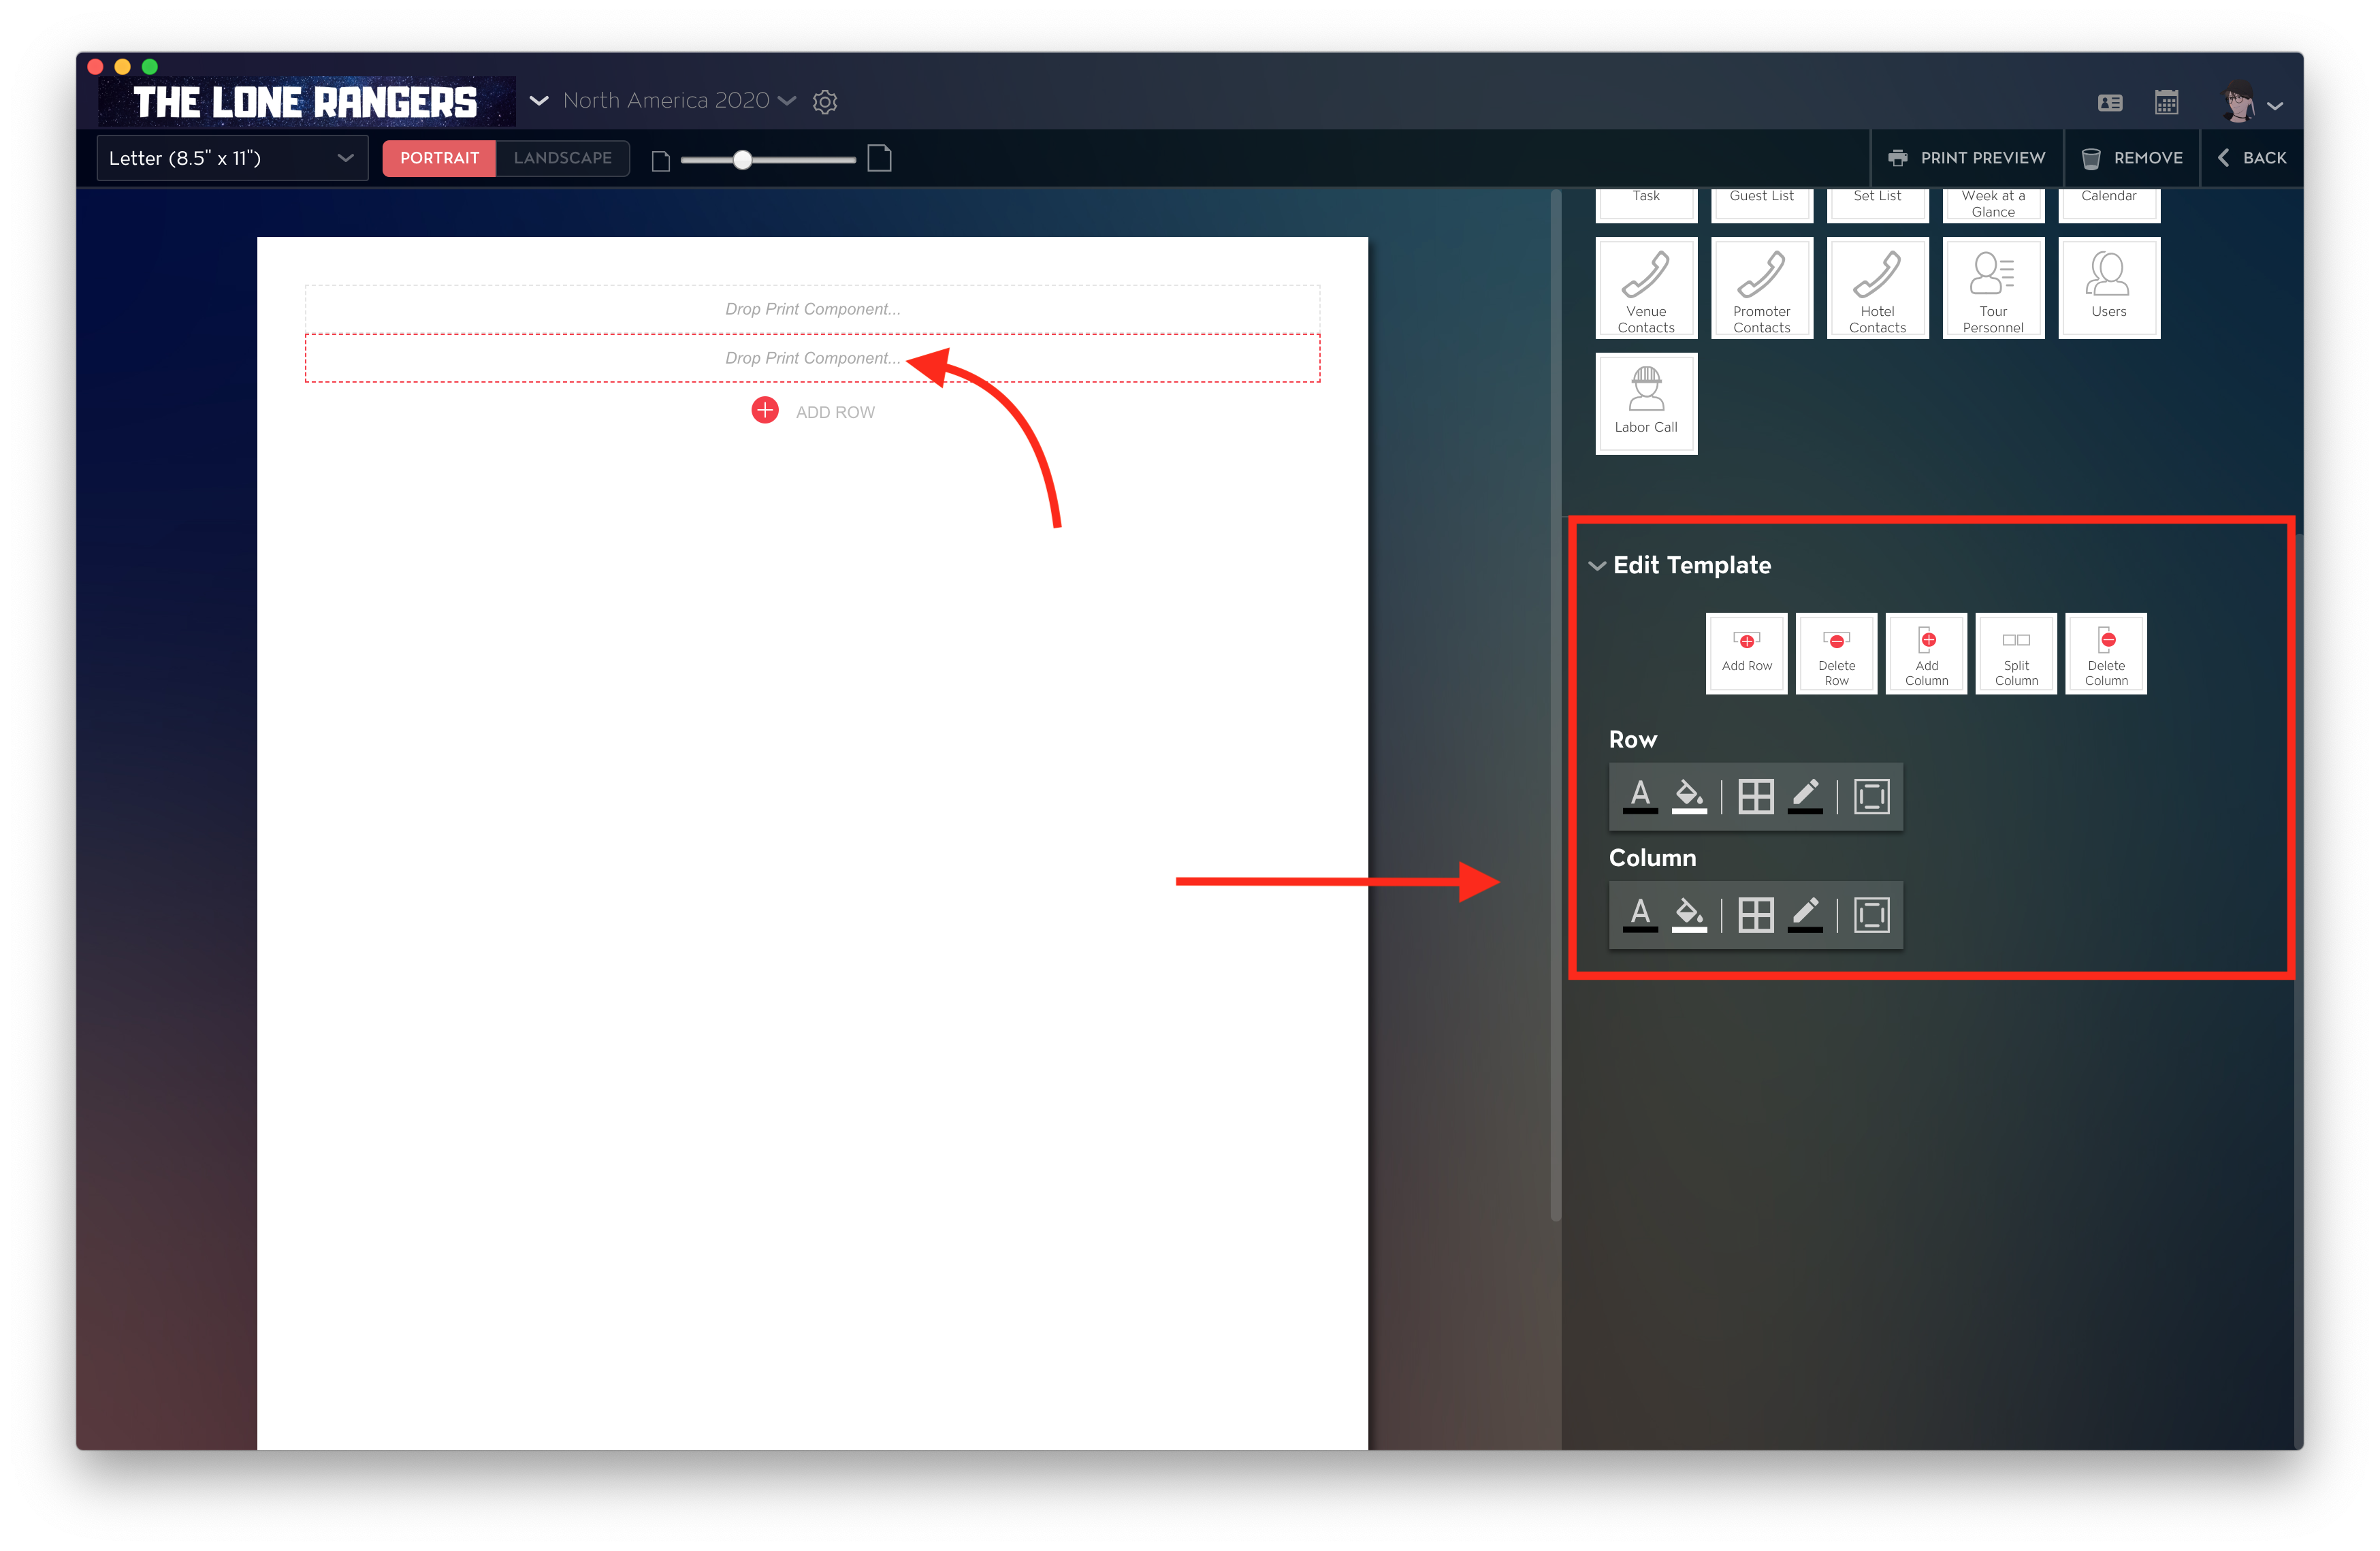
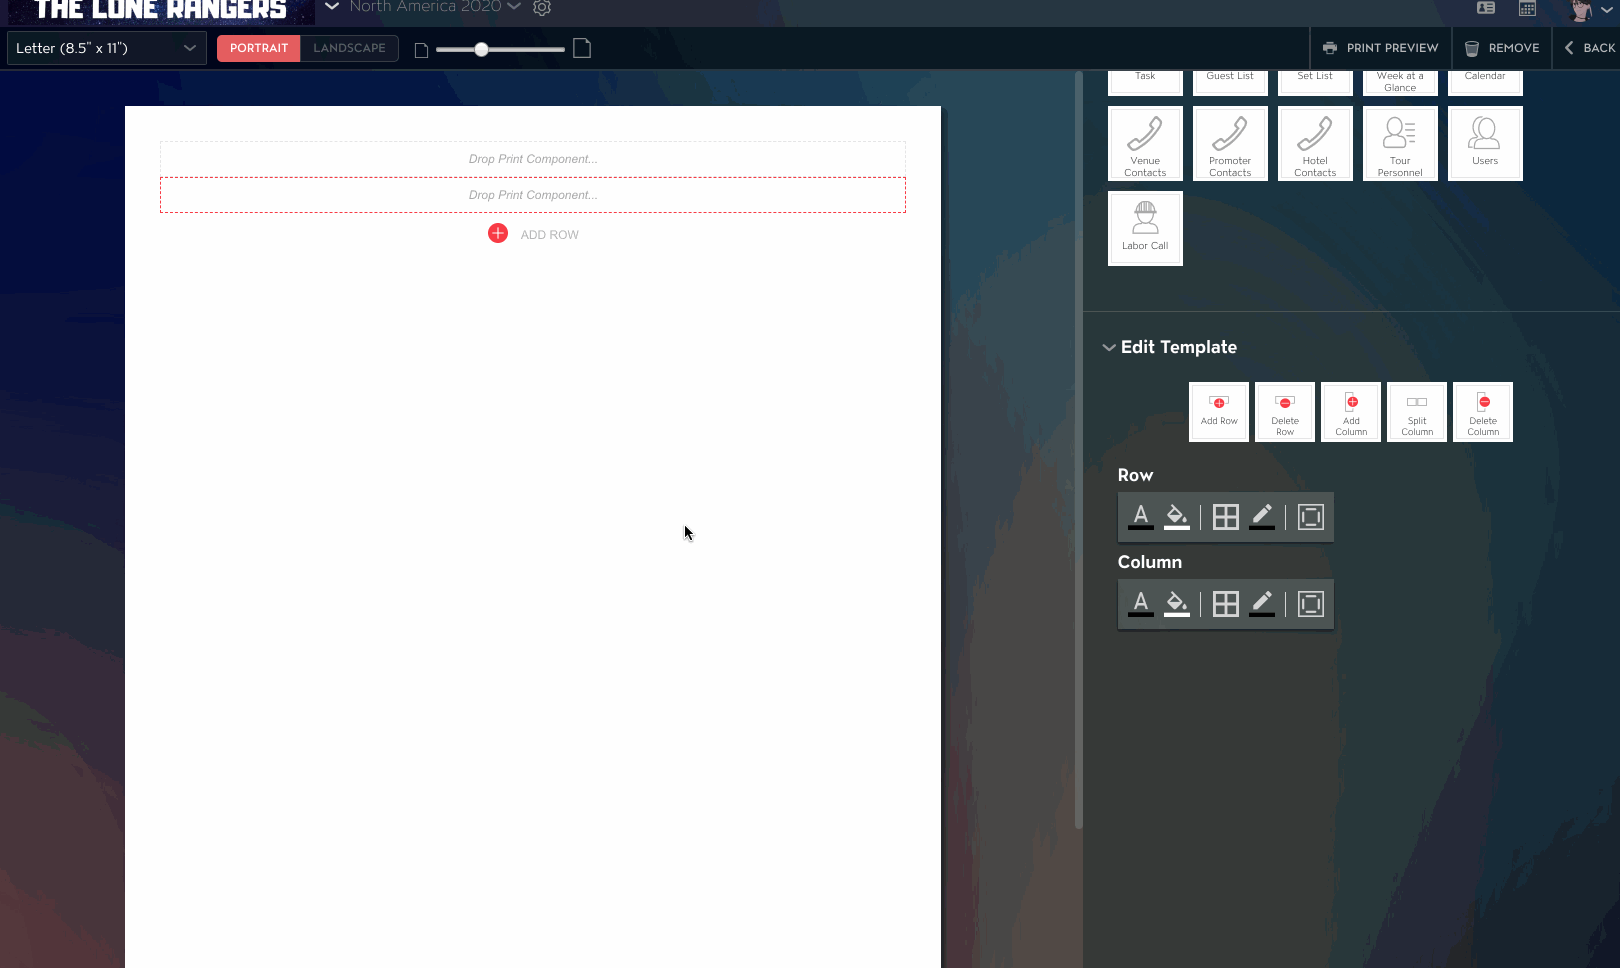
To change things like Text Color, Background Color, Padding, and Borders for a Row or Column of Print Blocks, click on your block of choice and scroll down on the right-hand side. Both Padding and Borders will apply to all four sides of your selected Print Block:
Delete Rows and Columns
To delete Rows or Columns, select what you want to remove and click on "Delete Row" or "Delete Column."
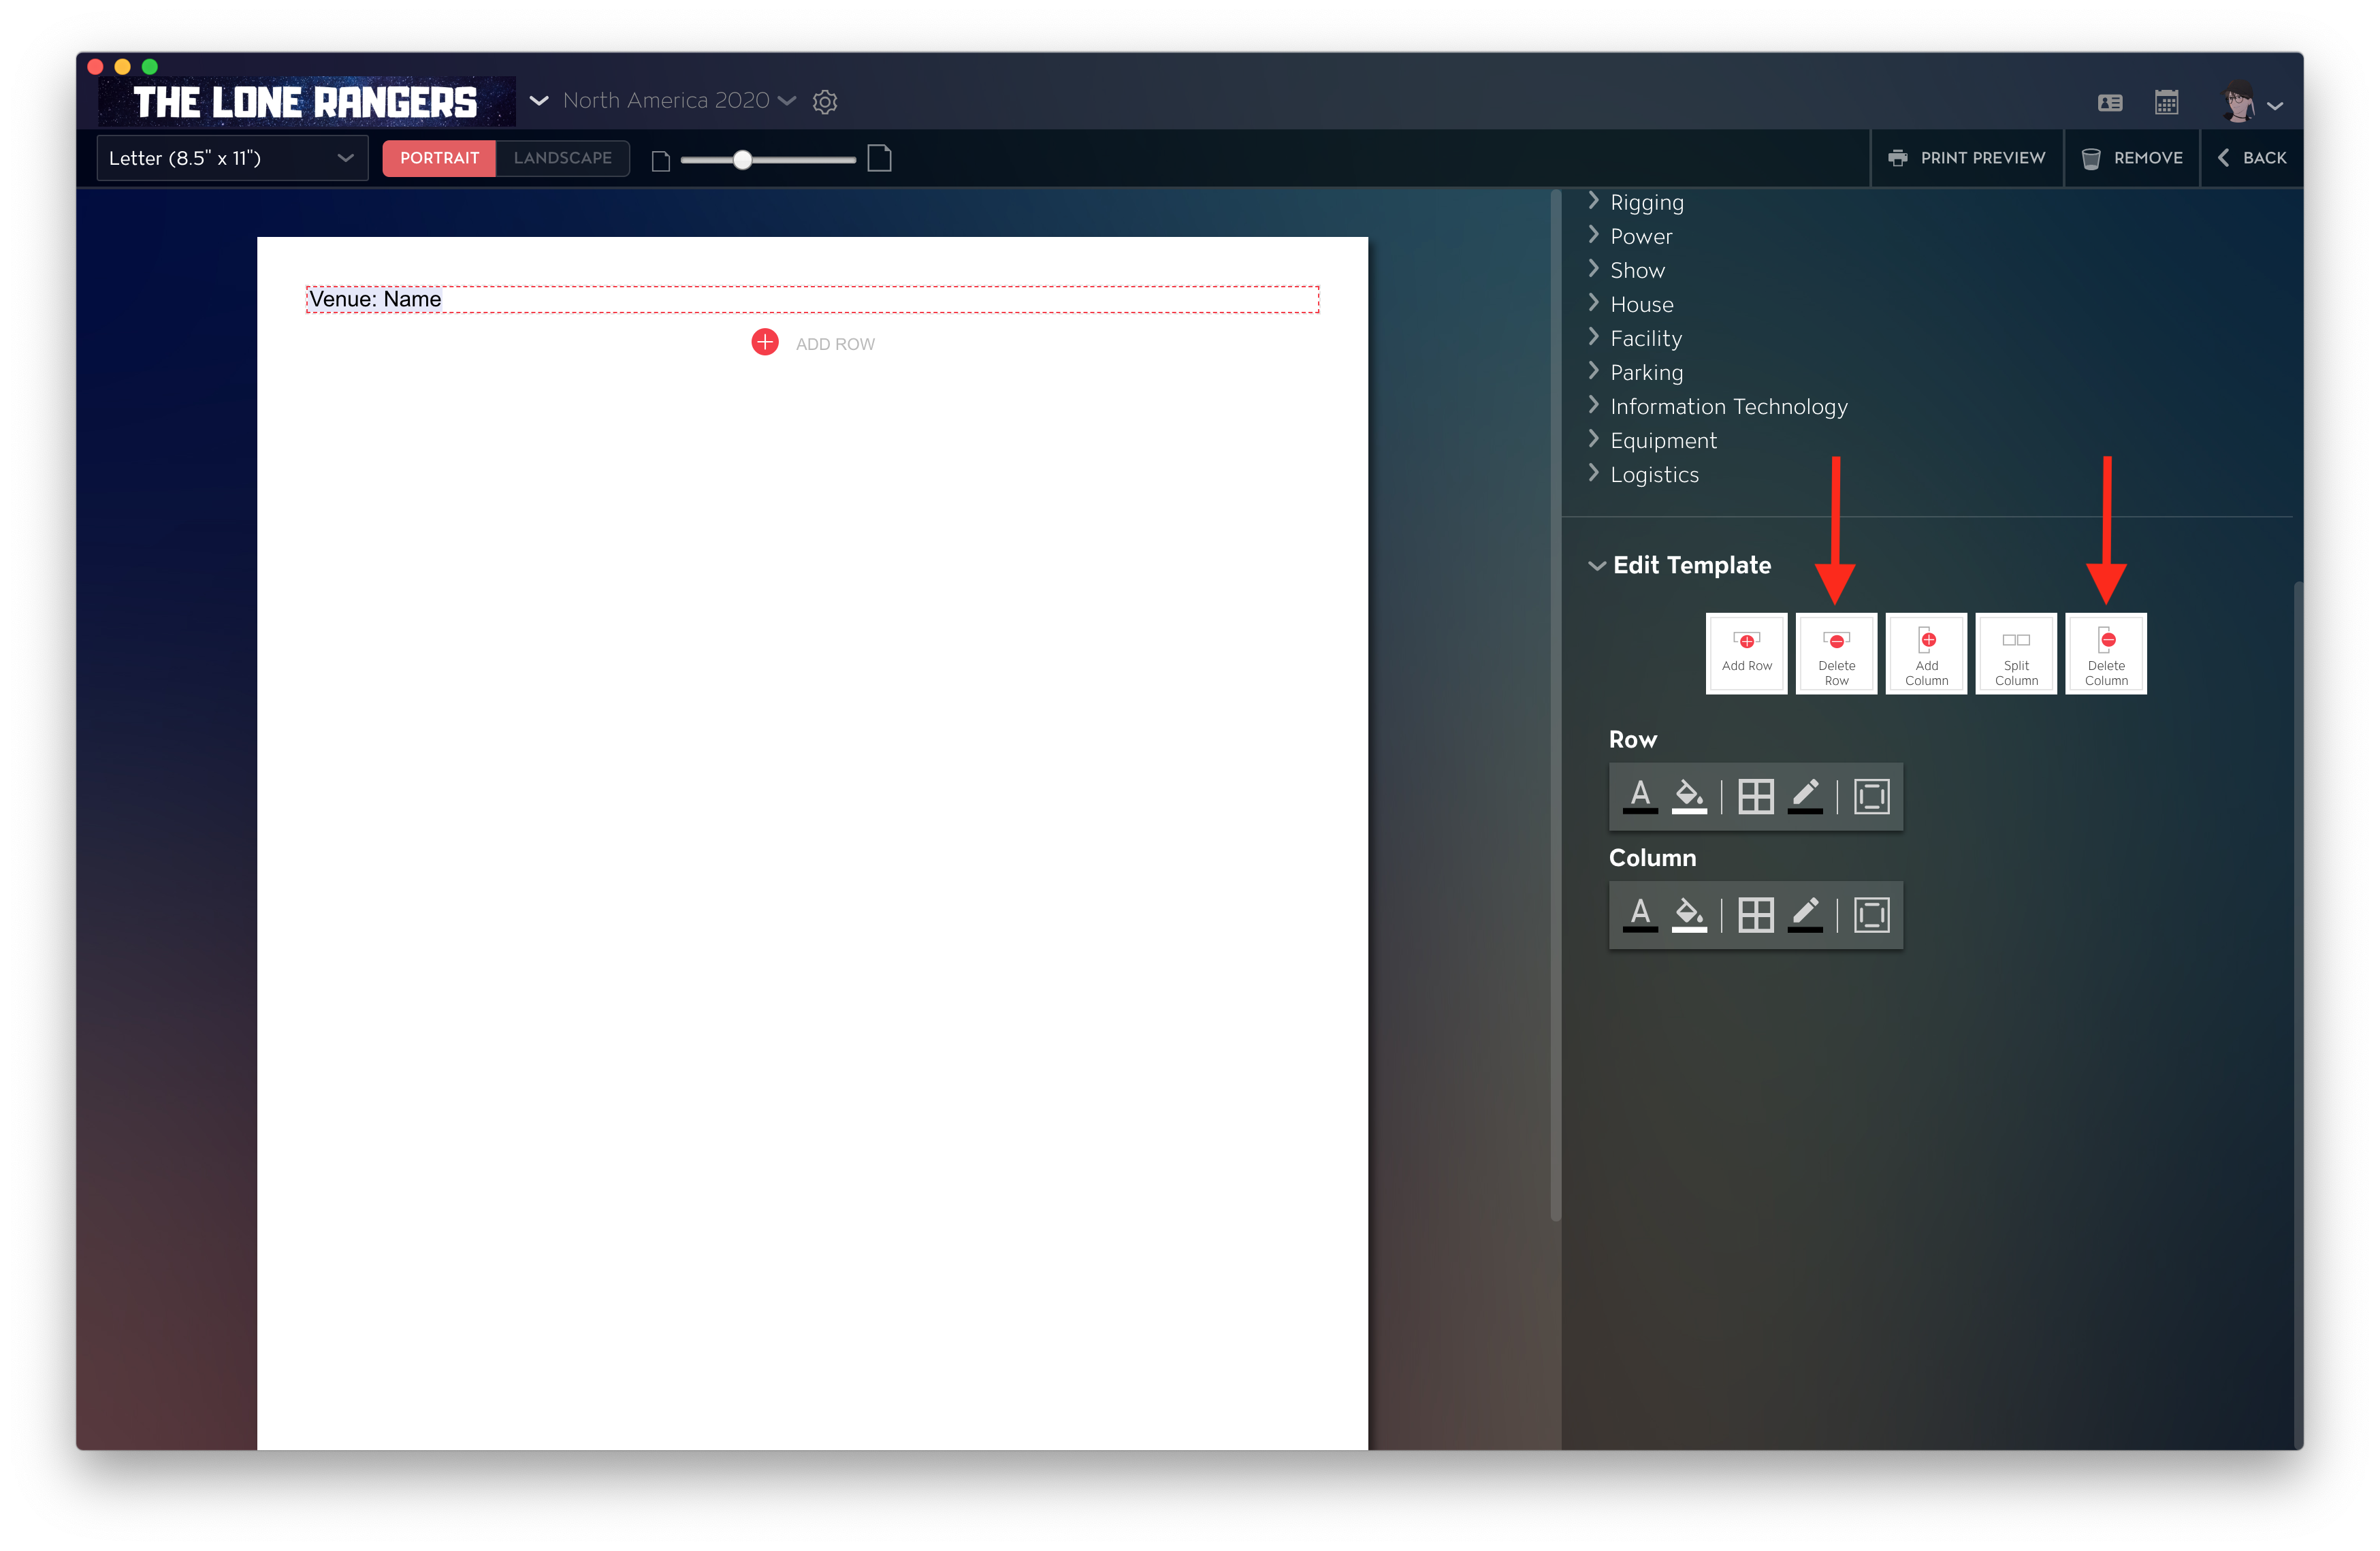
Keep in mind that deleting a Row will also delete any Columns placed in it.
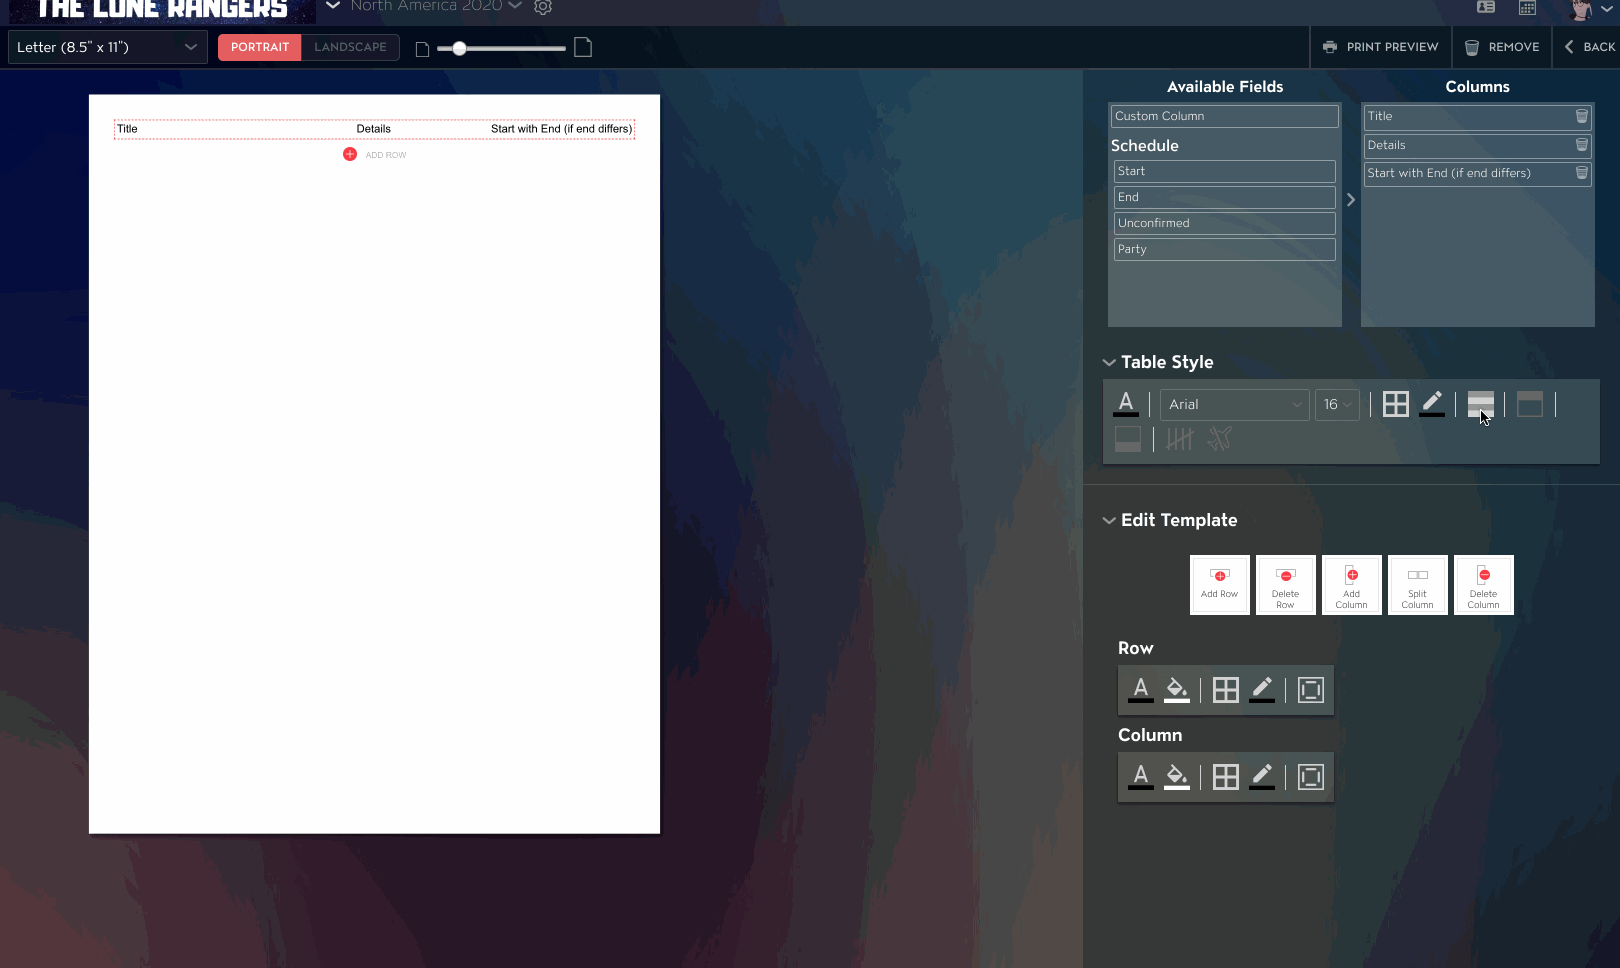
Edit and Style Tables
With some types of Print Blocks, you can use a Table format instead of the standard Text format. To use this format, just drag a Print Block onto your Template page, then select the Table option in your Print Block Edit section:

Here you can choose from a selection of available fields to drag over to your columns, and you'll see a preview of these fields on the left side of the Template Editor.

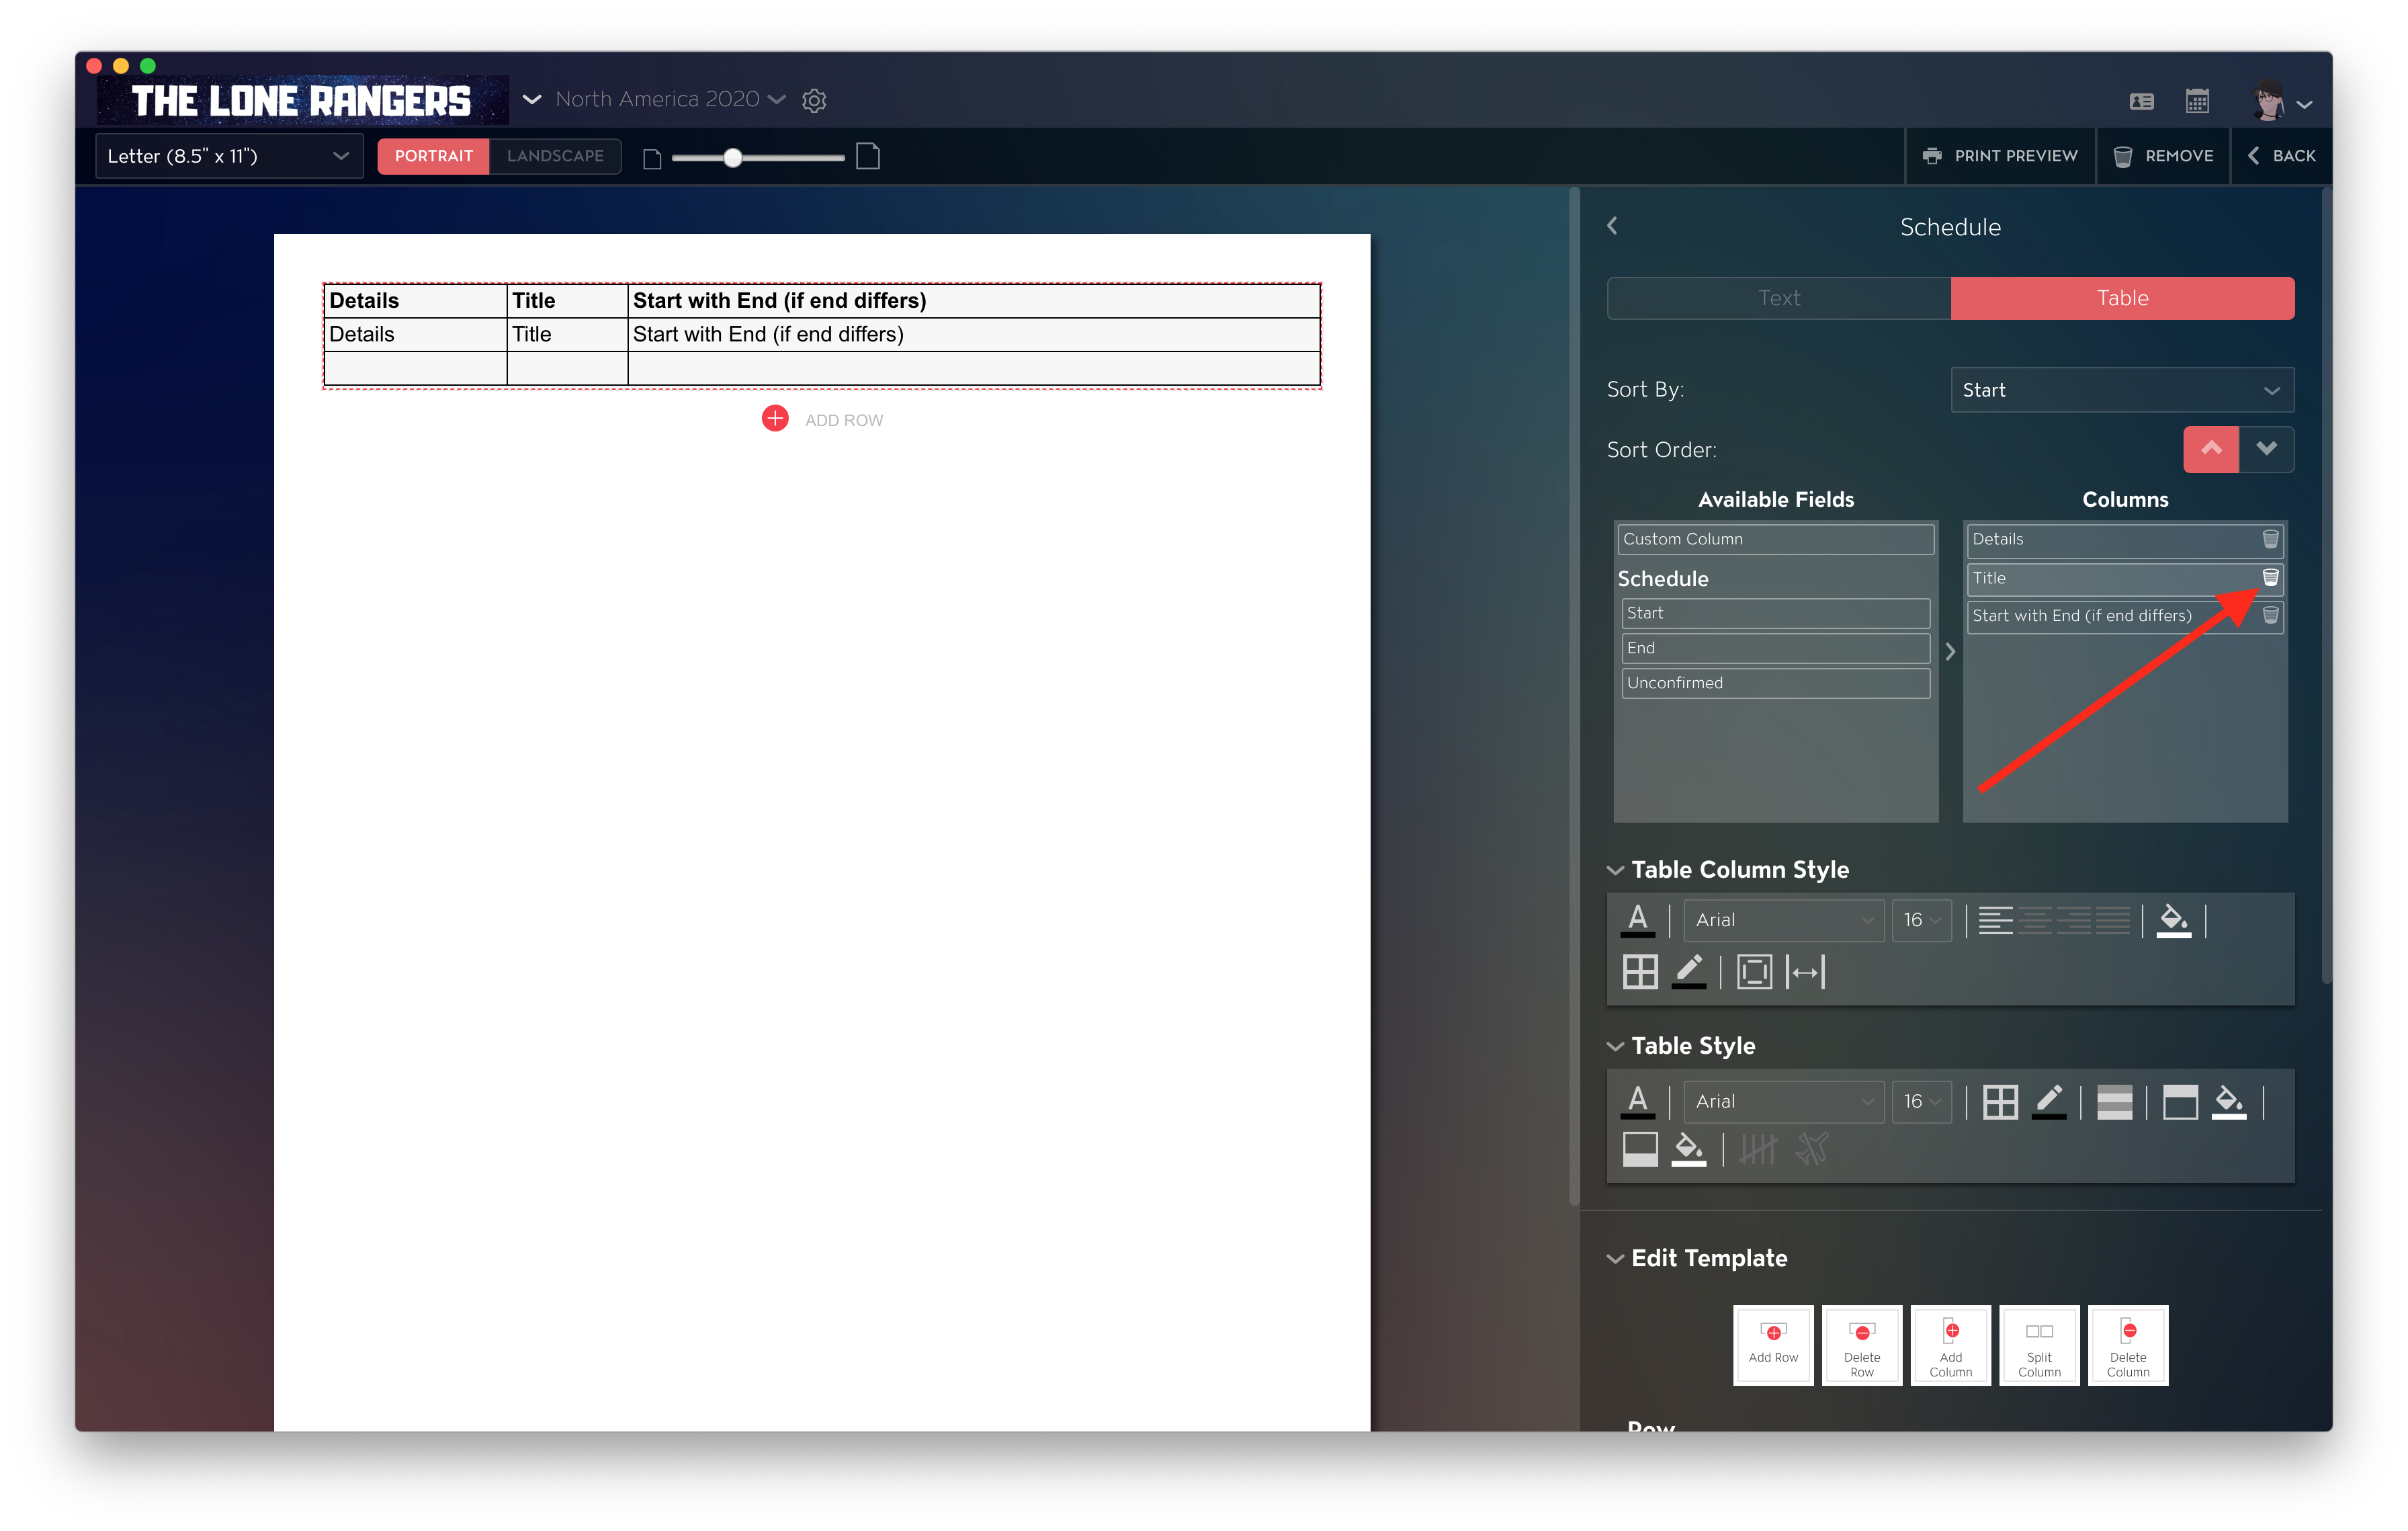
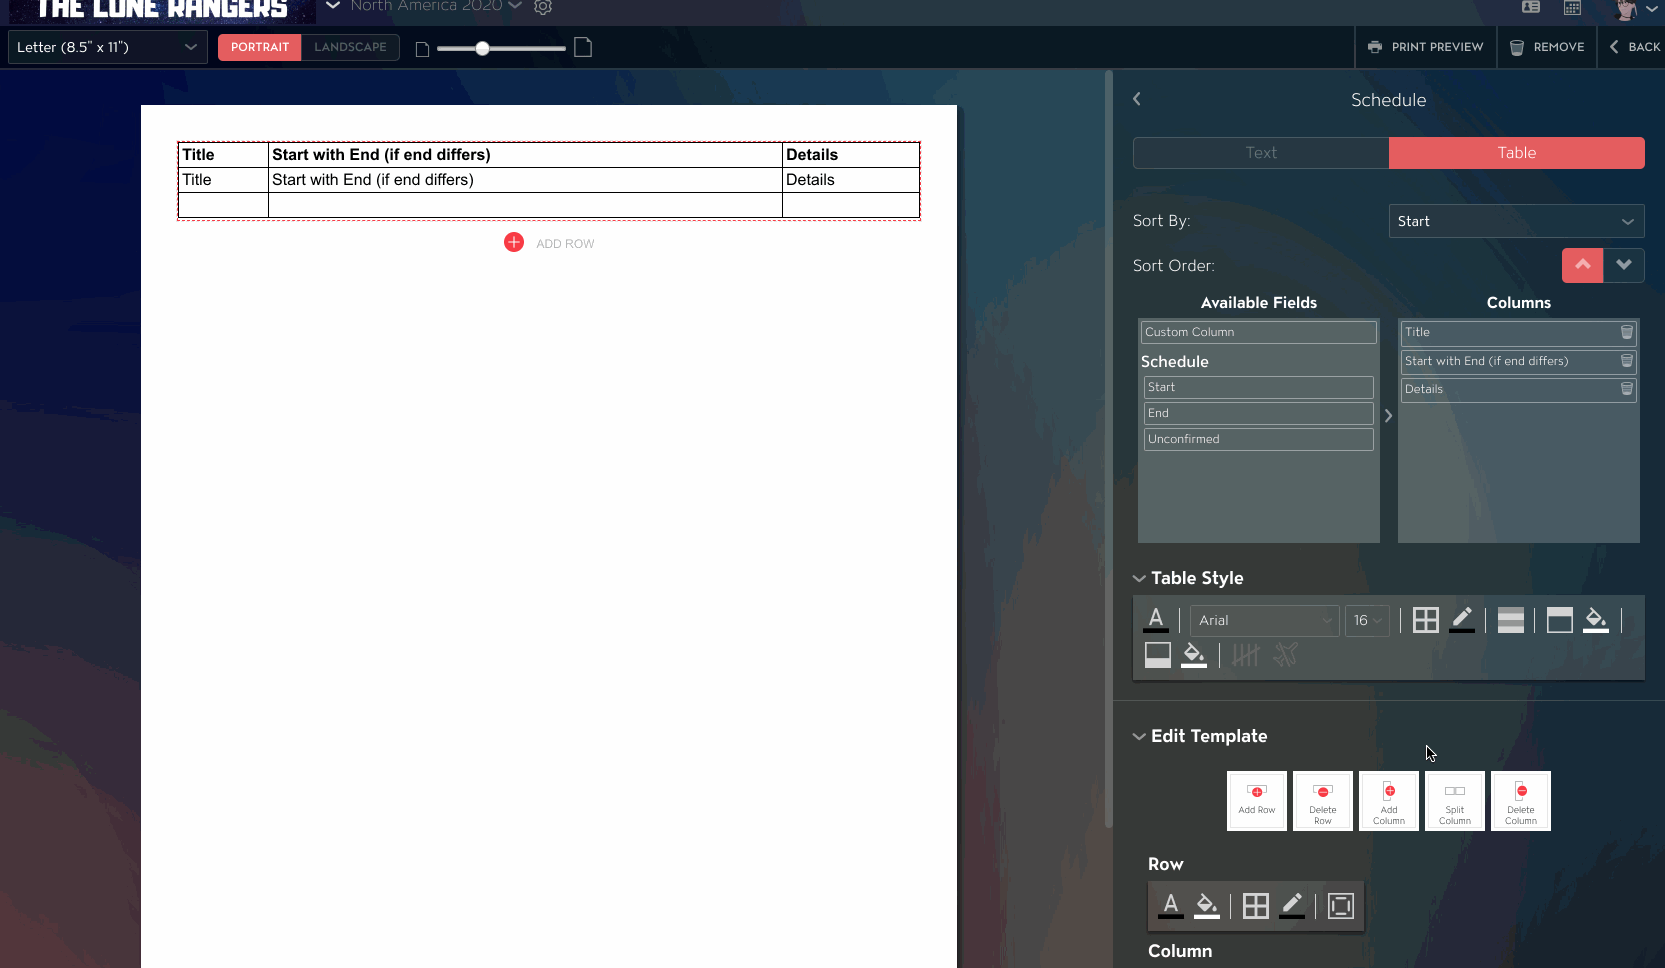
In the Print Block Edit section, you can also rearrange the order of any of your placed columns by clicking and dragging them in your desired order.
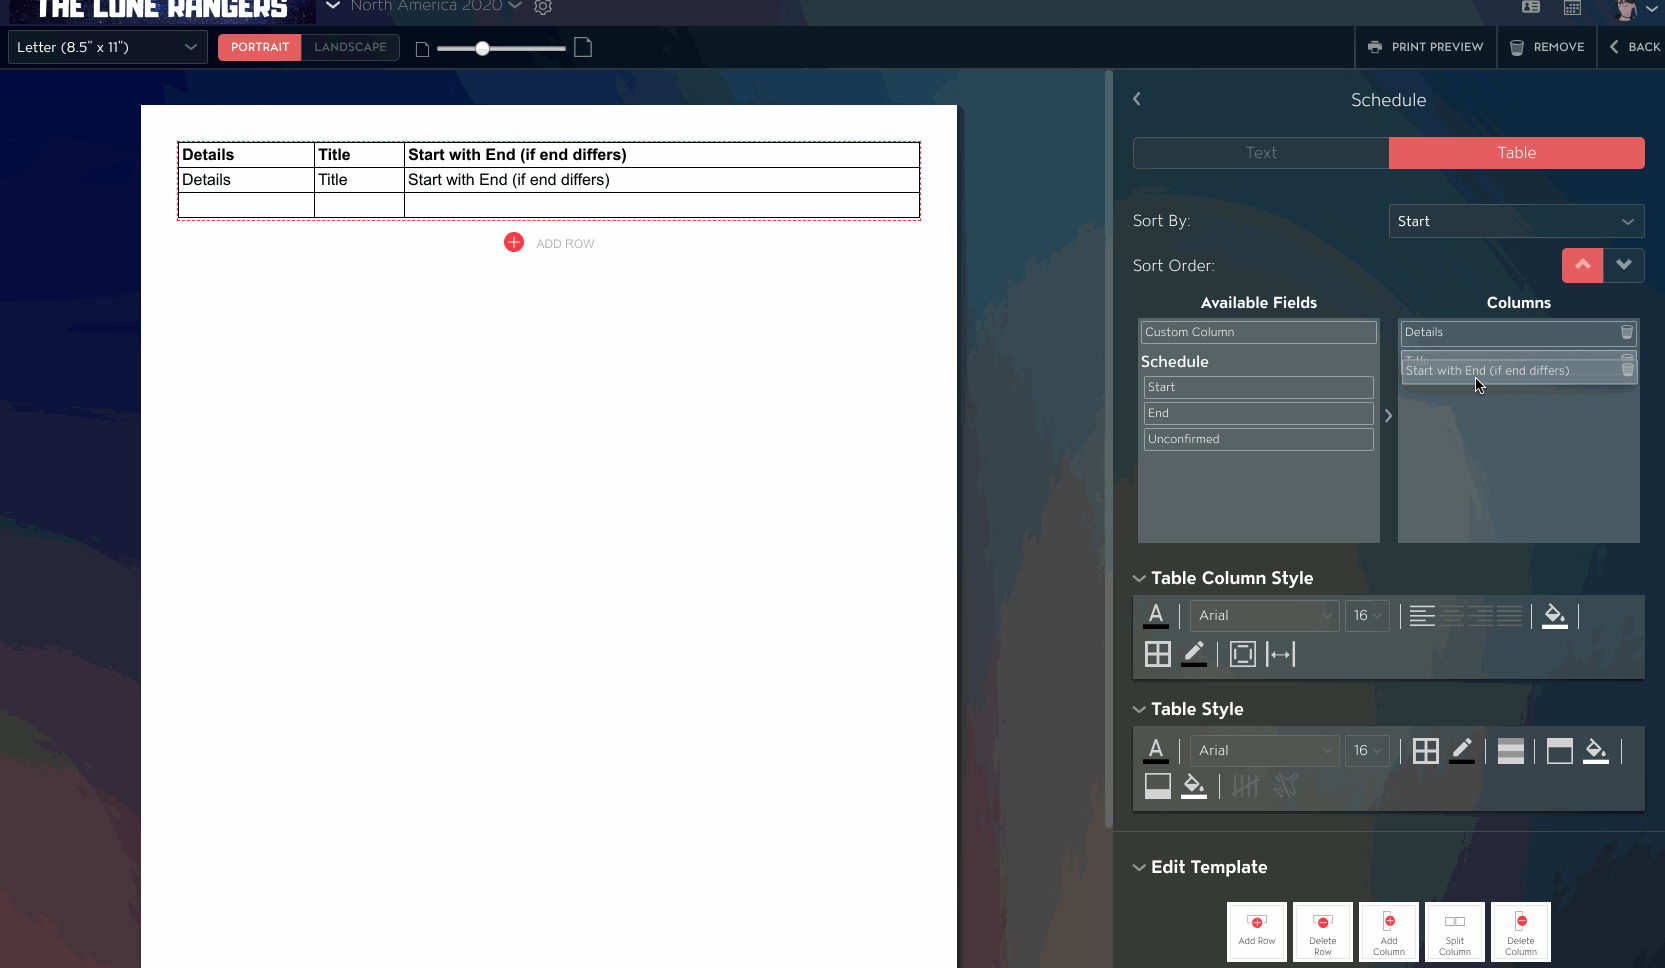
To delete a column from your Table, click on the trash icon next to the Column you want to remove.
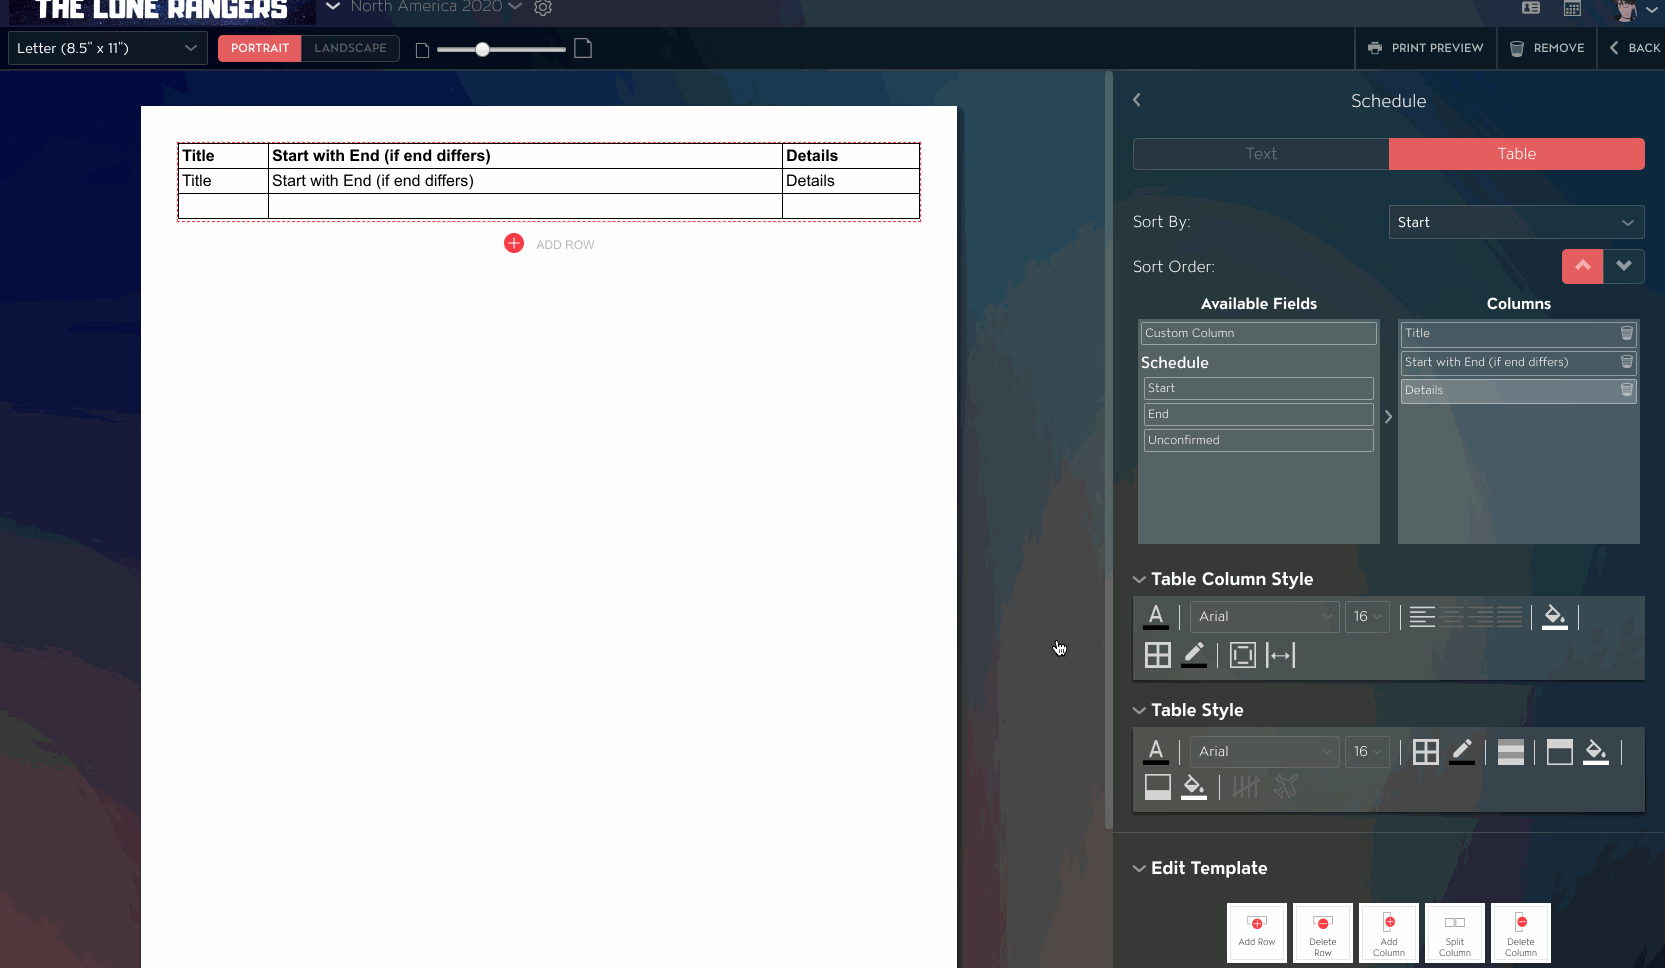
With the Table format of a Print Block, you can customize either individual Table Columns or the Table as a whole. To do so, click on the Table and/or a Table Column and scroll down on the right-hand side. Here, you can find Font, Font Size, Text Align, Color, Border, and Padding options:
You also have Show Header, Footer, and Item Count options, which you can toggle on or off depending on your preference:
With Table type Print Blocks, you can also select different background colors for different rows to help with readability. To set alternating colors on your Table Rows, click on the Odd Row Background or Even Row Background color box to select the color:
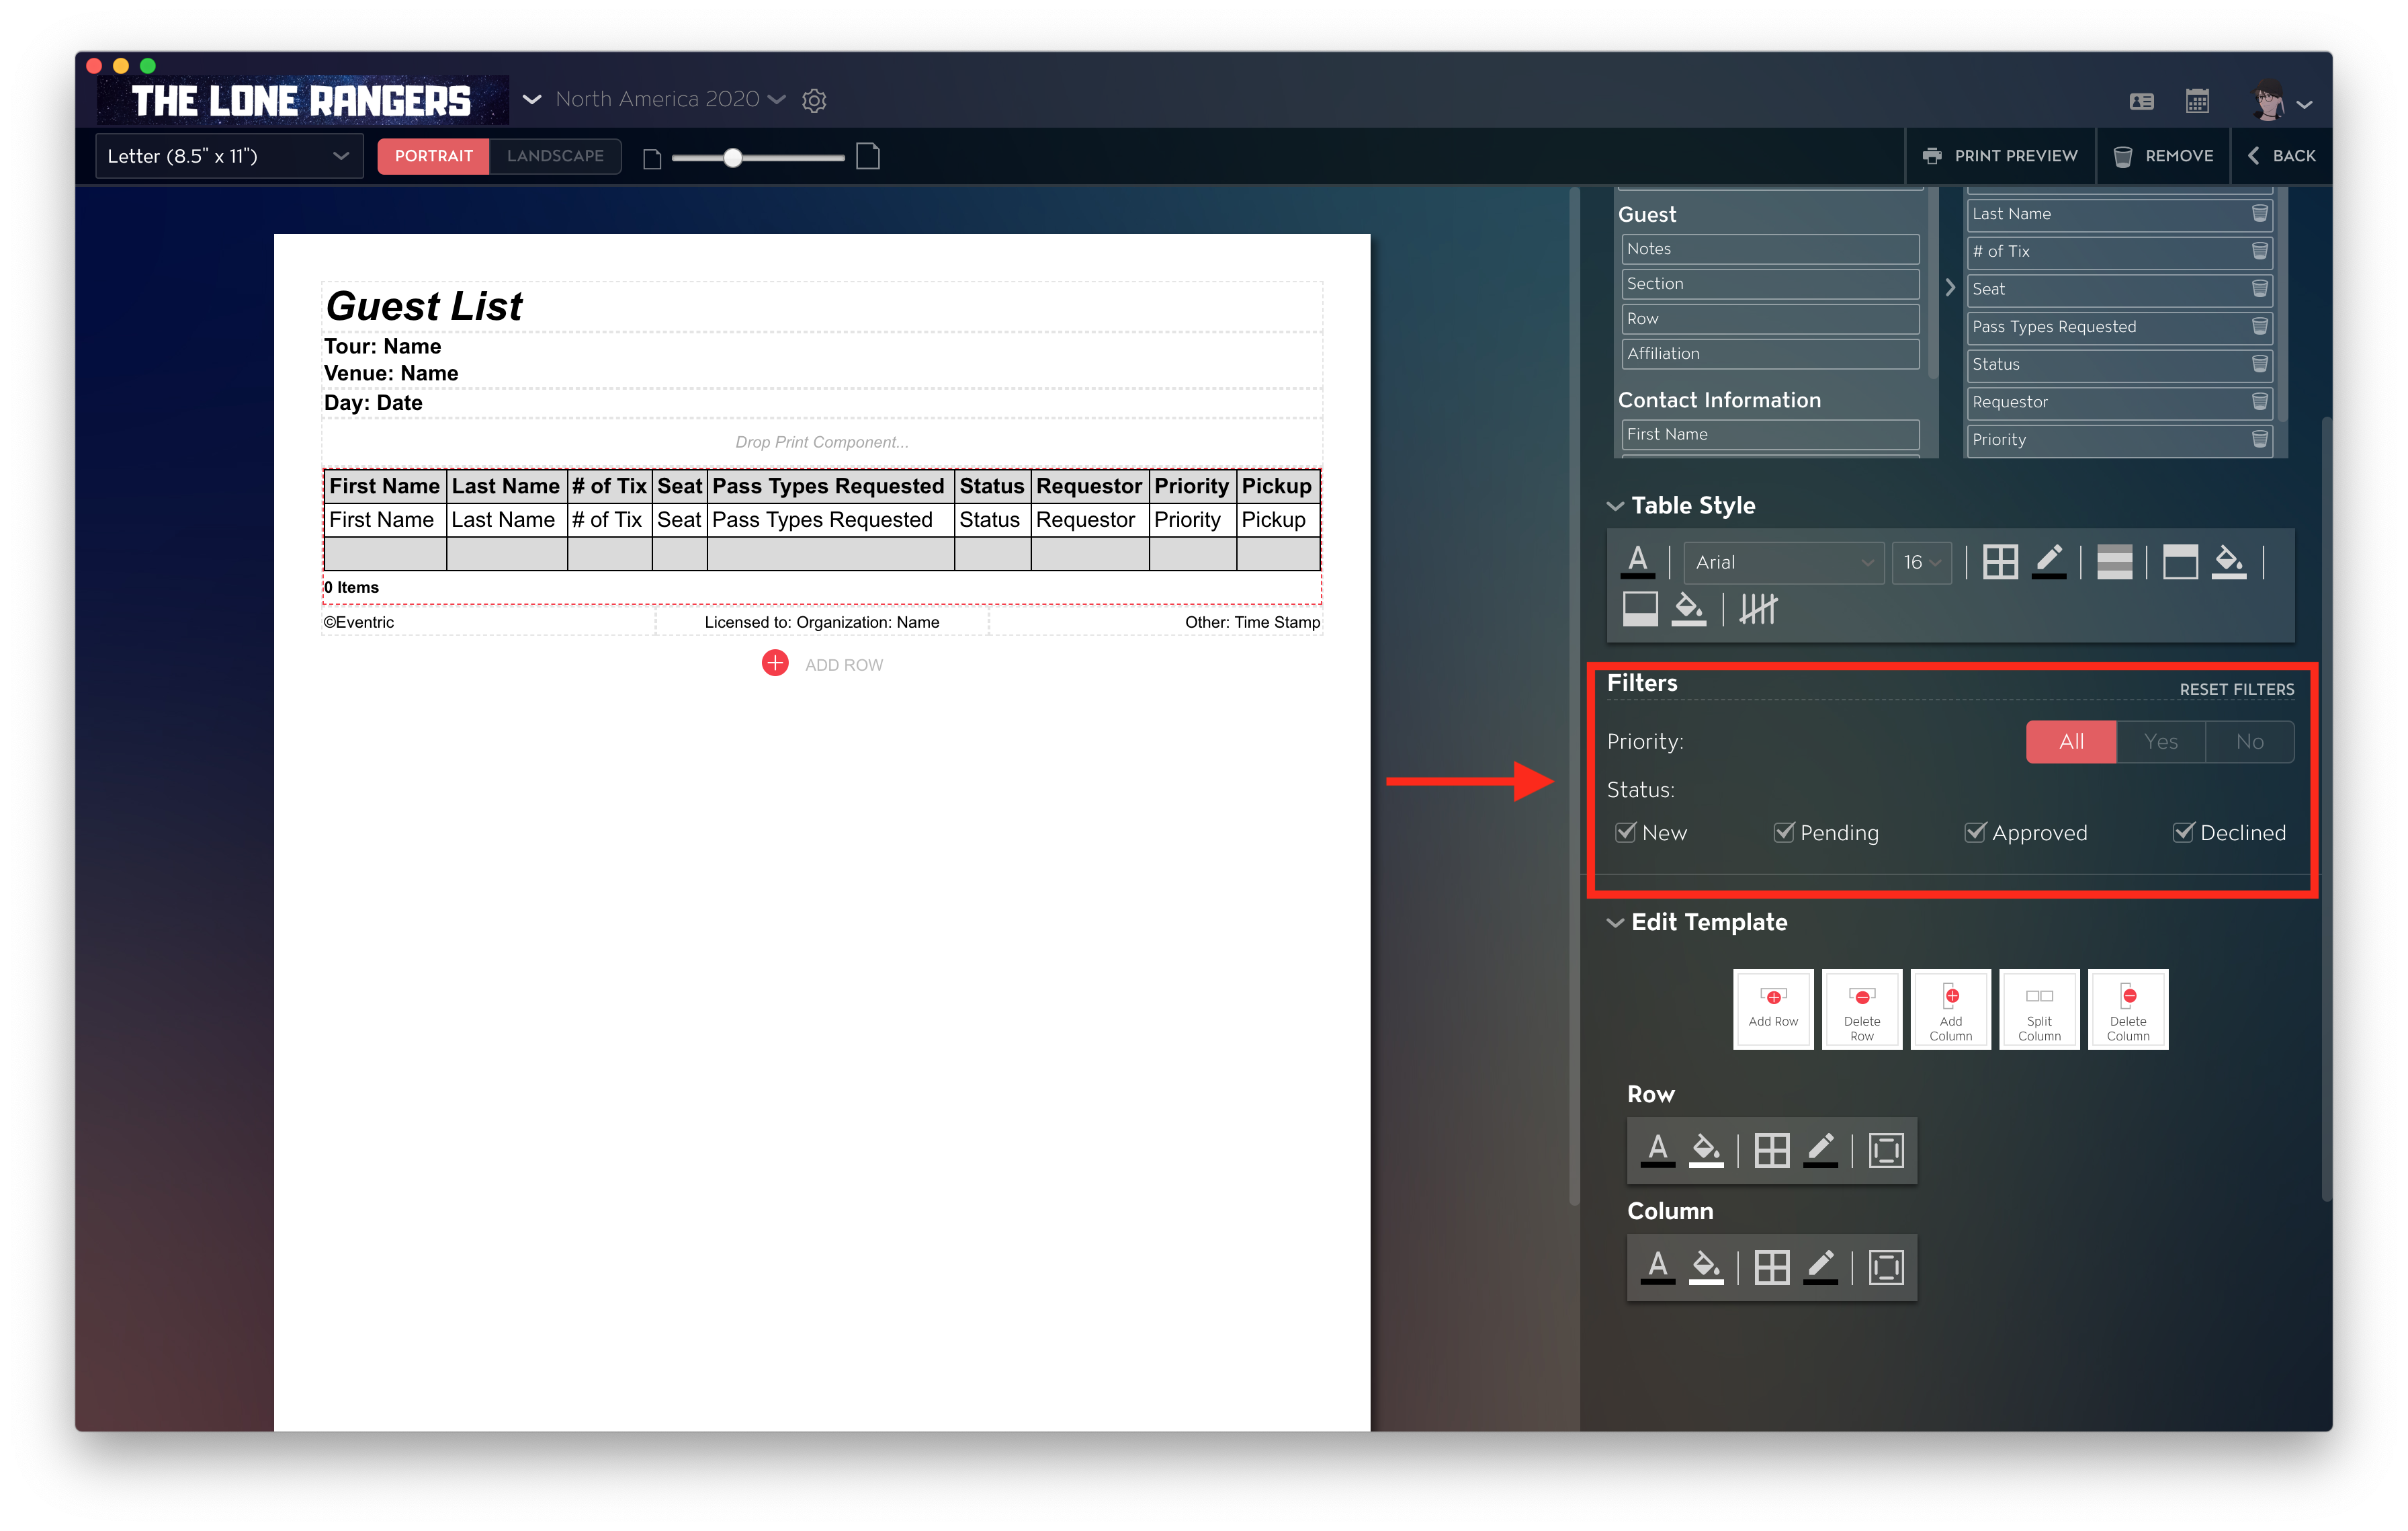
Use Guest List Filtering
For Guest List Print Blocks, you can set up your print template to filter out specific Priorities or Statuses by default. Just select the Priority or Status options that you want to include, and only those Guest Listings will appear when you print this template:
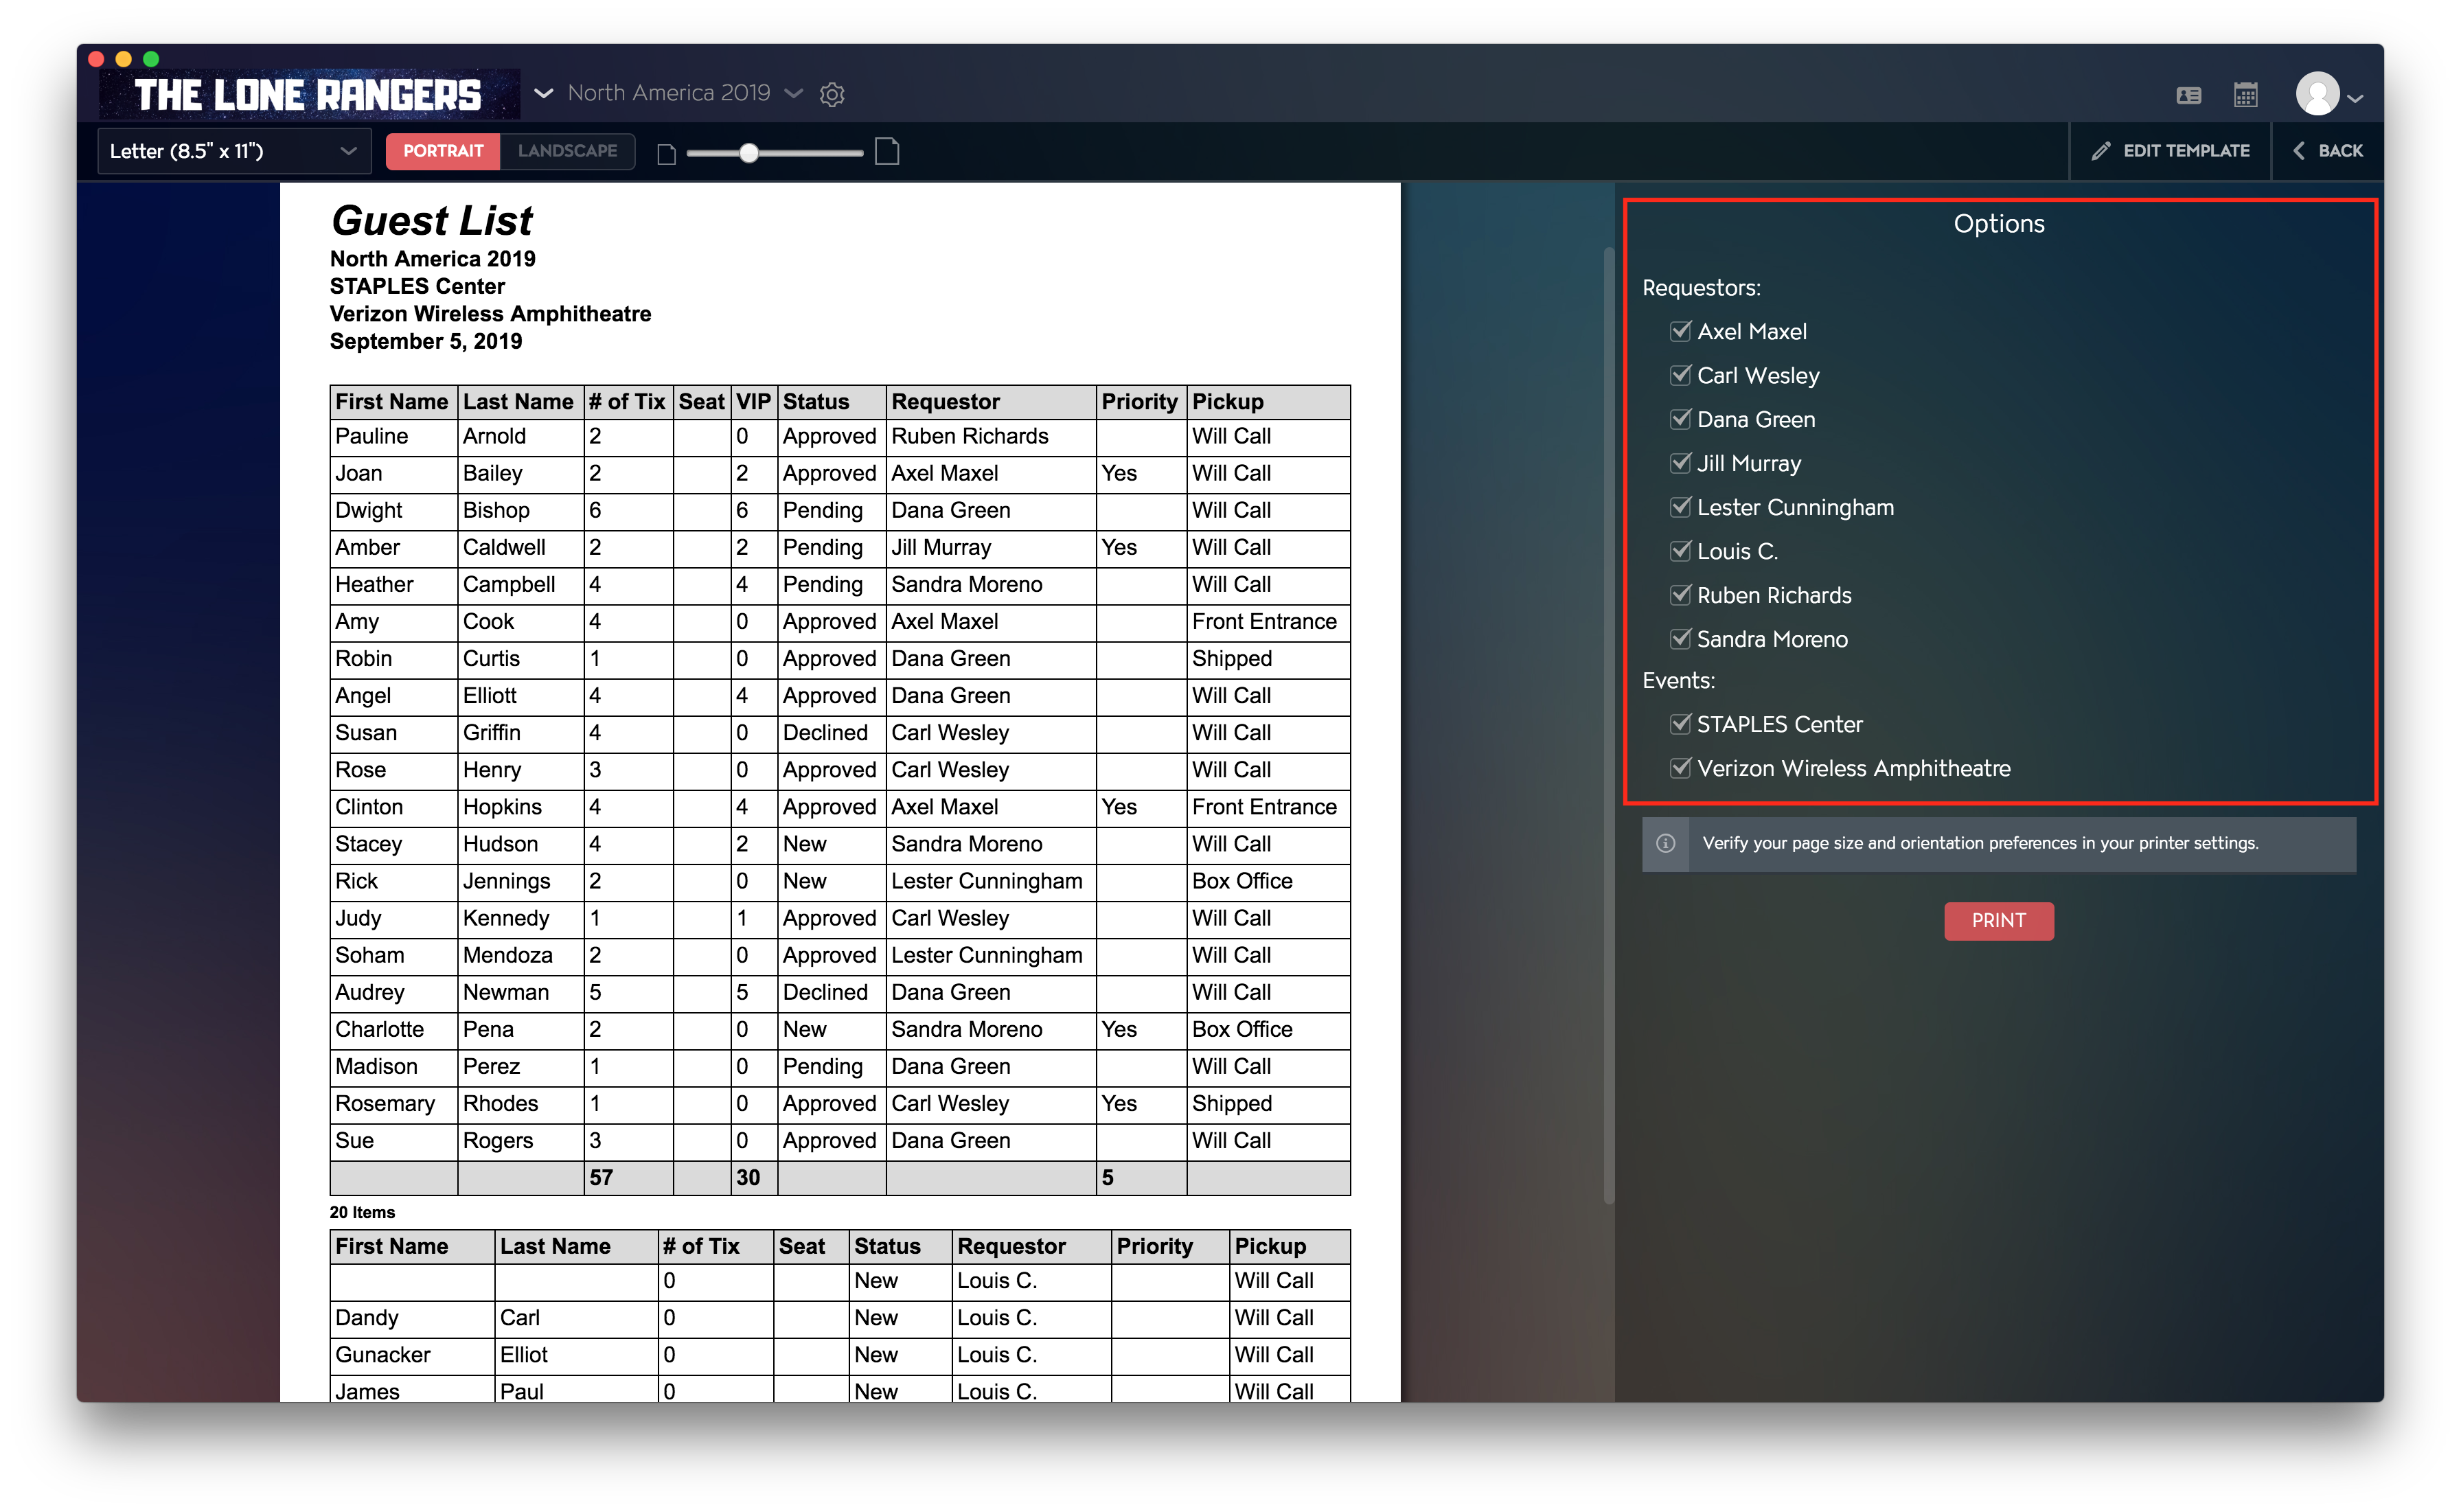
Once you click on Print Preview to see your Guest List, you'll also have the option to filter out Requestors or Events:
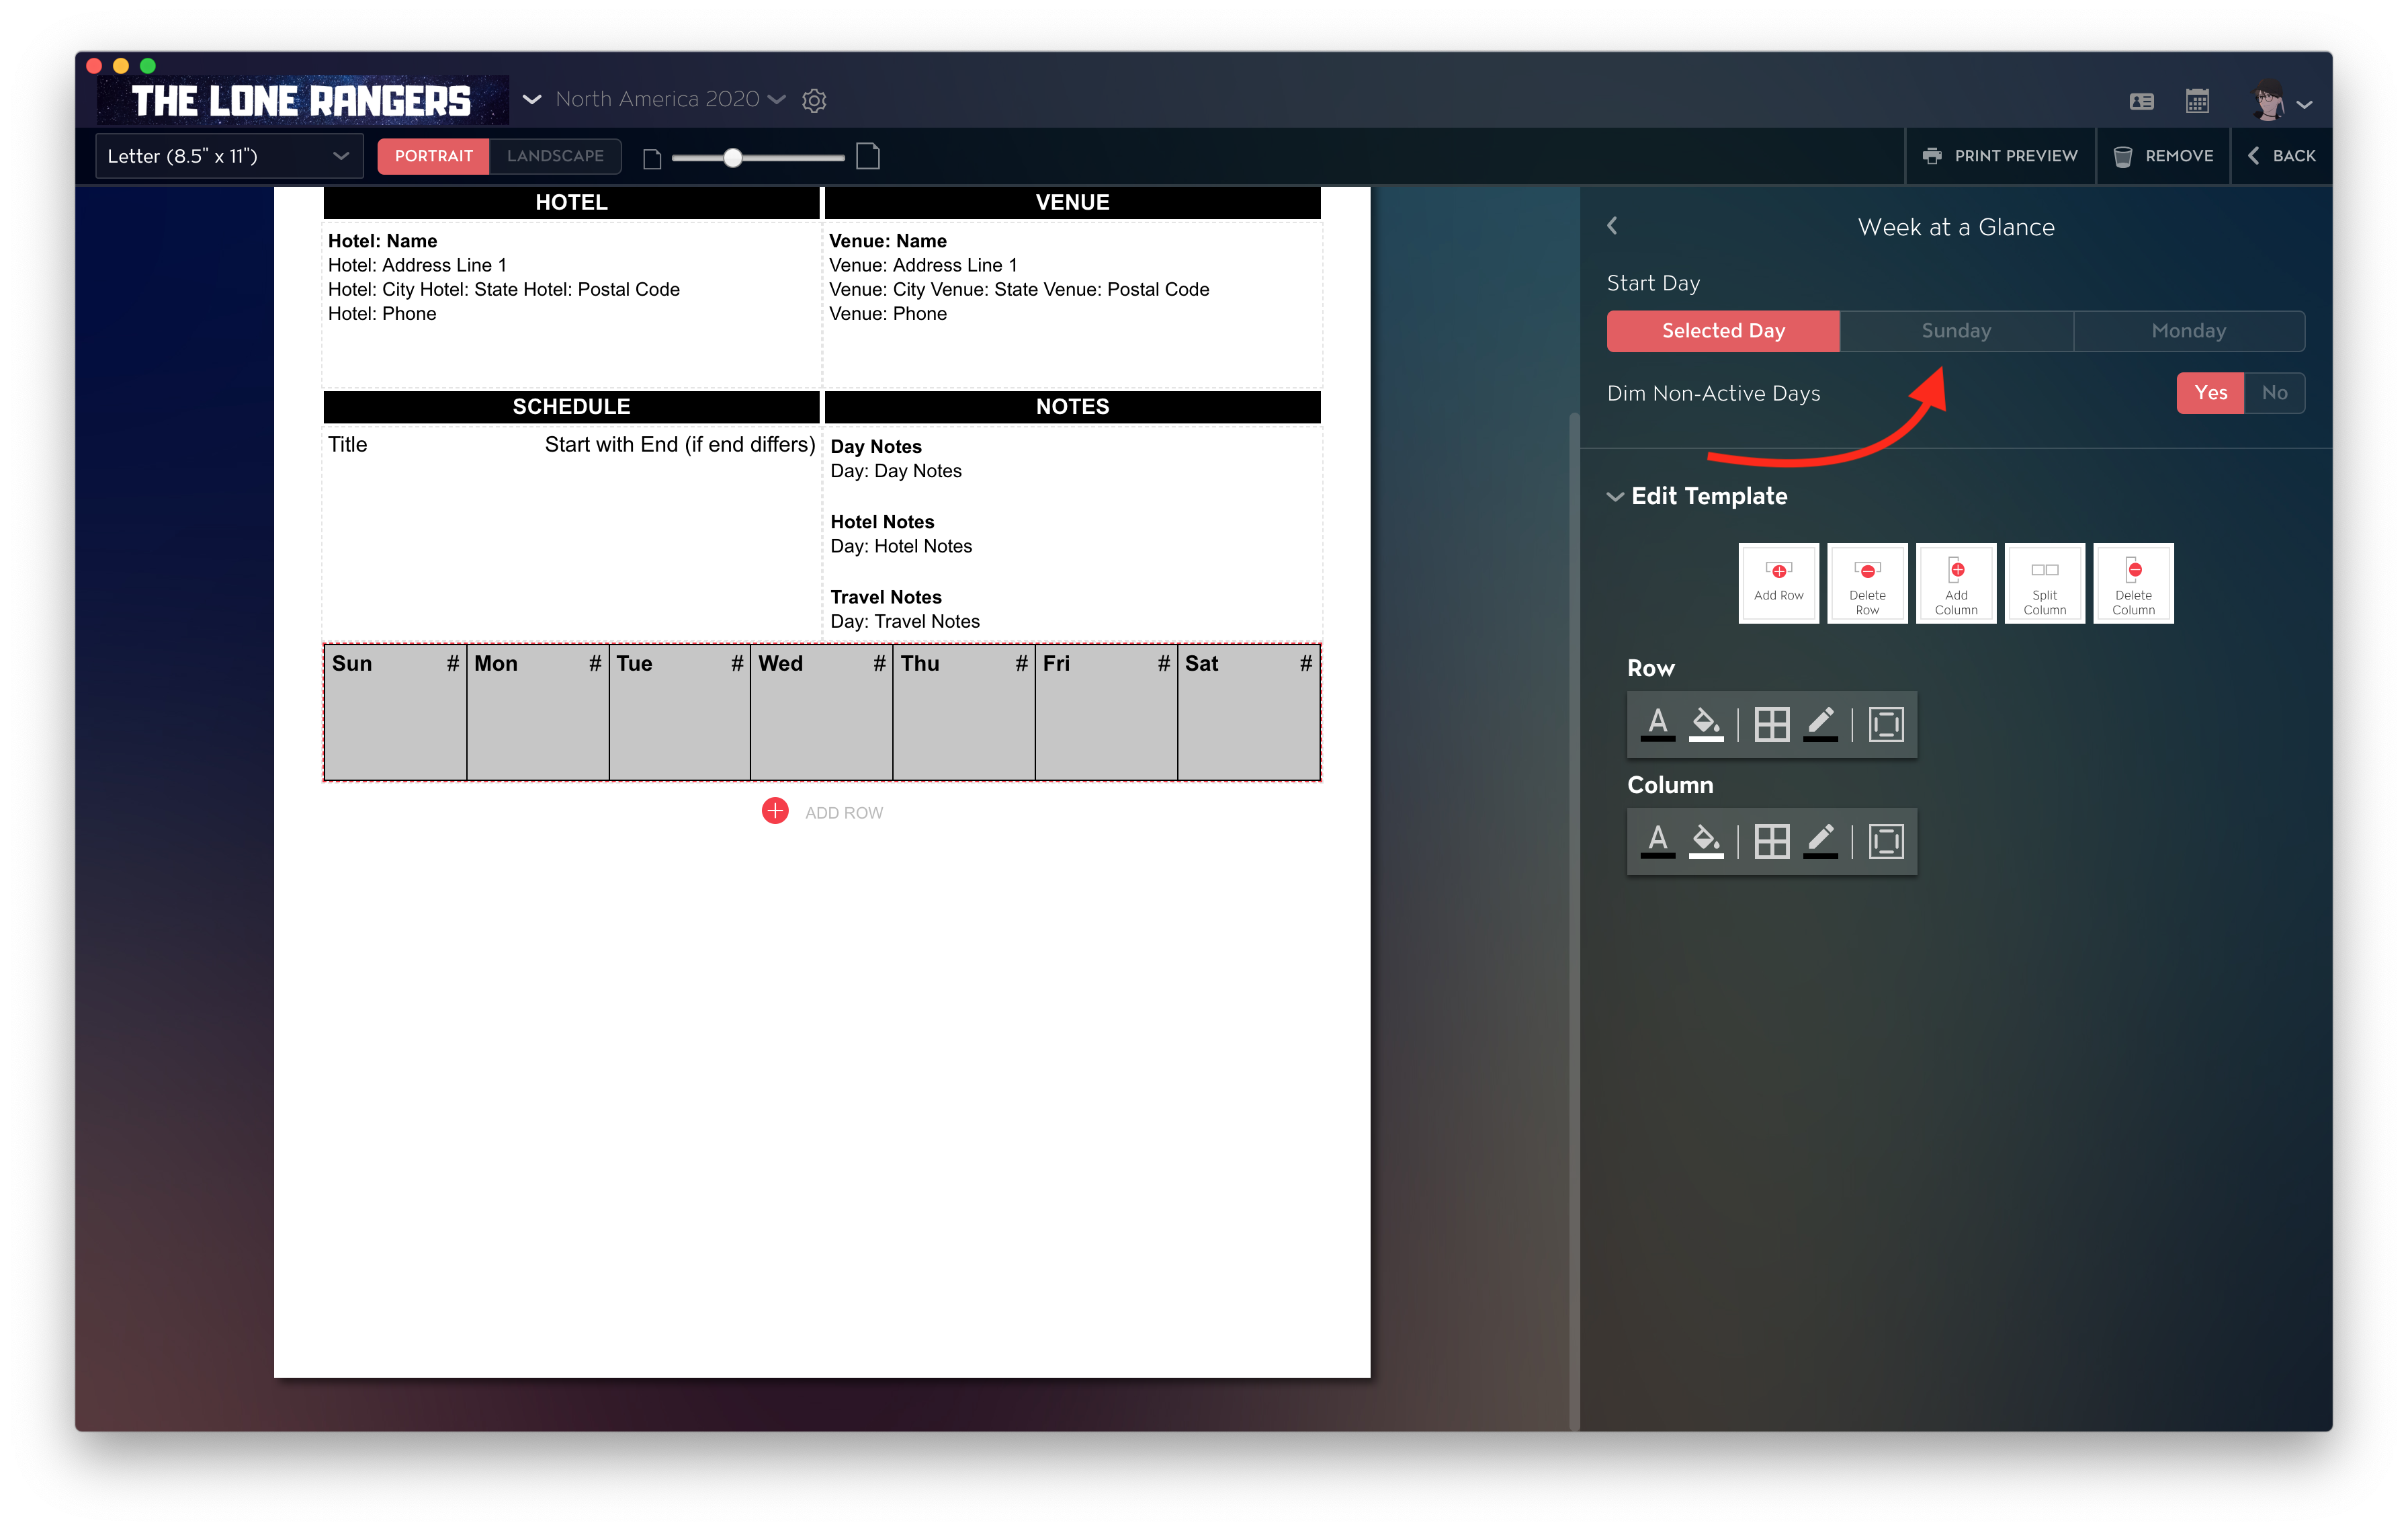
Use the Week at a Glance Print Block
To add a Week At A Glance Print Block, click and drag the block to your desired Row.
With a Week At A Glance block, you will see upcoming Tour Dates' Day Title, City, State, and Country in a seven-day Row.
You can also choose a start date for the seven dates that display. You can decide to start on your currently Selected Day, Sunday, or Monday. You also have the option to dim any calendar dates that you have not added Tour Dates for in Master Tour, by selecting "Dim Non-Active Days":
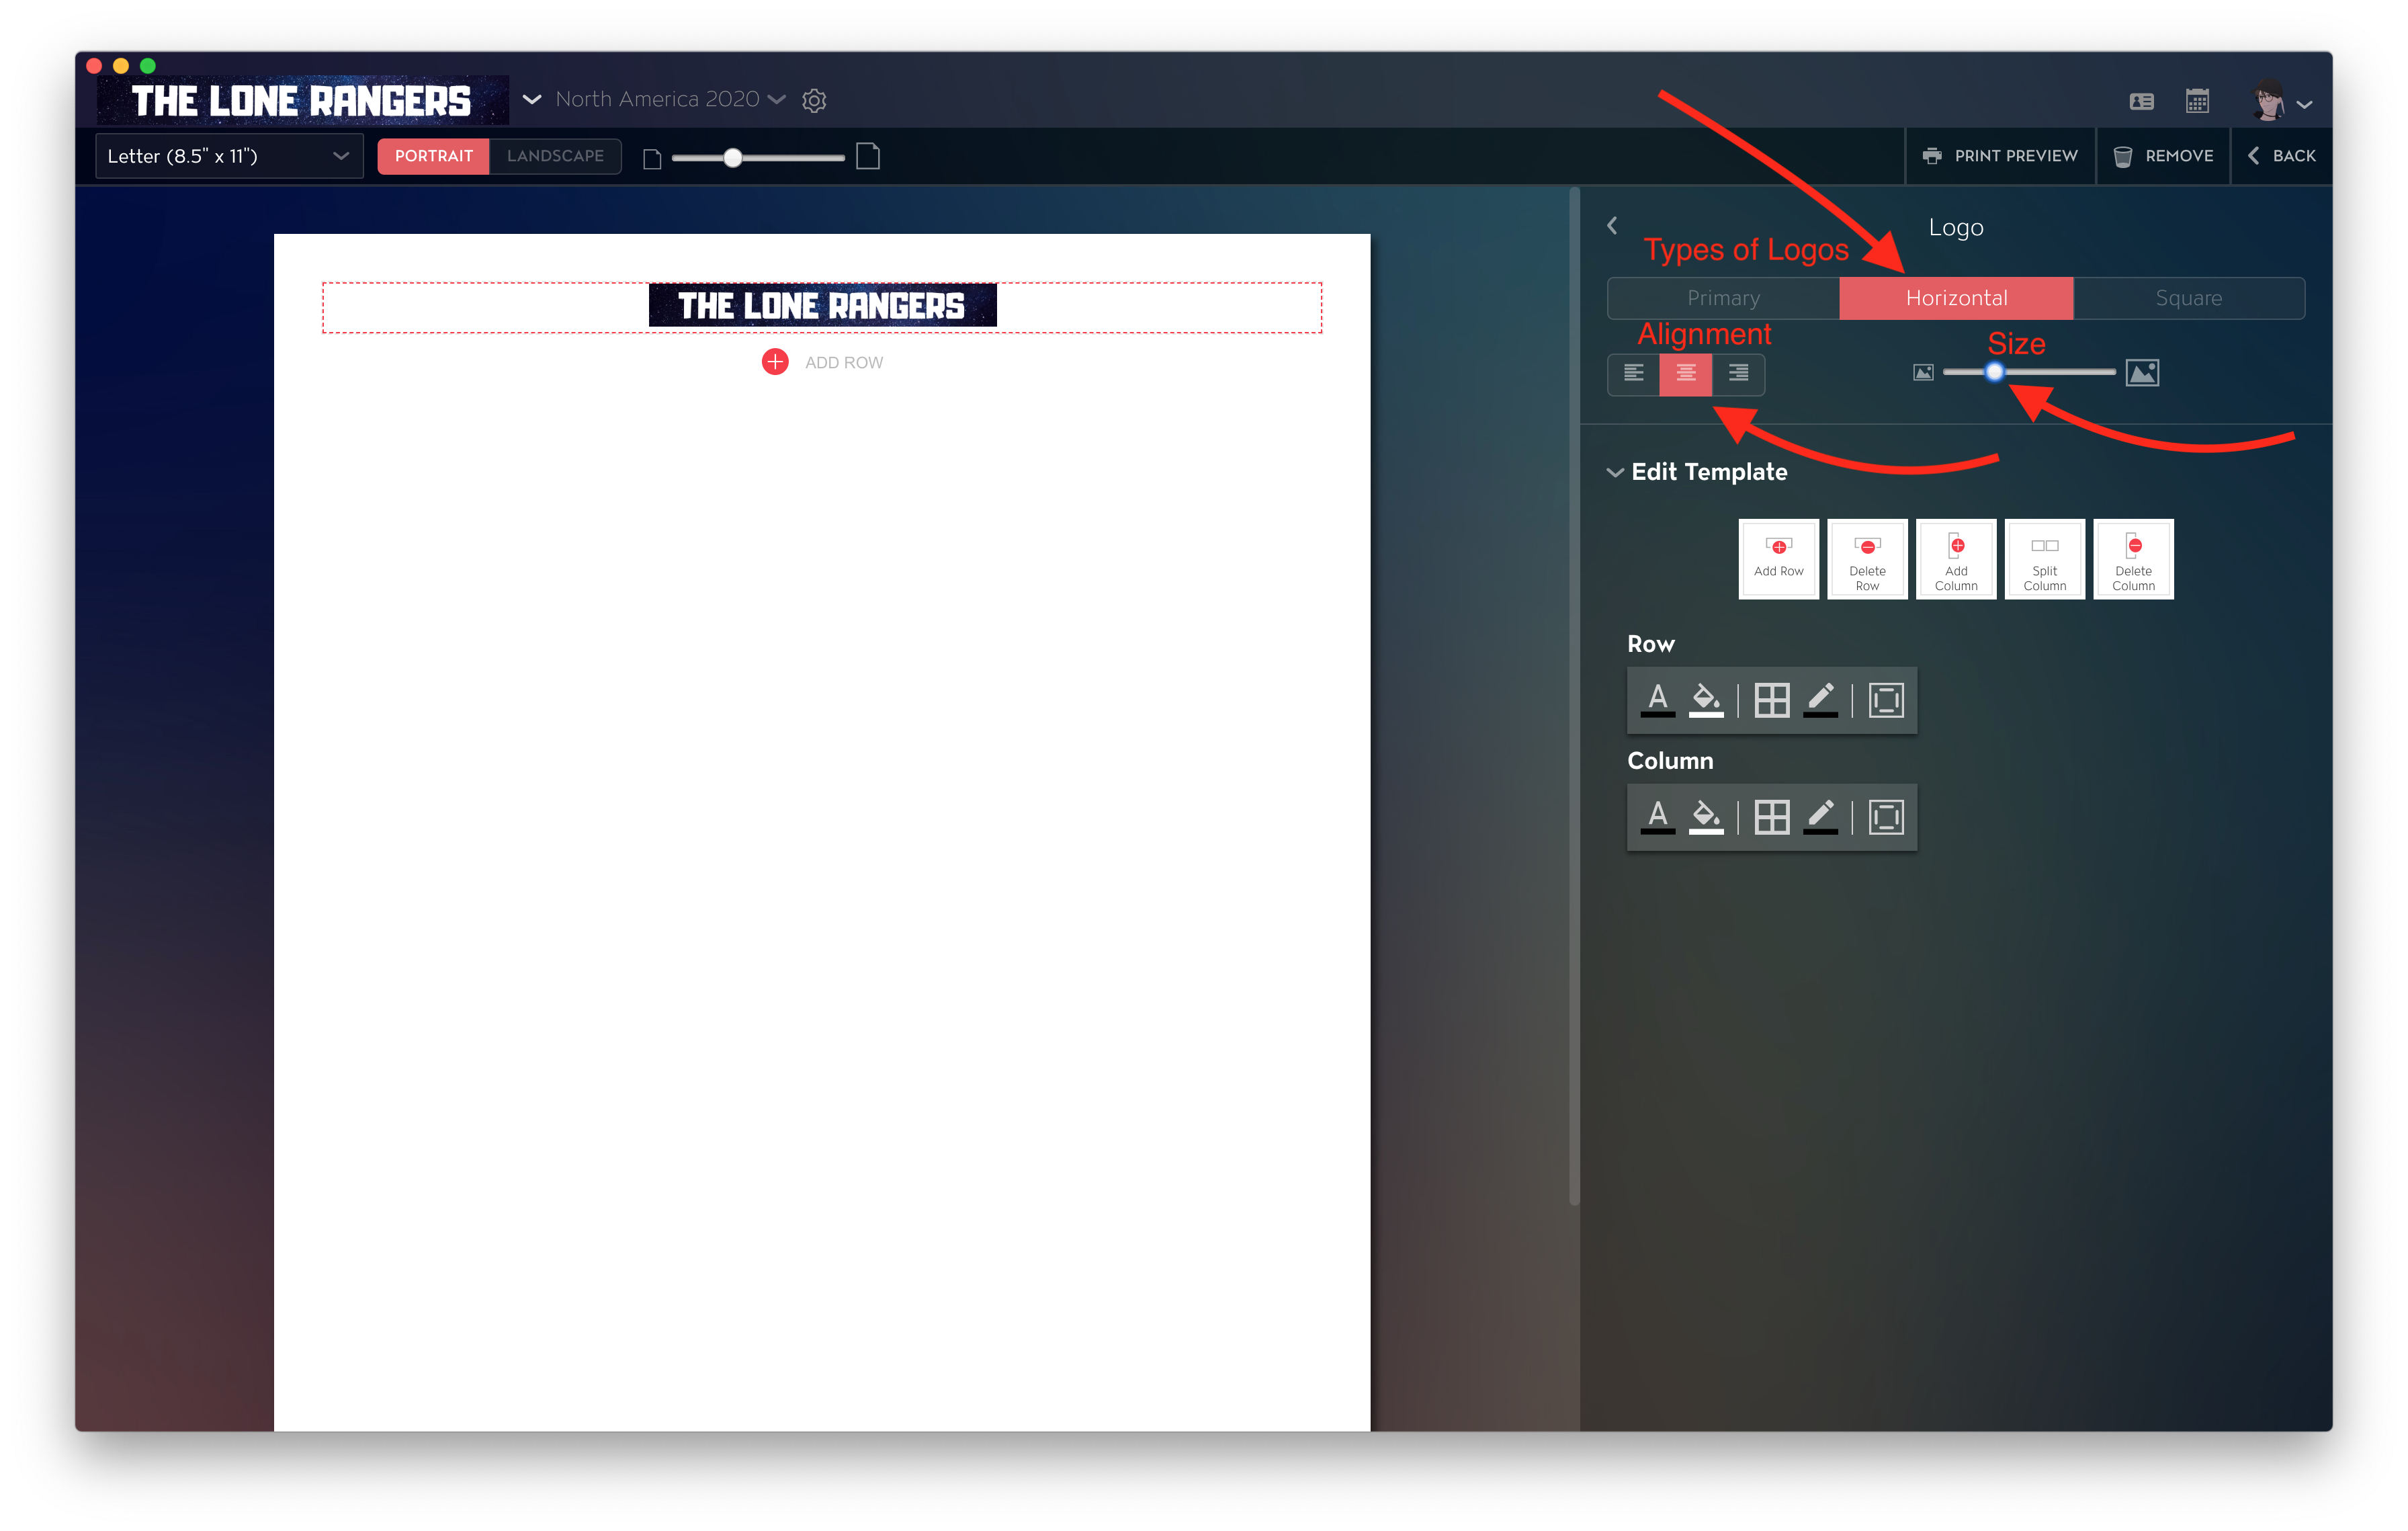
Add Logos
To add Logos to your print template, you'll first need to have Logos uploaded for your Organization. If you don't have Logos uploaded yet, you can upload them by going to Navigate>Organization in the top menu bar, then clicking on the Logos section in your Organization Settings.
Once you have Logos uploaded for your Organization, you can drag and drop a Logo Print Block onto your print template:

Once placed, you can choose between your Primary, Horizontal, and Square logos. You can also adjust the Size and Alignment, and use any of the usual Row or Column styling settings: