Use Schedule Templates to apply multiple Schedule and/or Travel Items at once to a Tour Date.
This article covers how to:
Locate the Schedule Template Section
Apply a Schedule Template to an Existing Date
Apply a Schedule Template on Top of an Existing Schedule
Replace Existing Schedule/Travel Items
Apply a Schedule Template to a New Day
Copy Schedule Templates to Another Organization
Locate the Schedule Template Section
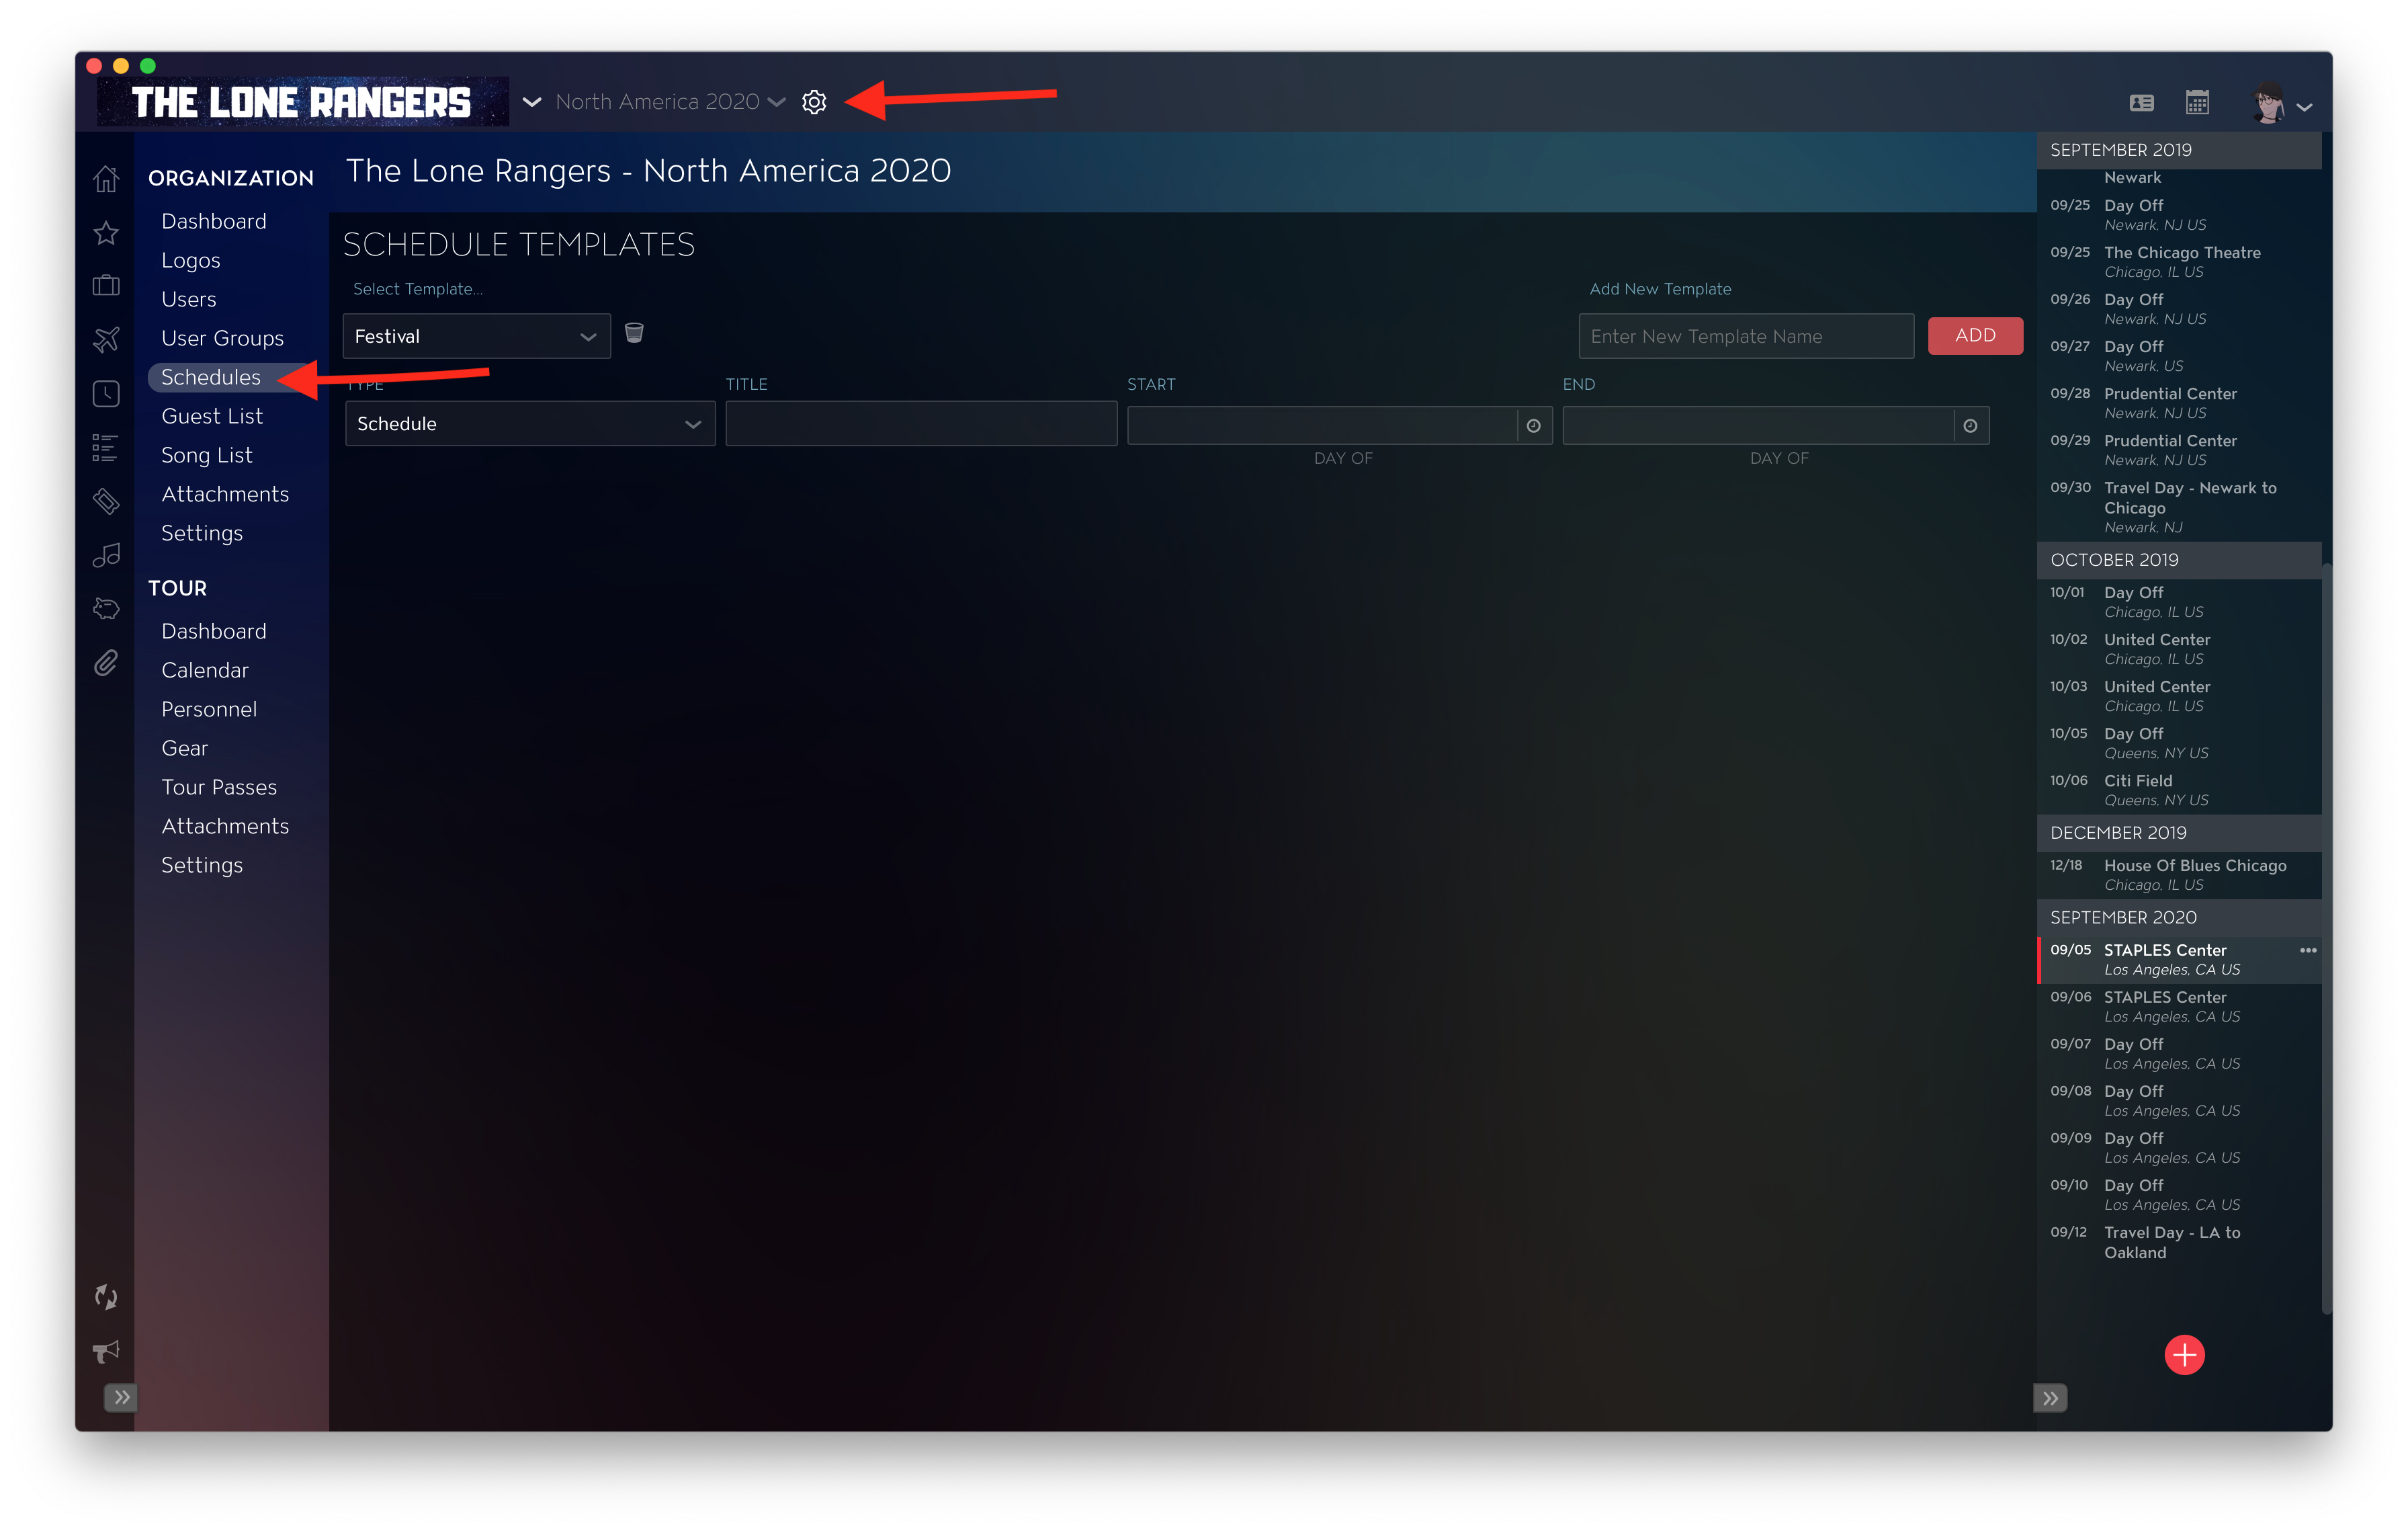
To access your Schedule Templates, first, click on the Gear icon at the top left, then click on the Schedules section in the left panel.
Add a New Schedule Template
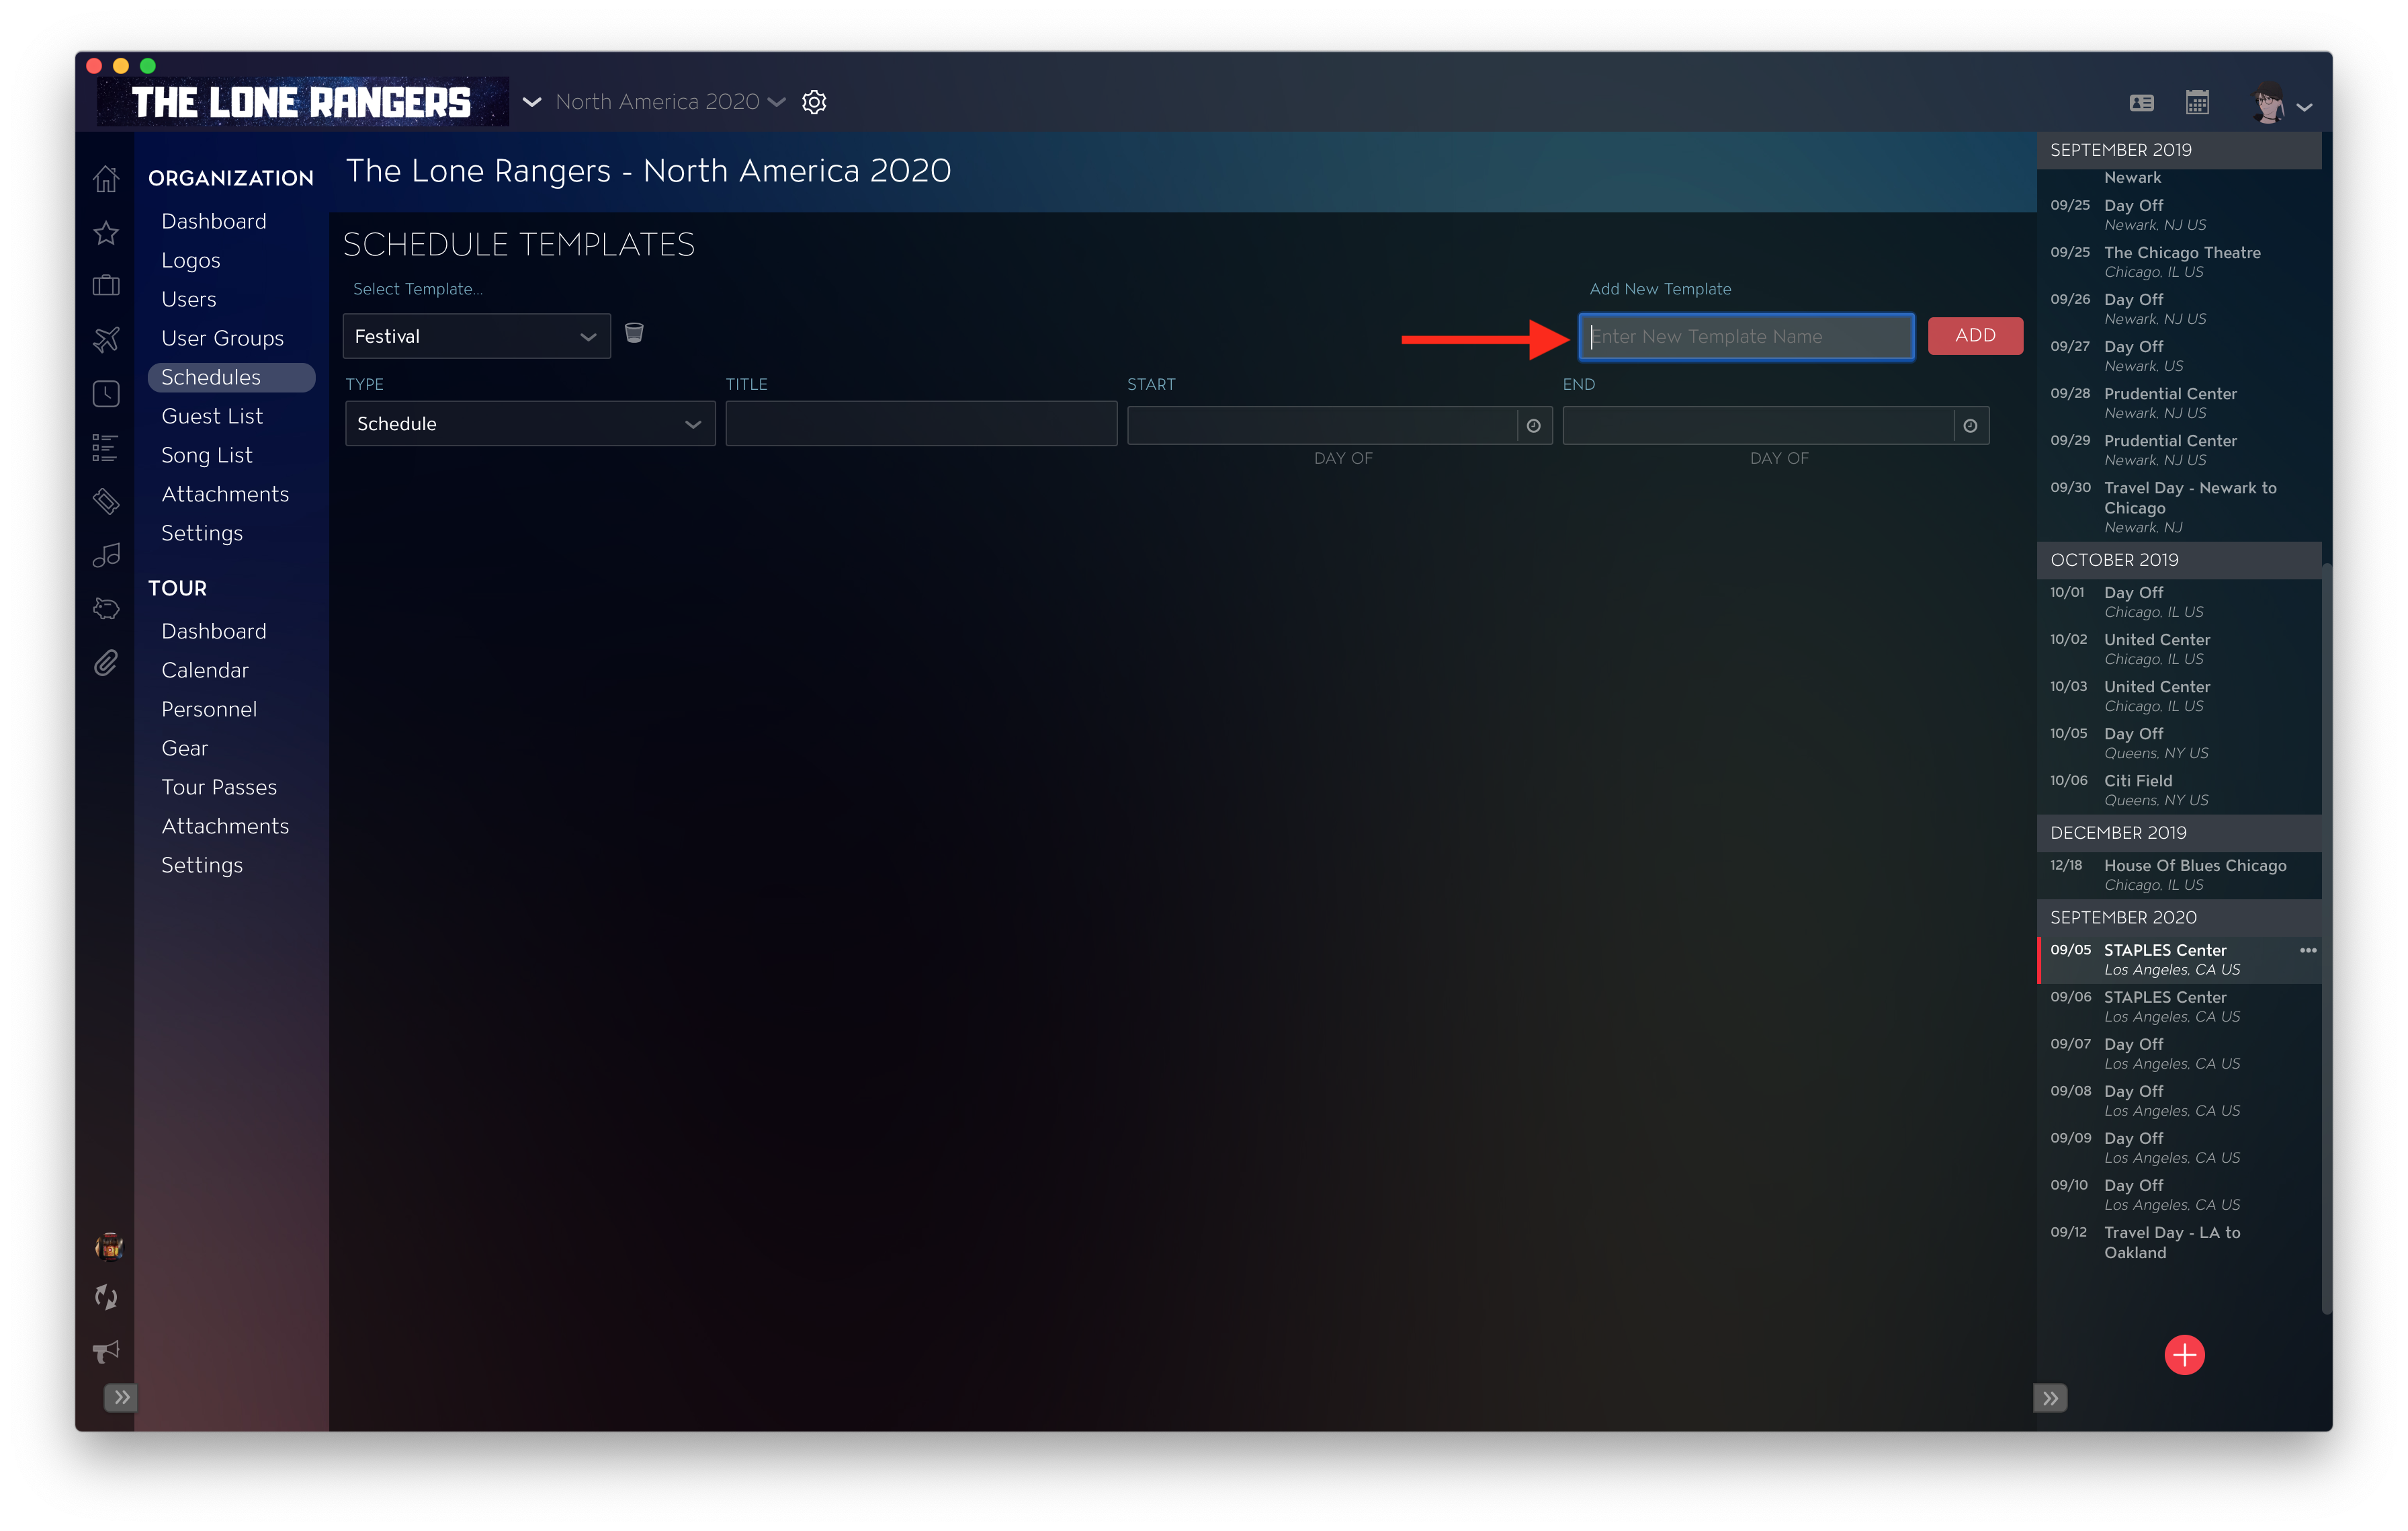
To add a new Schedule Template, first, click on the text box at the upper right titled Enter New Template Name and begin typing in your title. Once done, click on the Add button to the right of it.
Add New Schedule Items
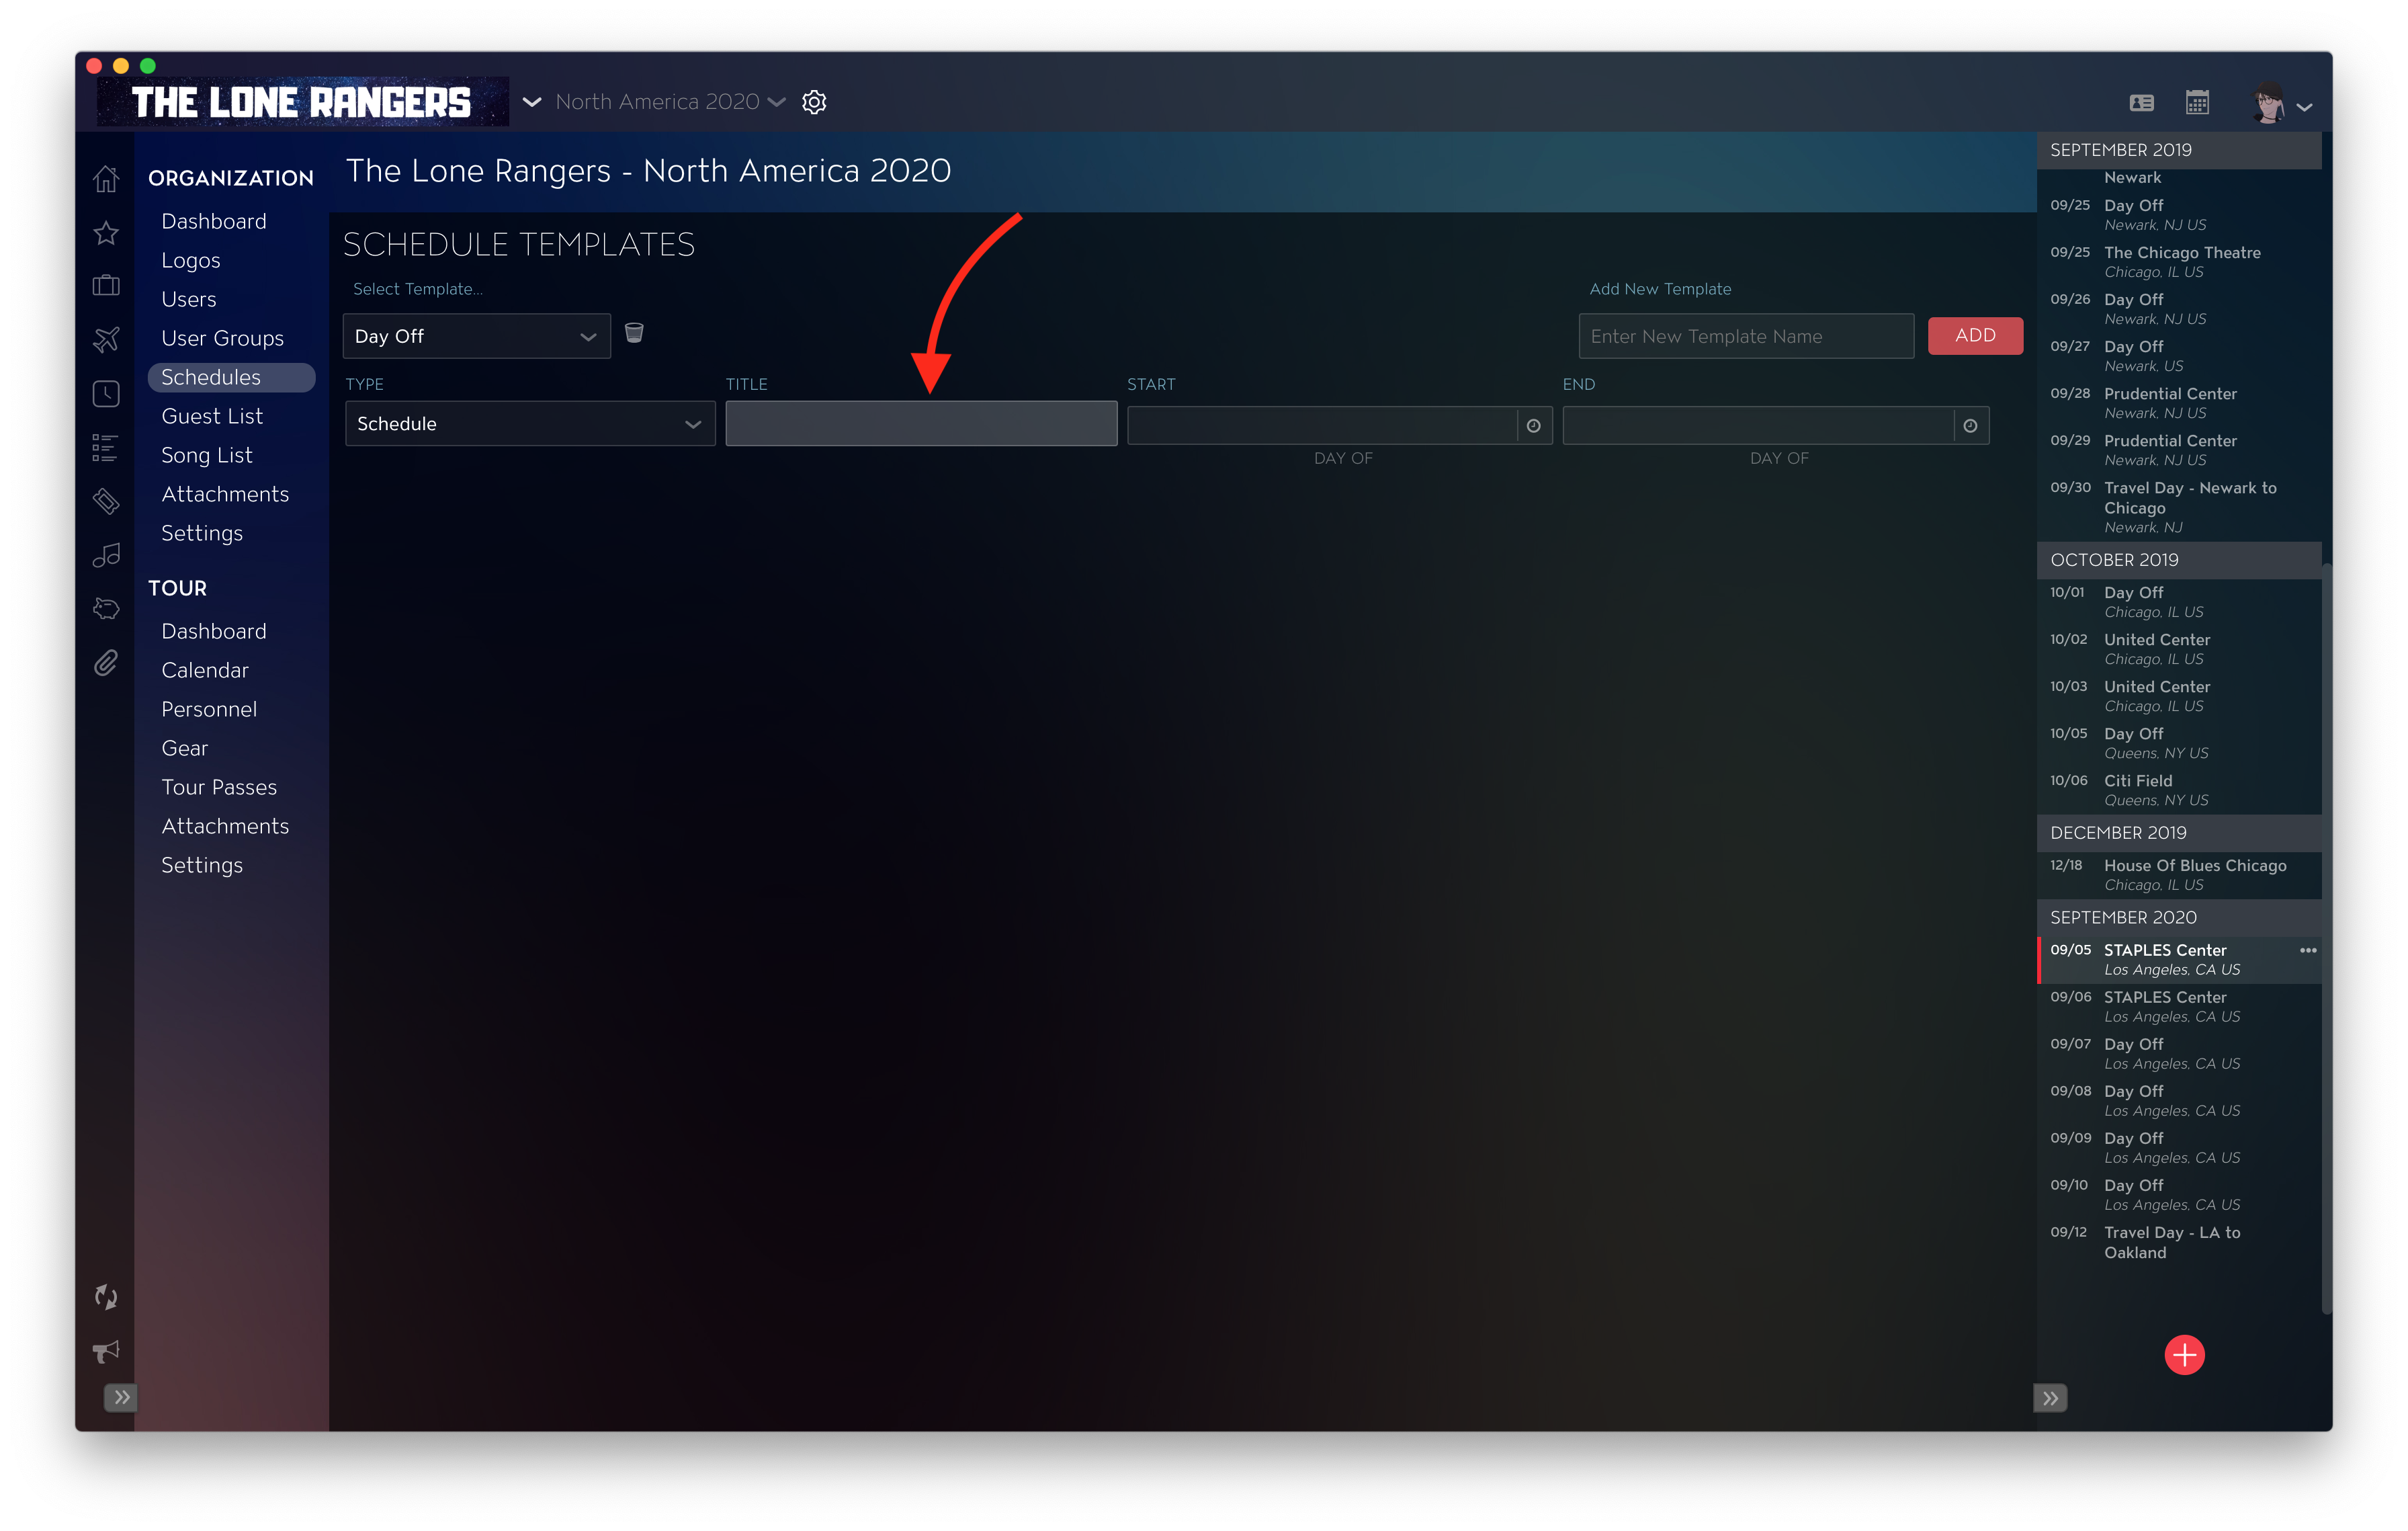
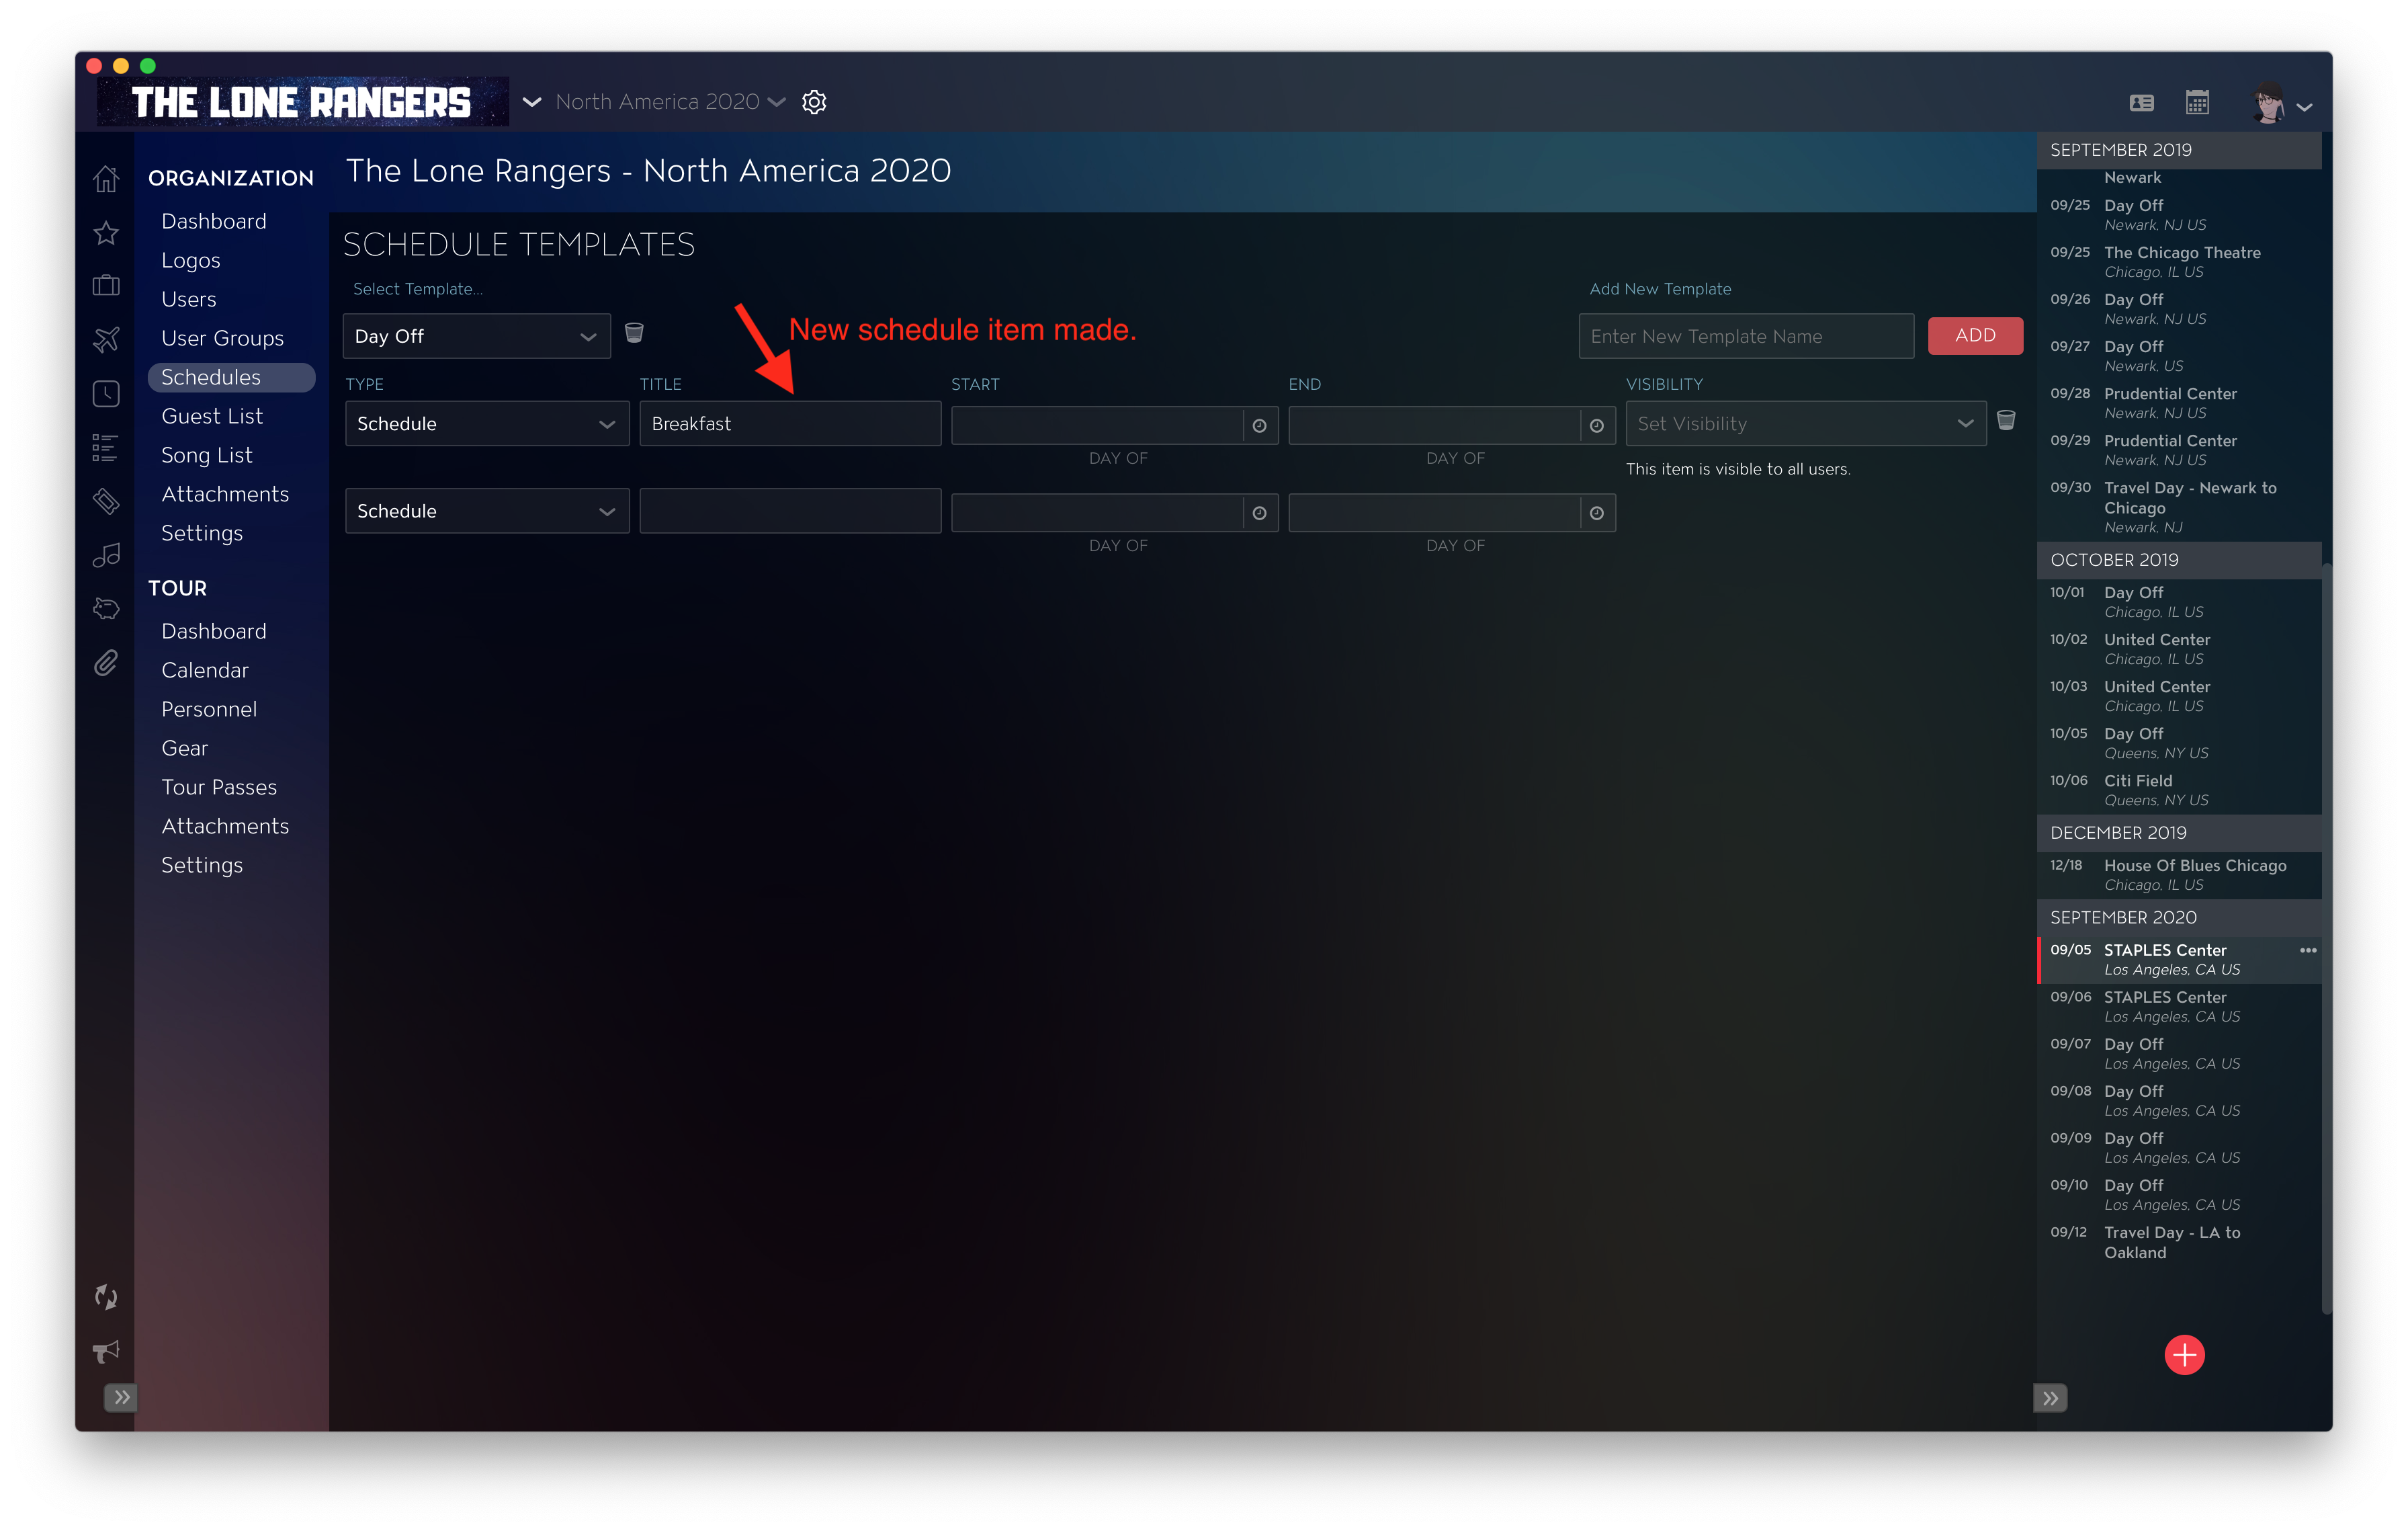
To add a new Schedule Item to your Schedule Template, click on the title box of your new item and type in the title.
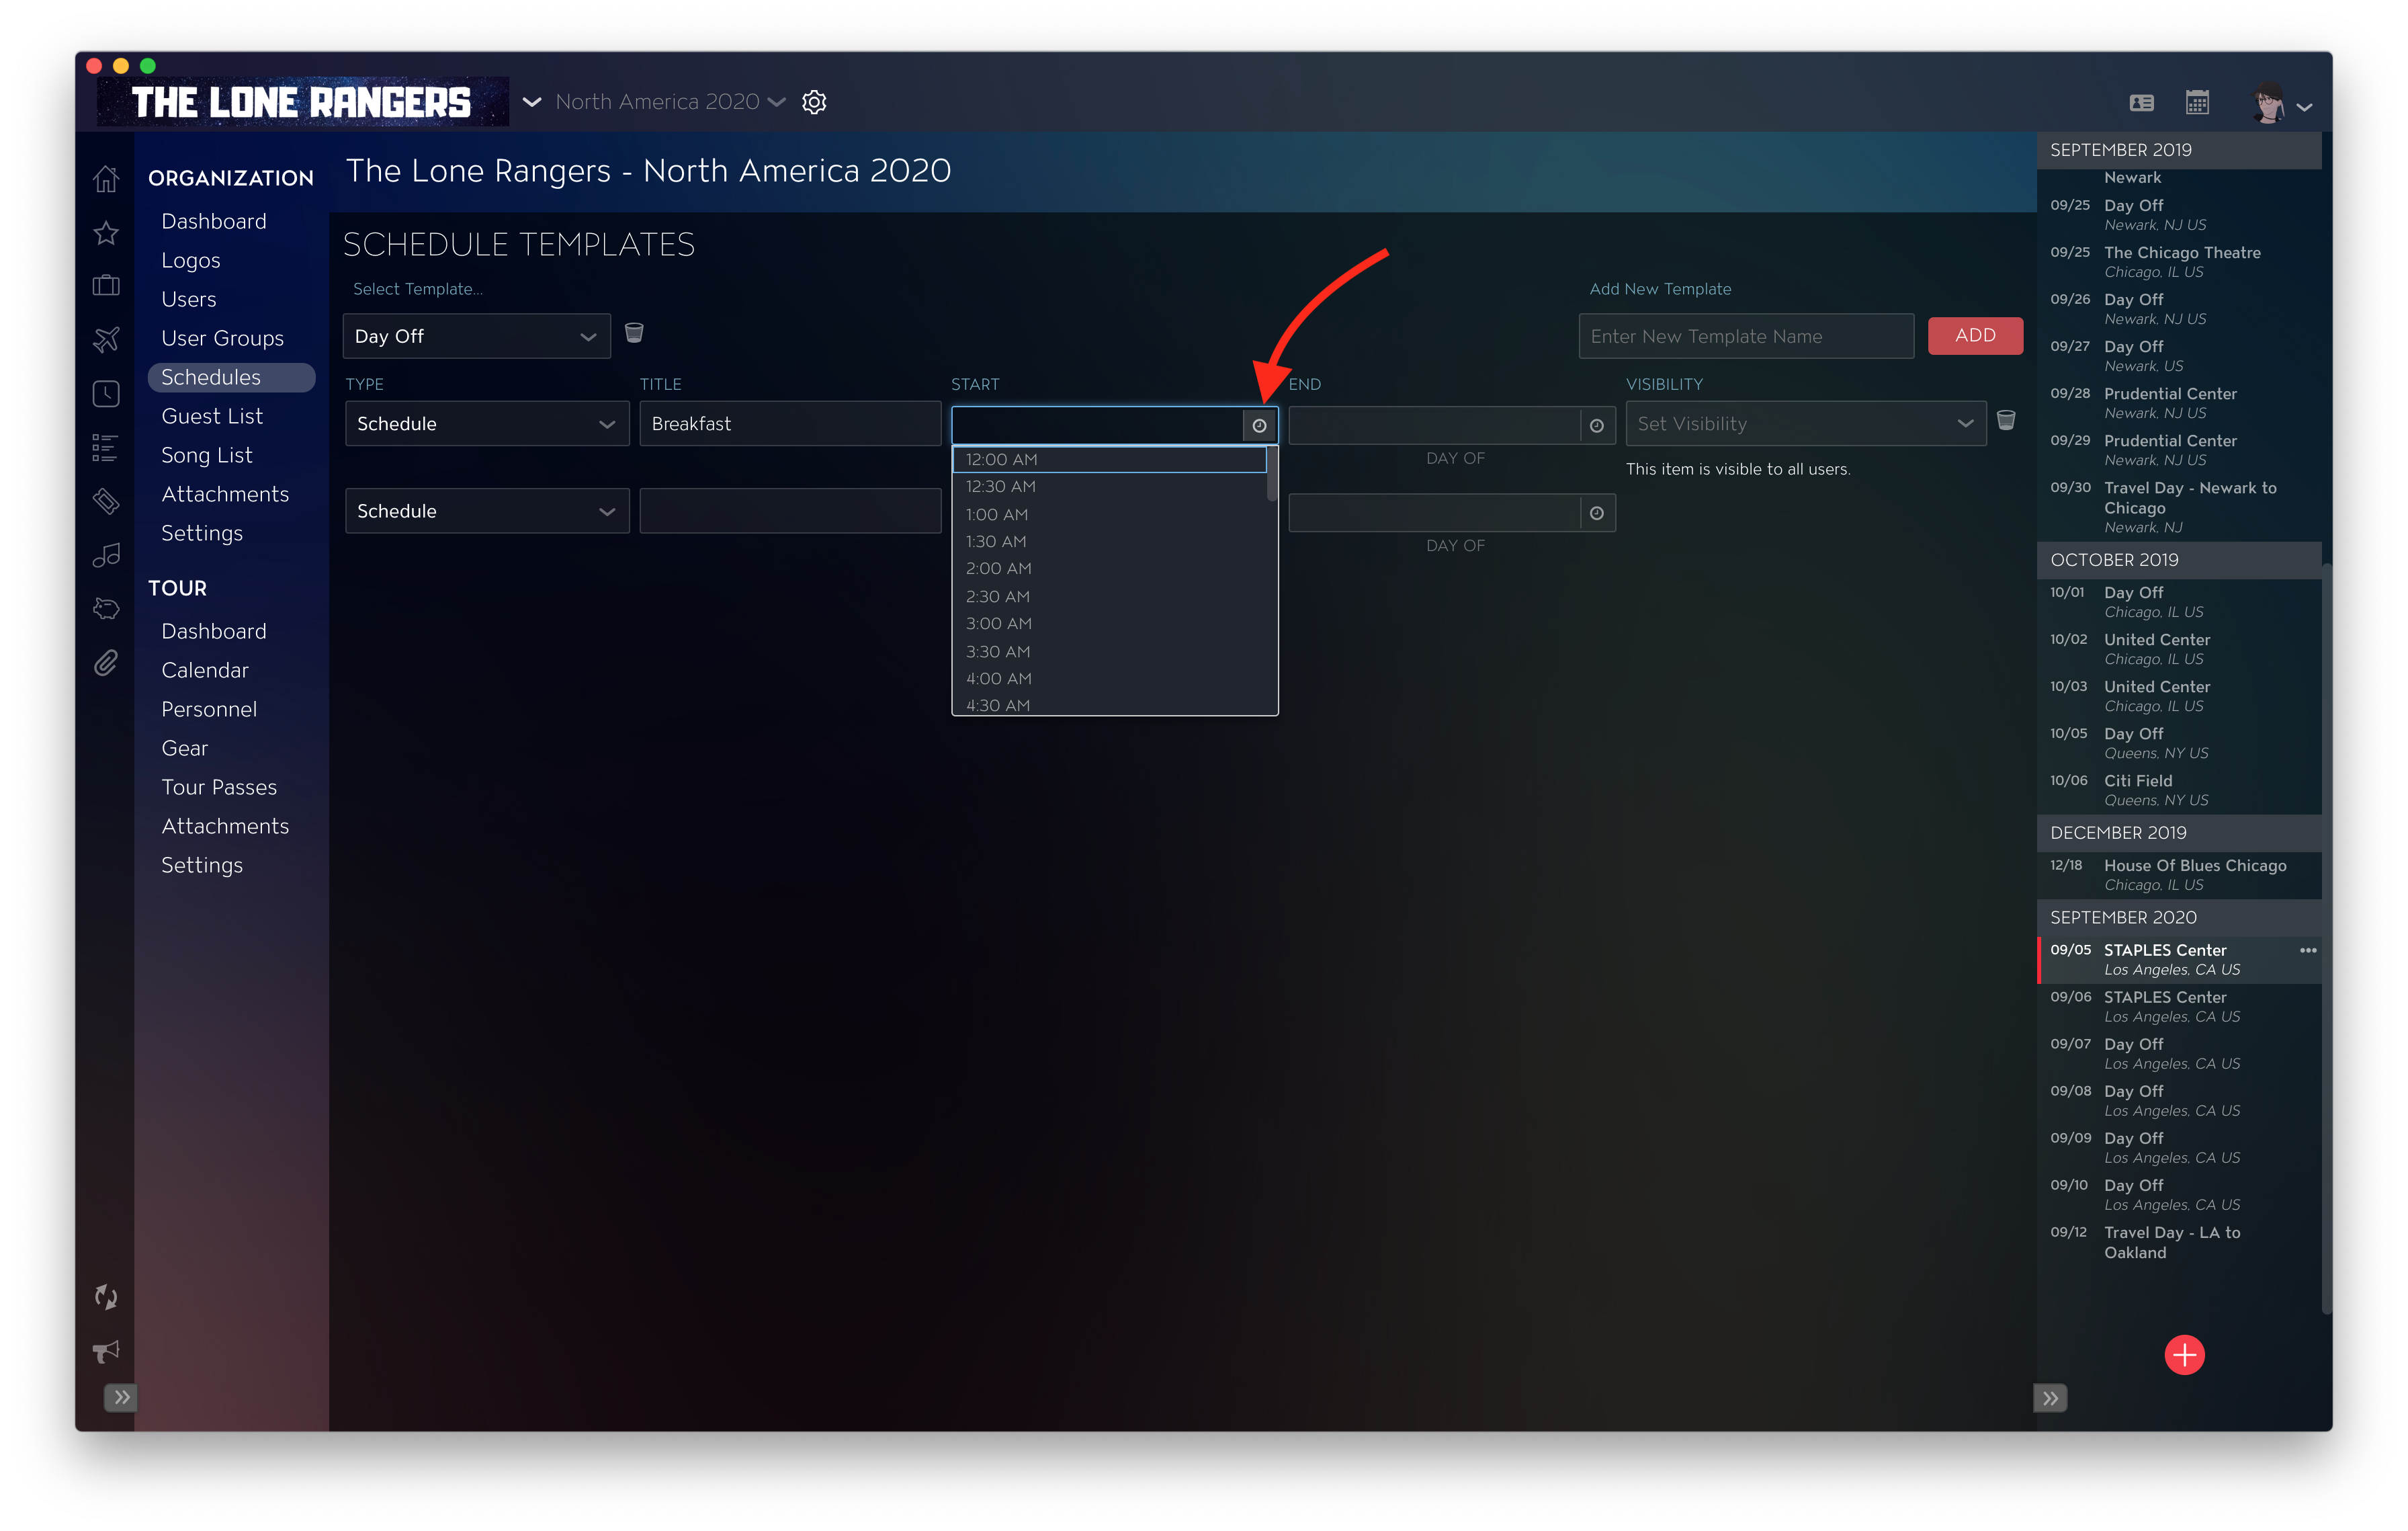
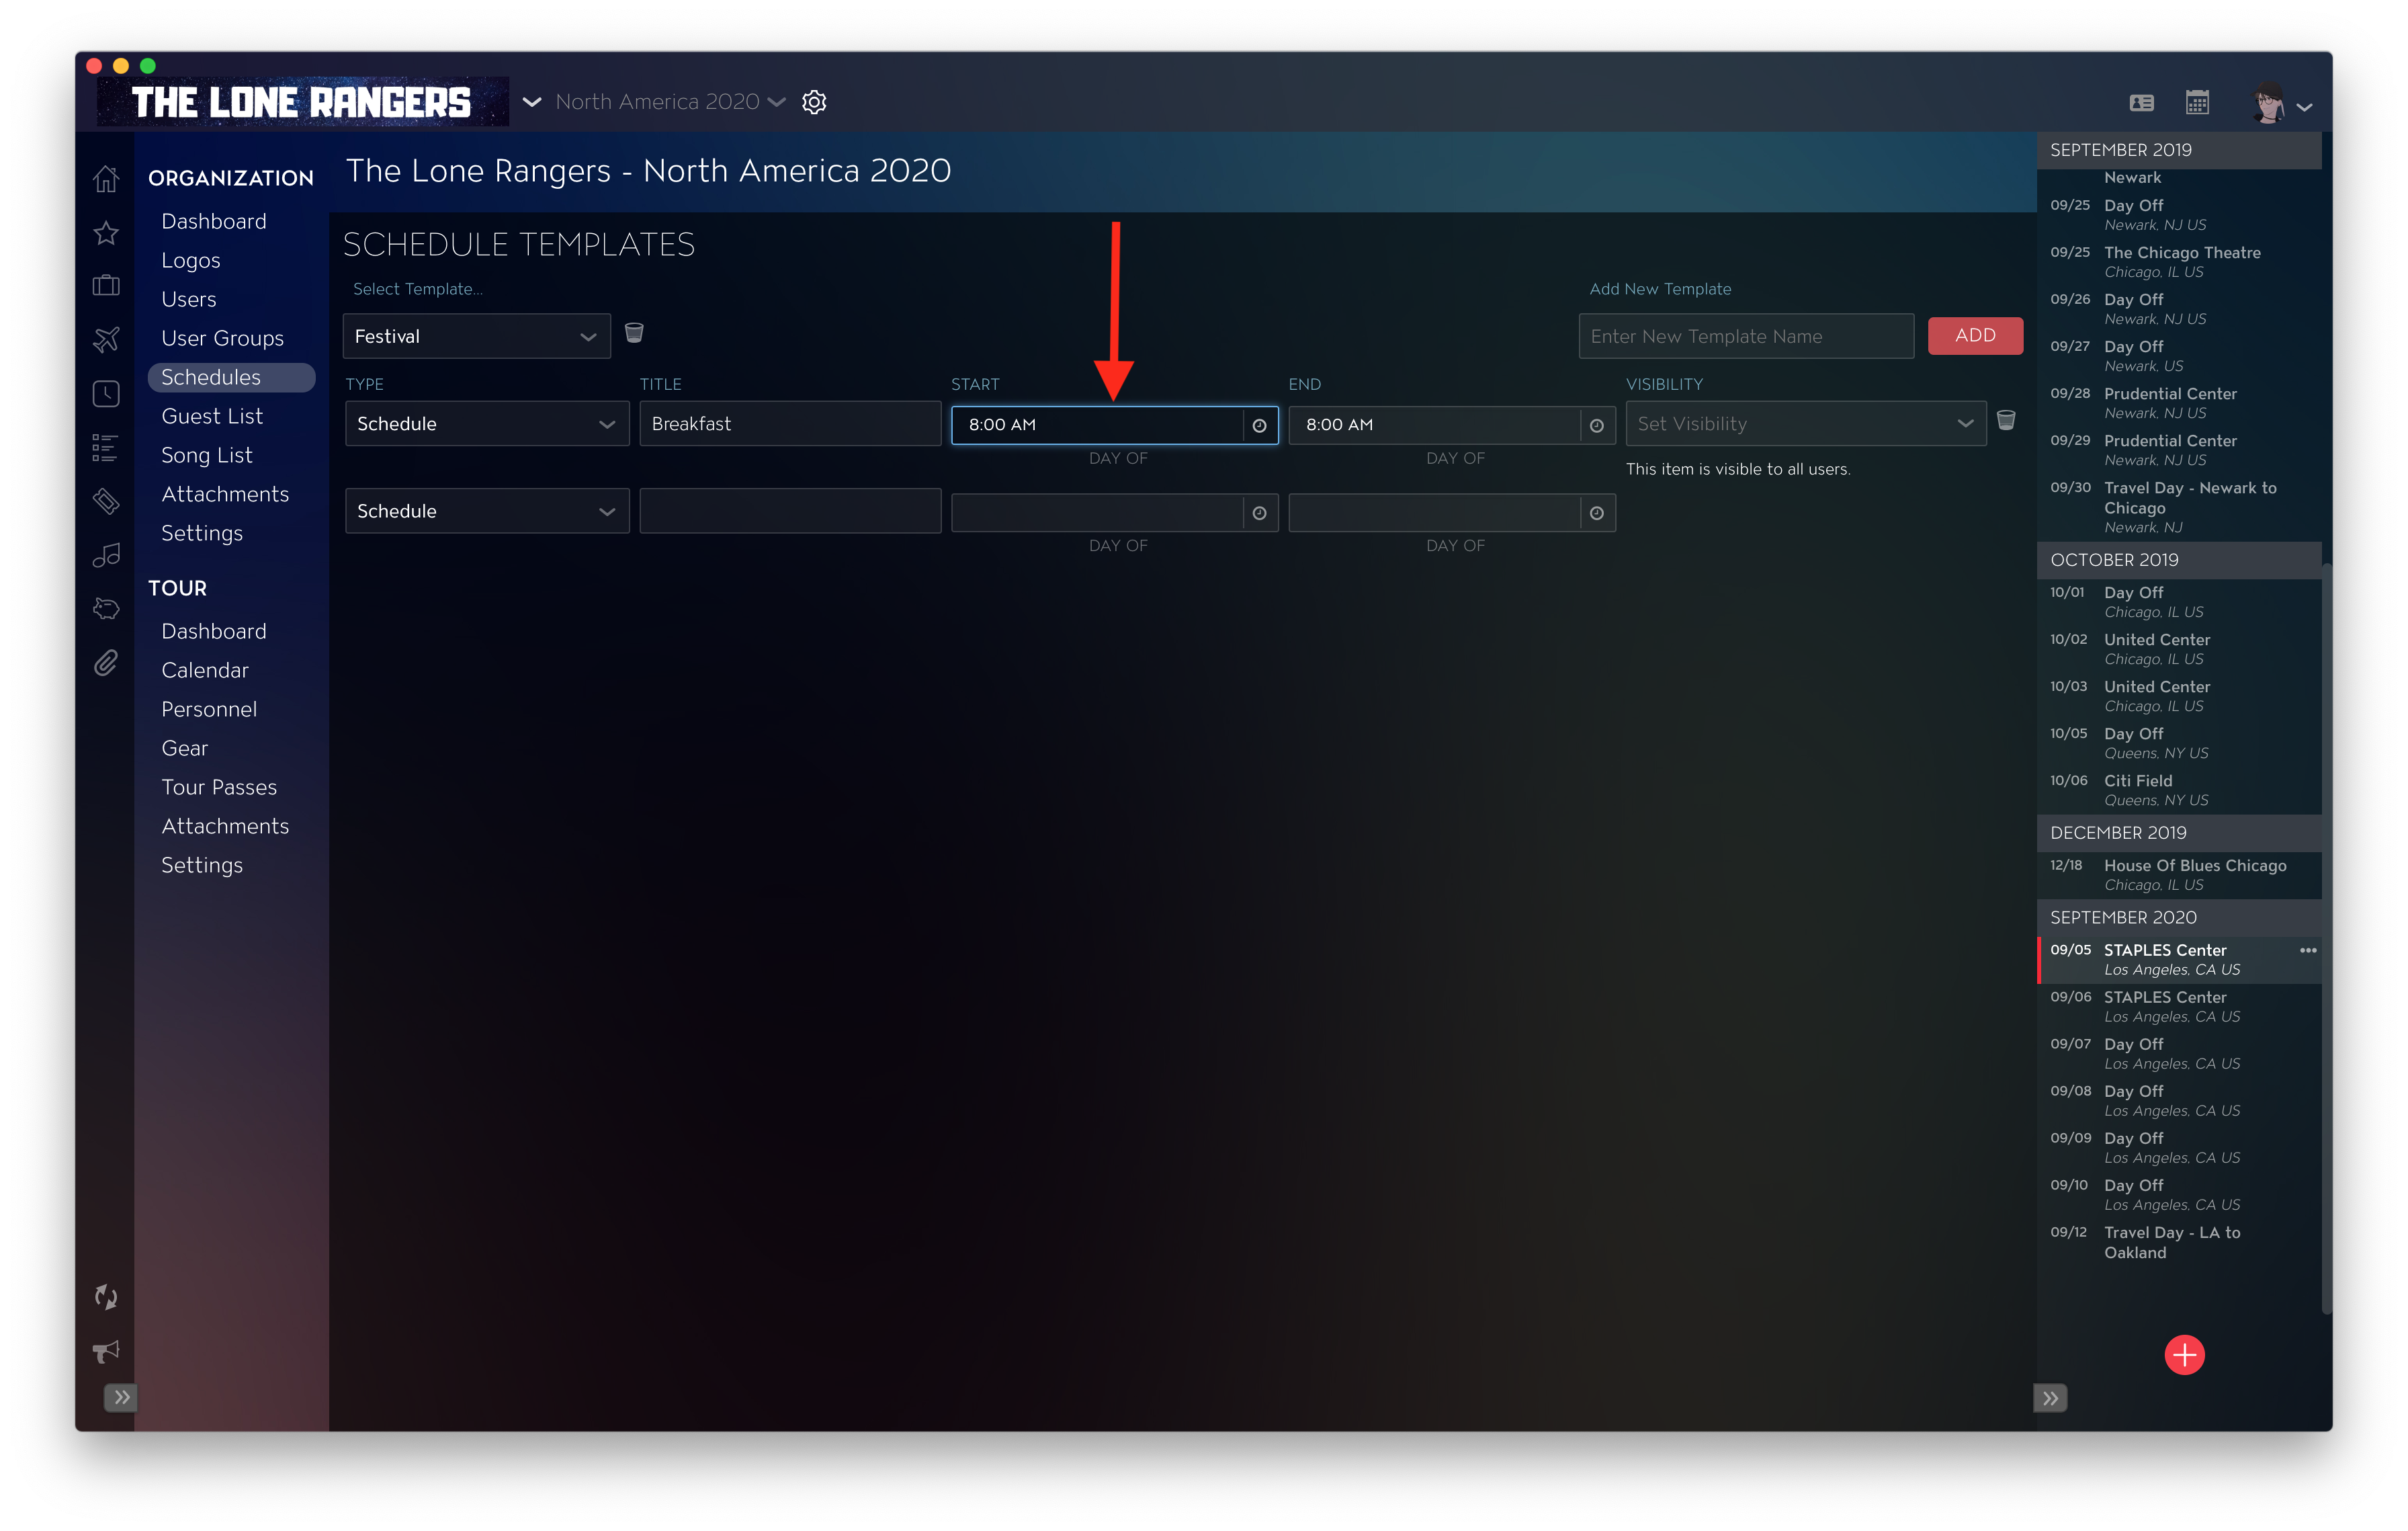
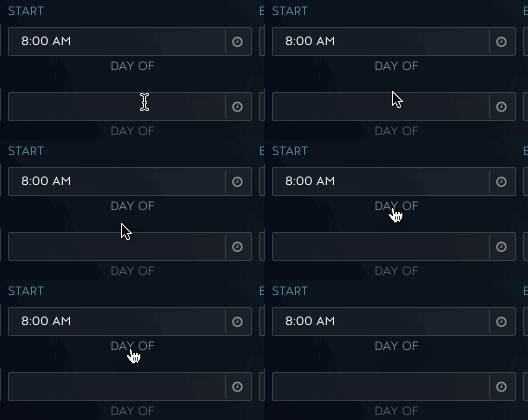
To adjust the start and end times of your new Schedule Item, click on the clock icon located within the Start and End boxes to open the dropdown selection, from here you can select your desired times. You can also type your times in by clicking on the text box space and entering your values.
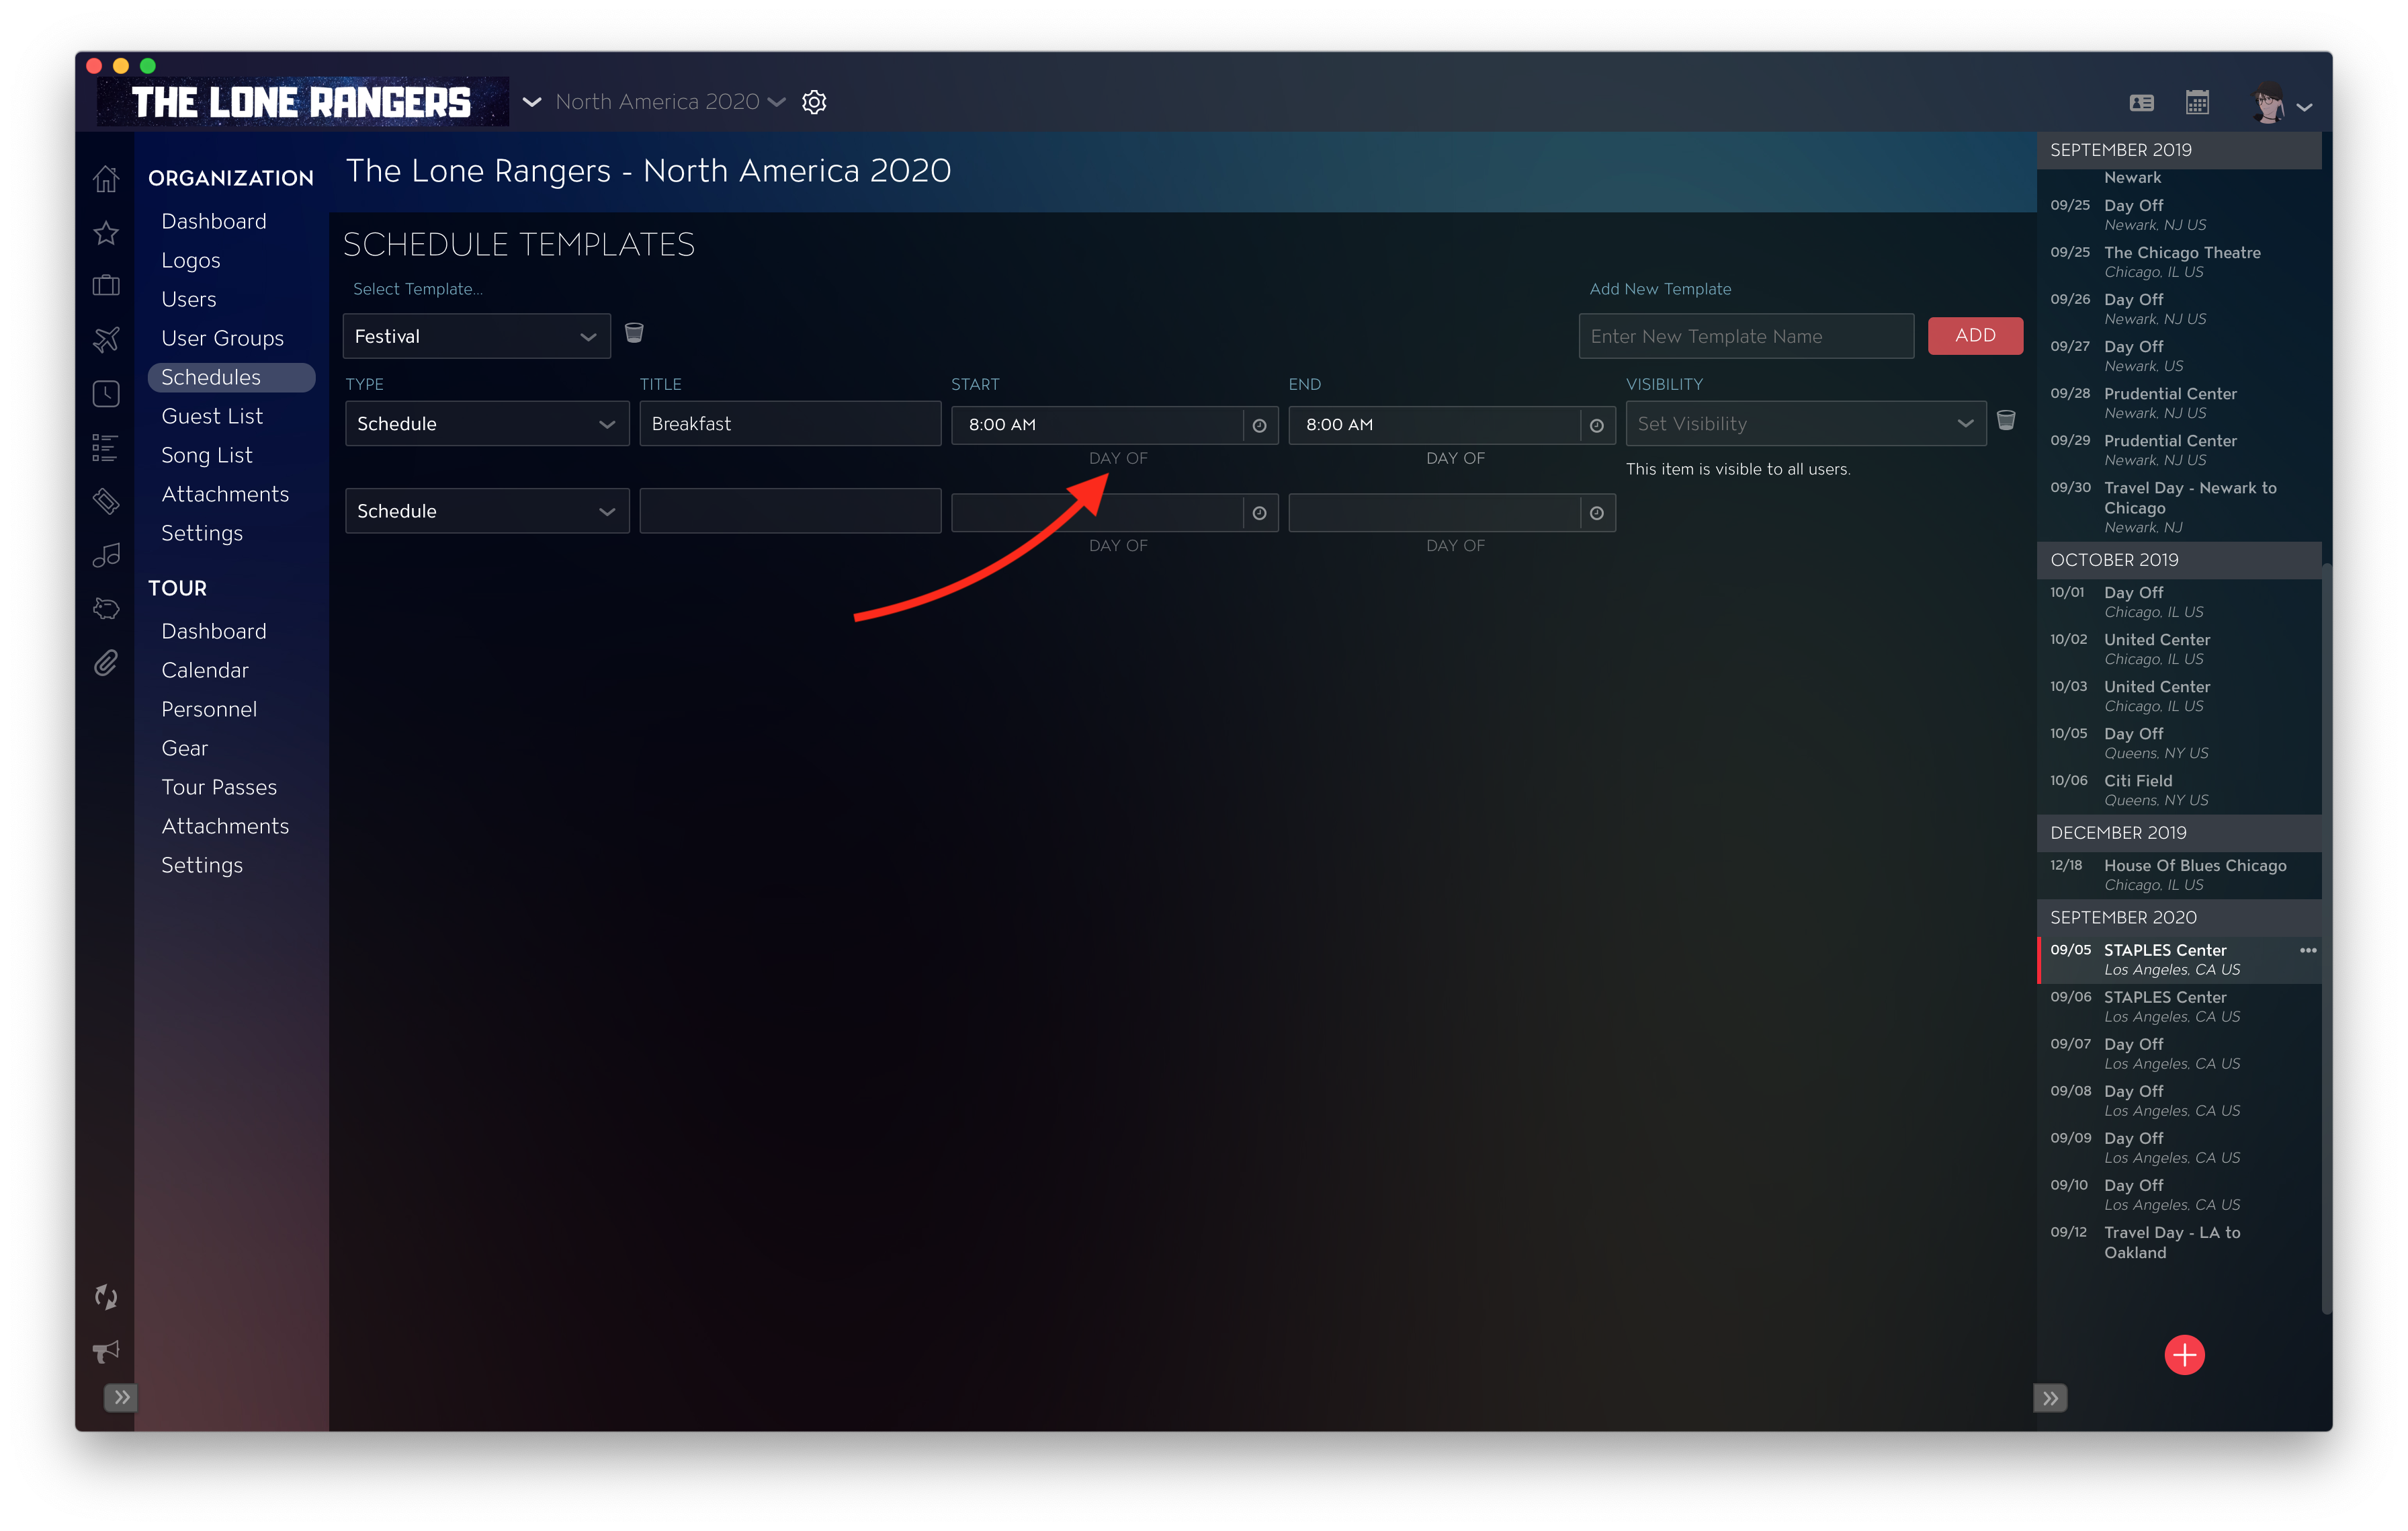
To set your "Day Of" or "Day After" options, click on your desired choice under your times.
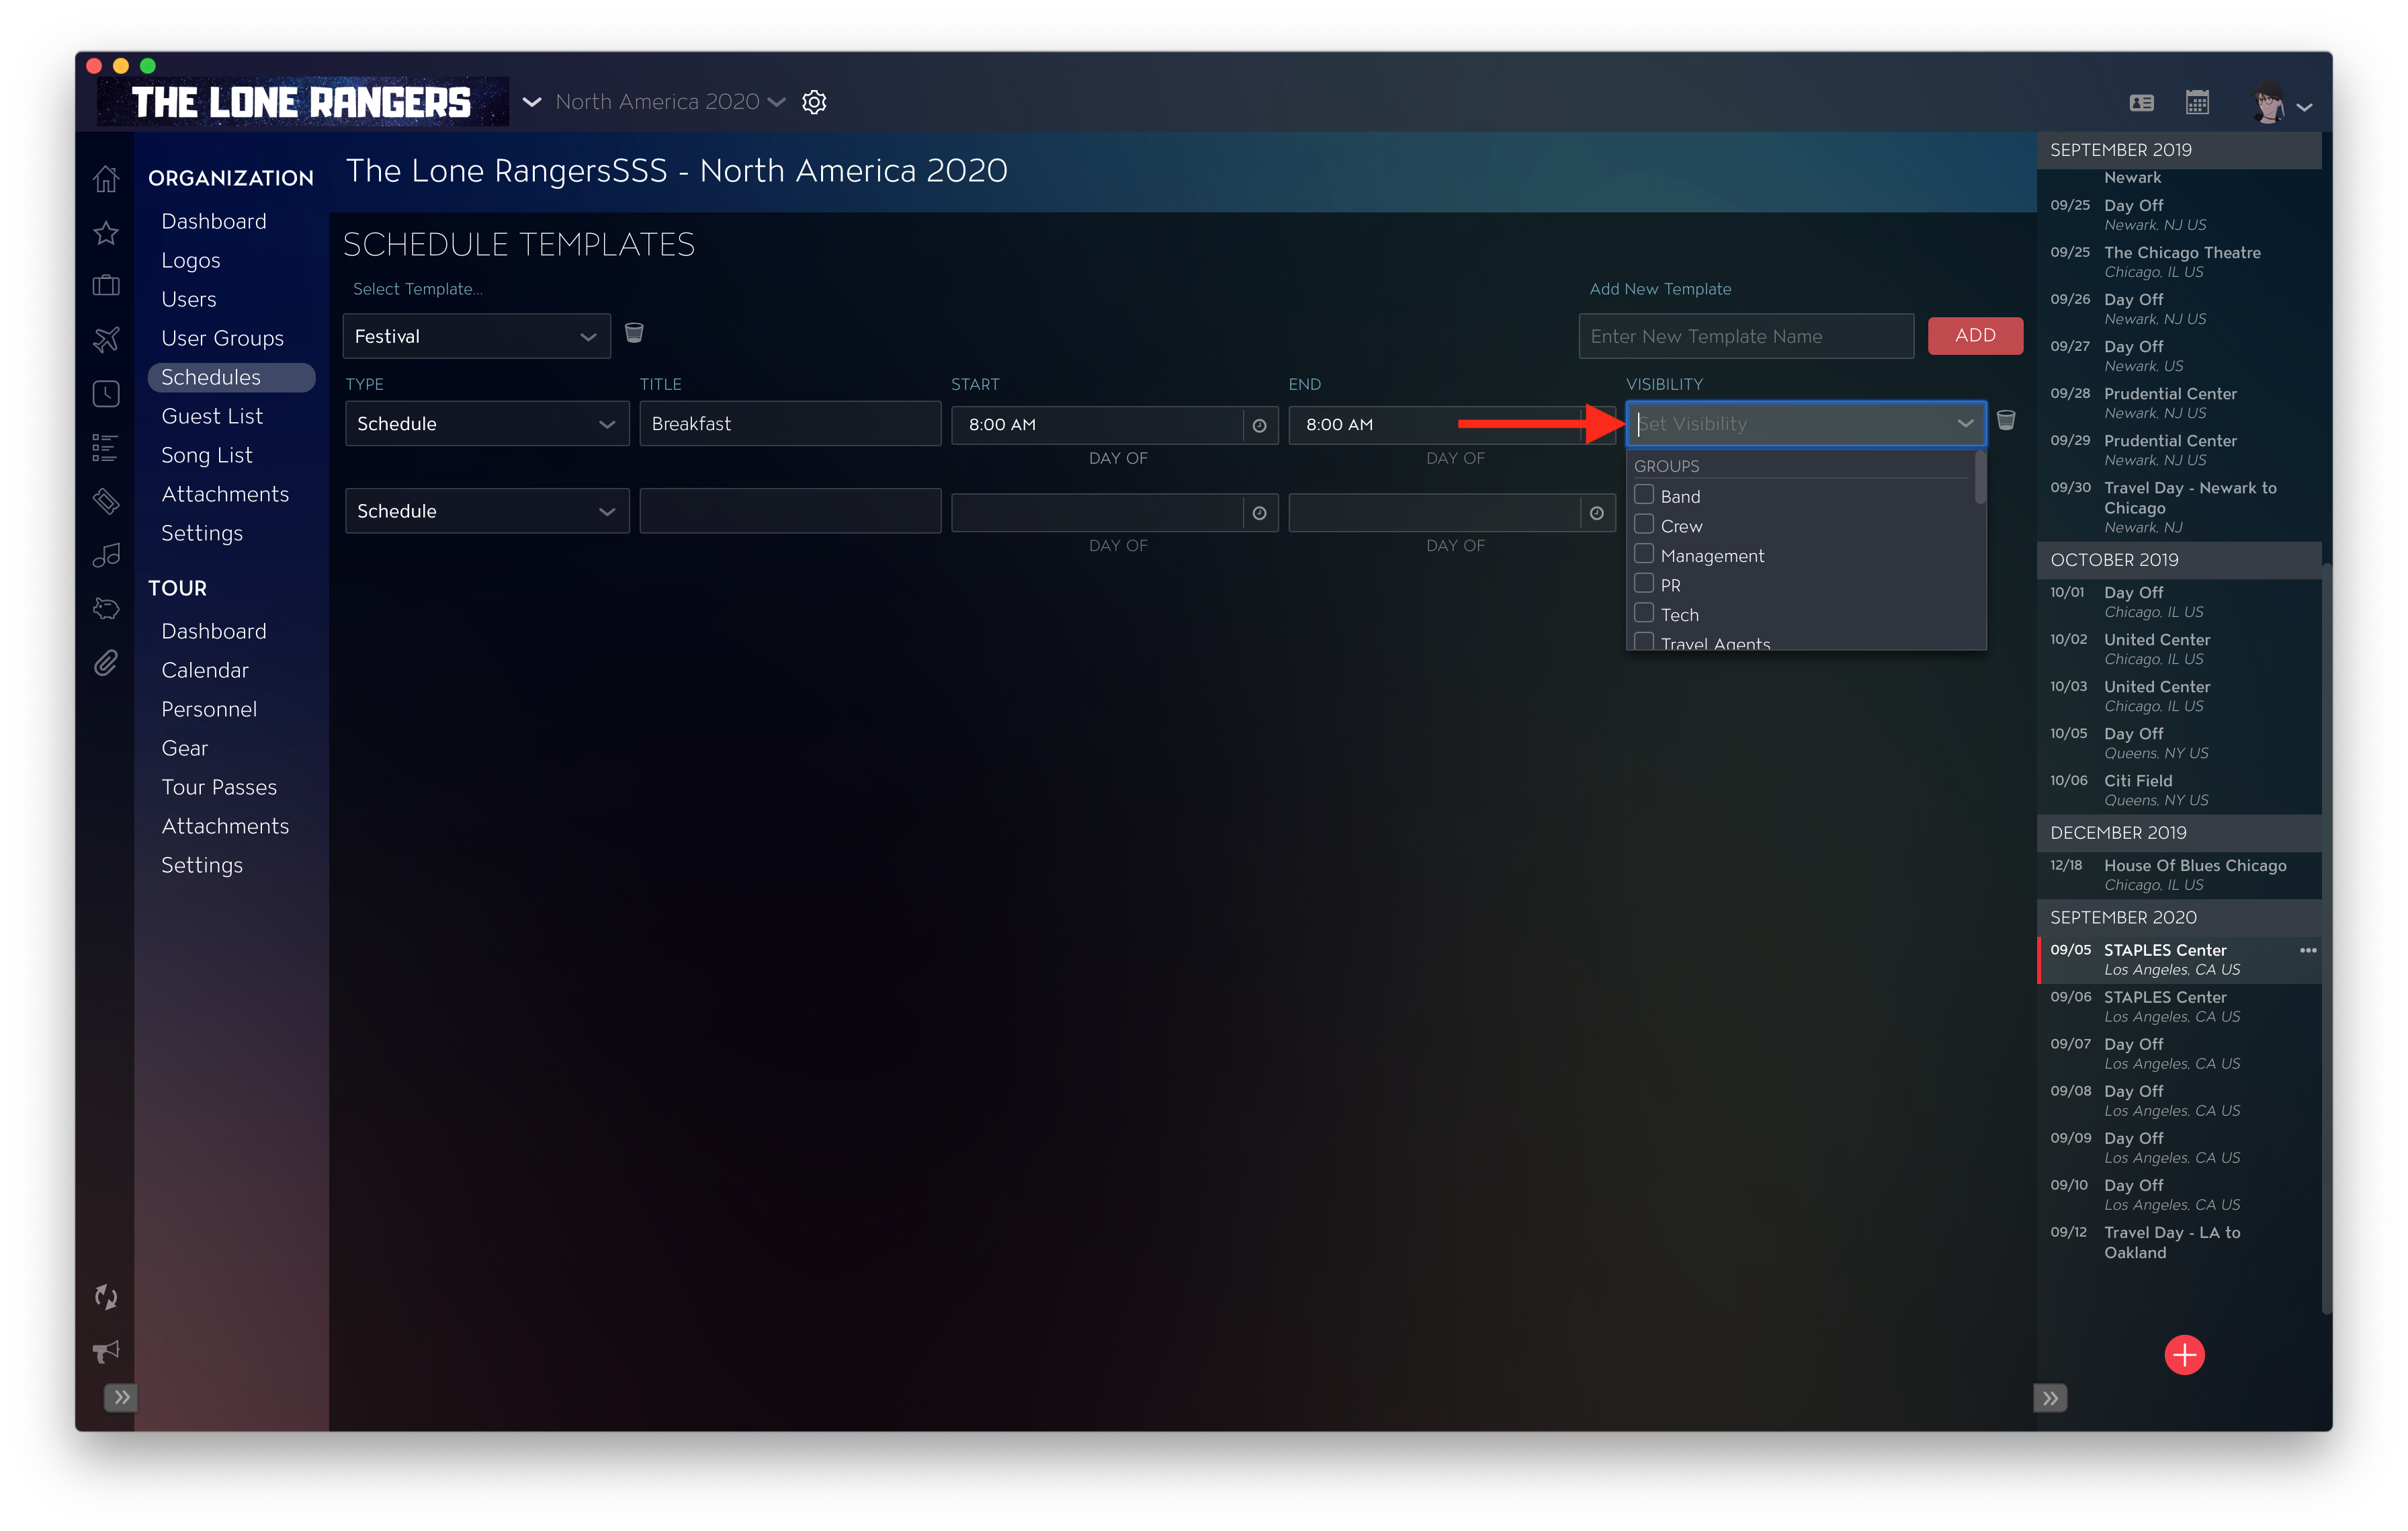
Set Visibility
Once you have created your schedule items, you can enable visibility for them by clicking on the visibility dropdown and selecting the user(s) or user group(s) you'd like to apply to it.
Apply a Schedule Template to an Existing Date
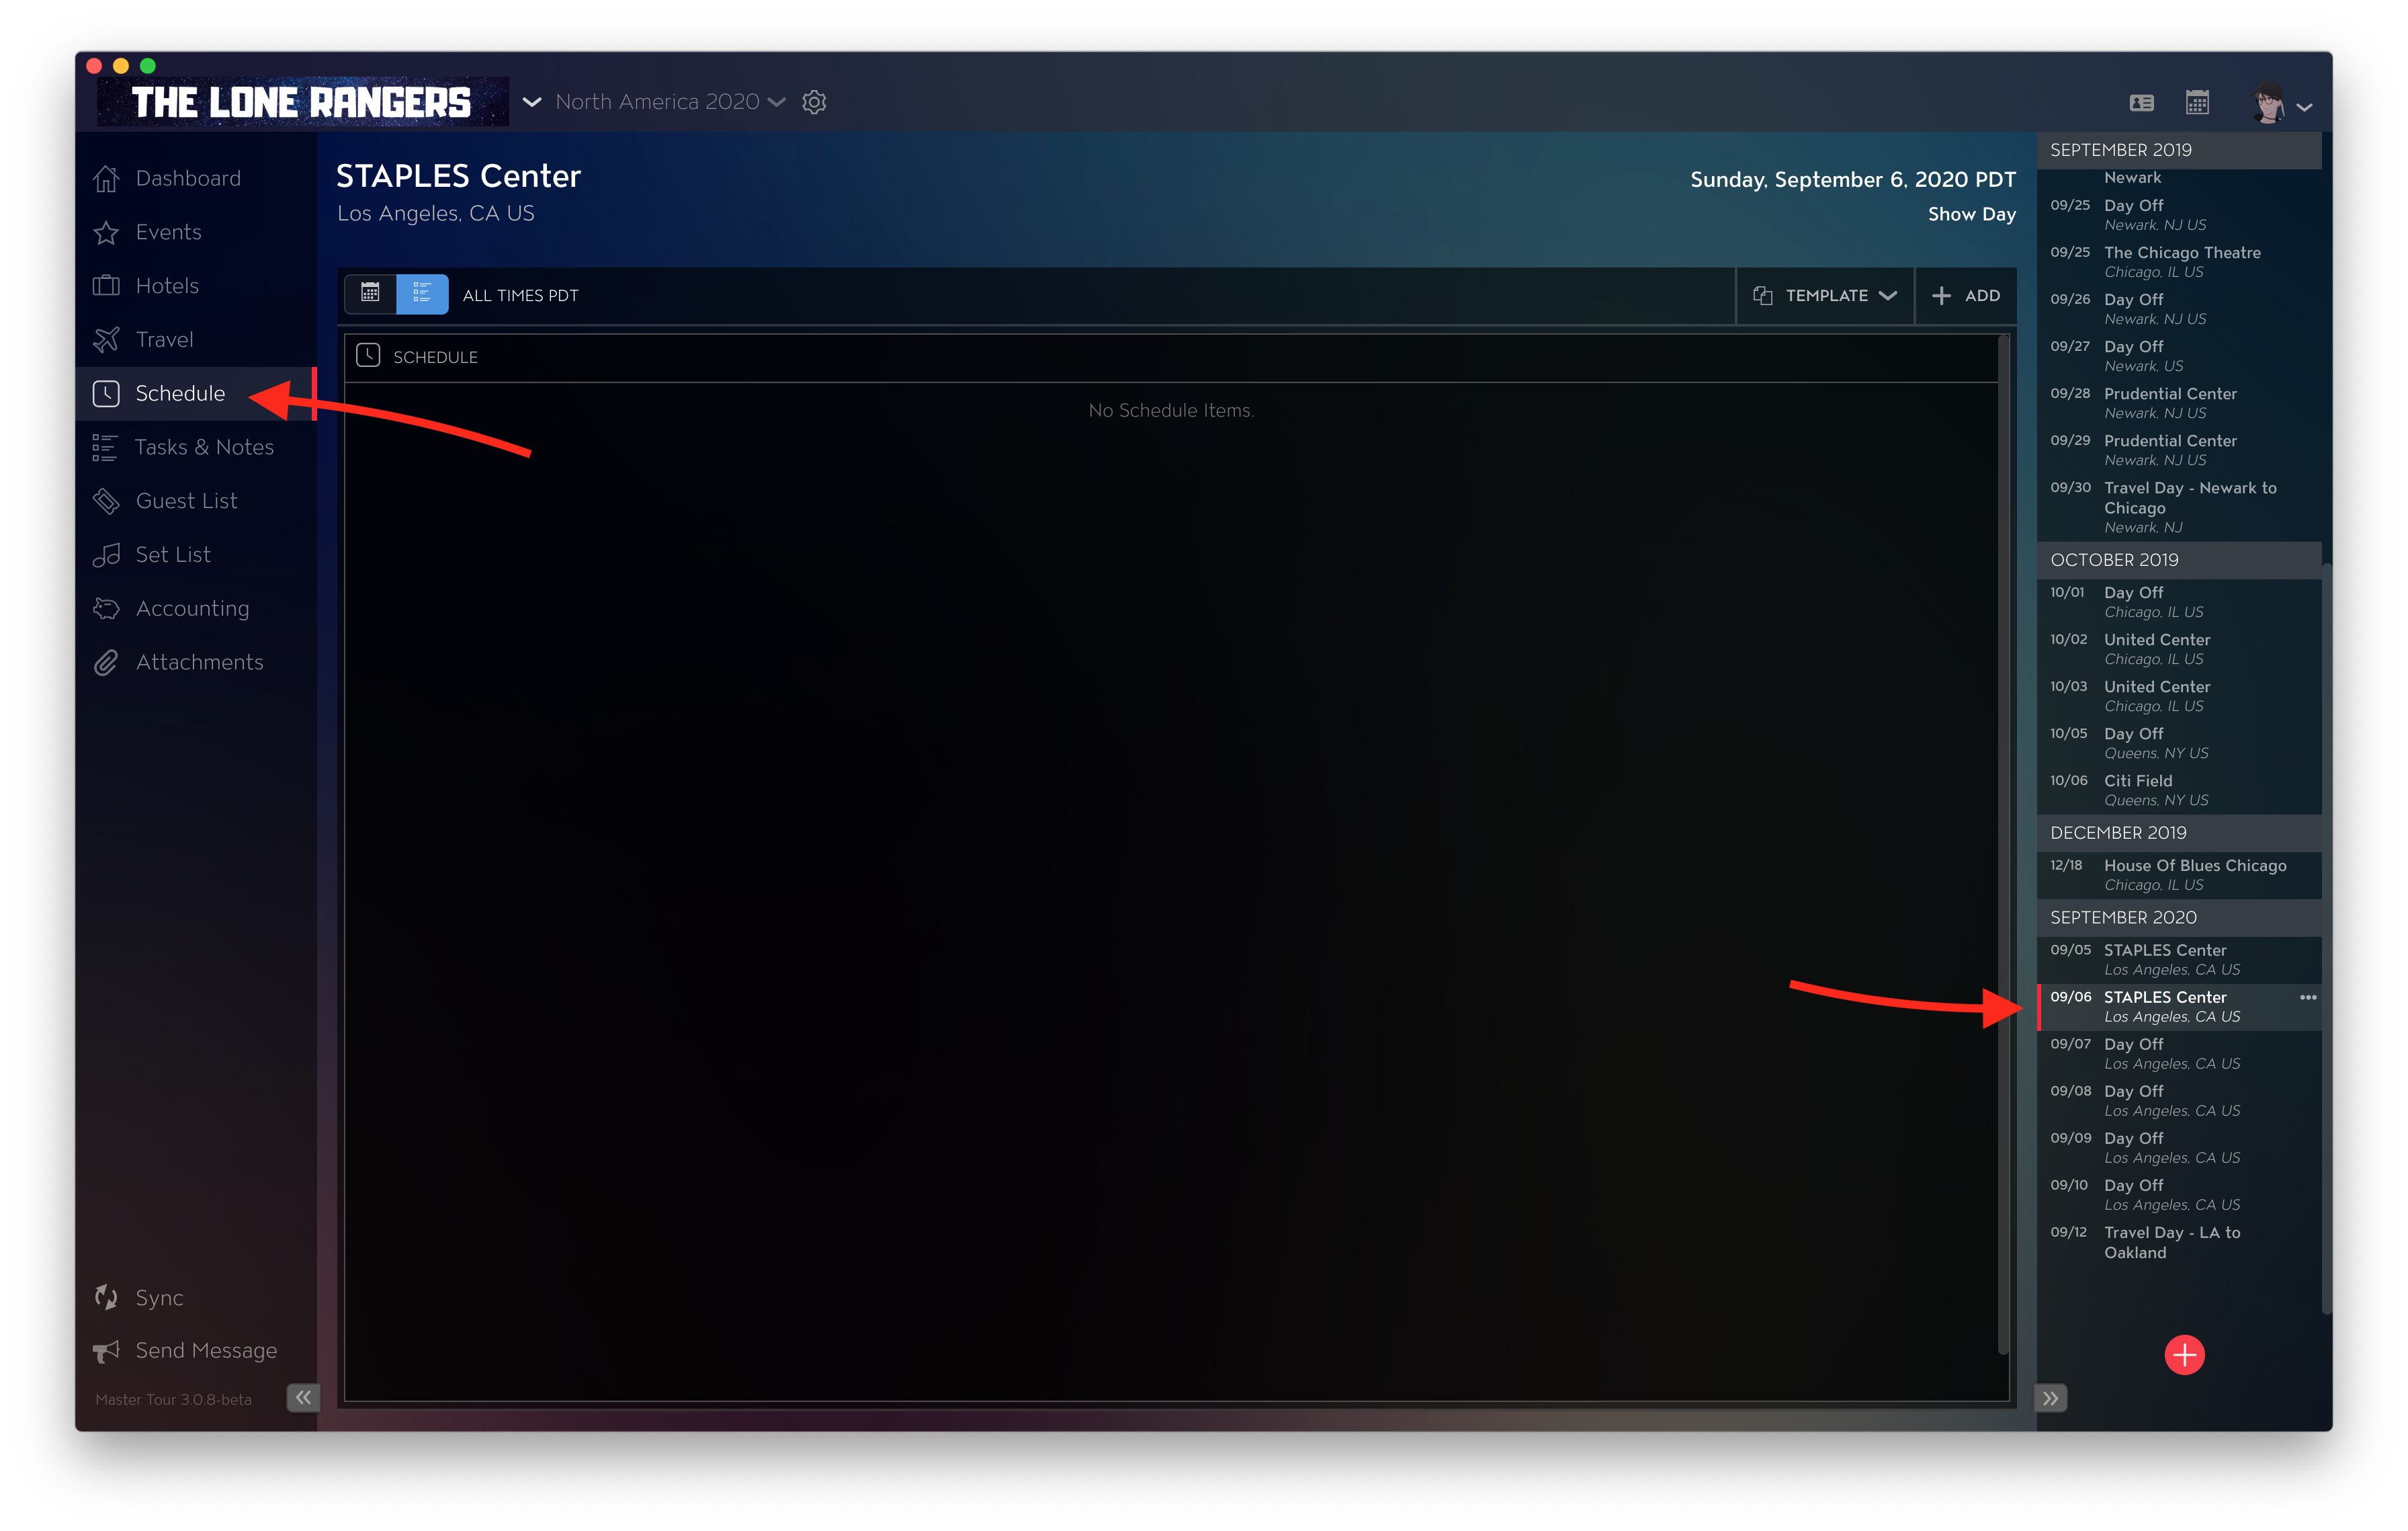
To apply a Schedule Template to an already created date, click on the desired date on the right-hand side, followed by clicking on Schedule on the left-hand side.
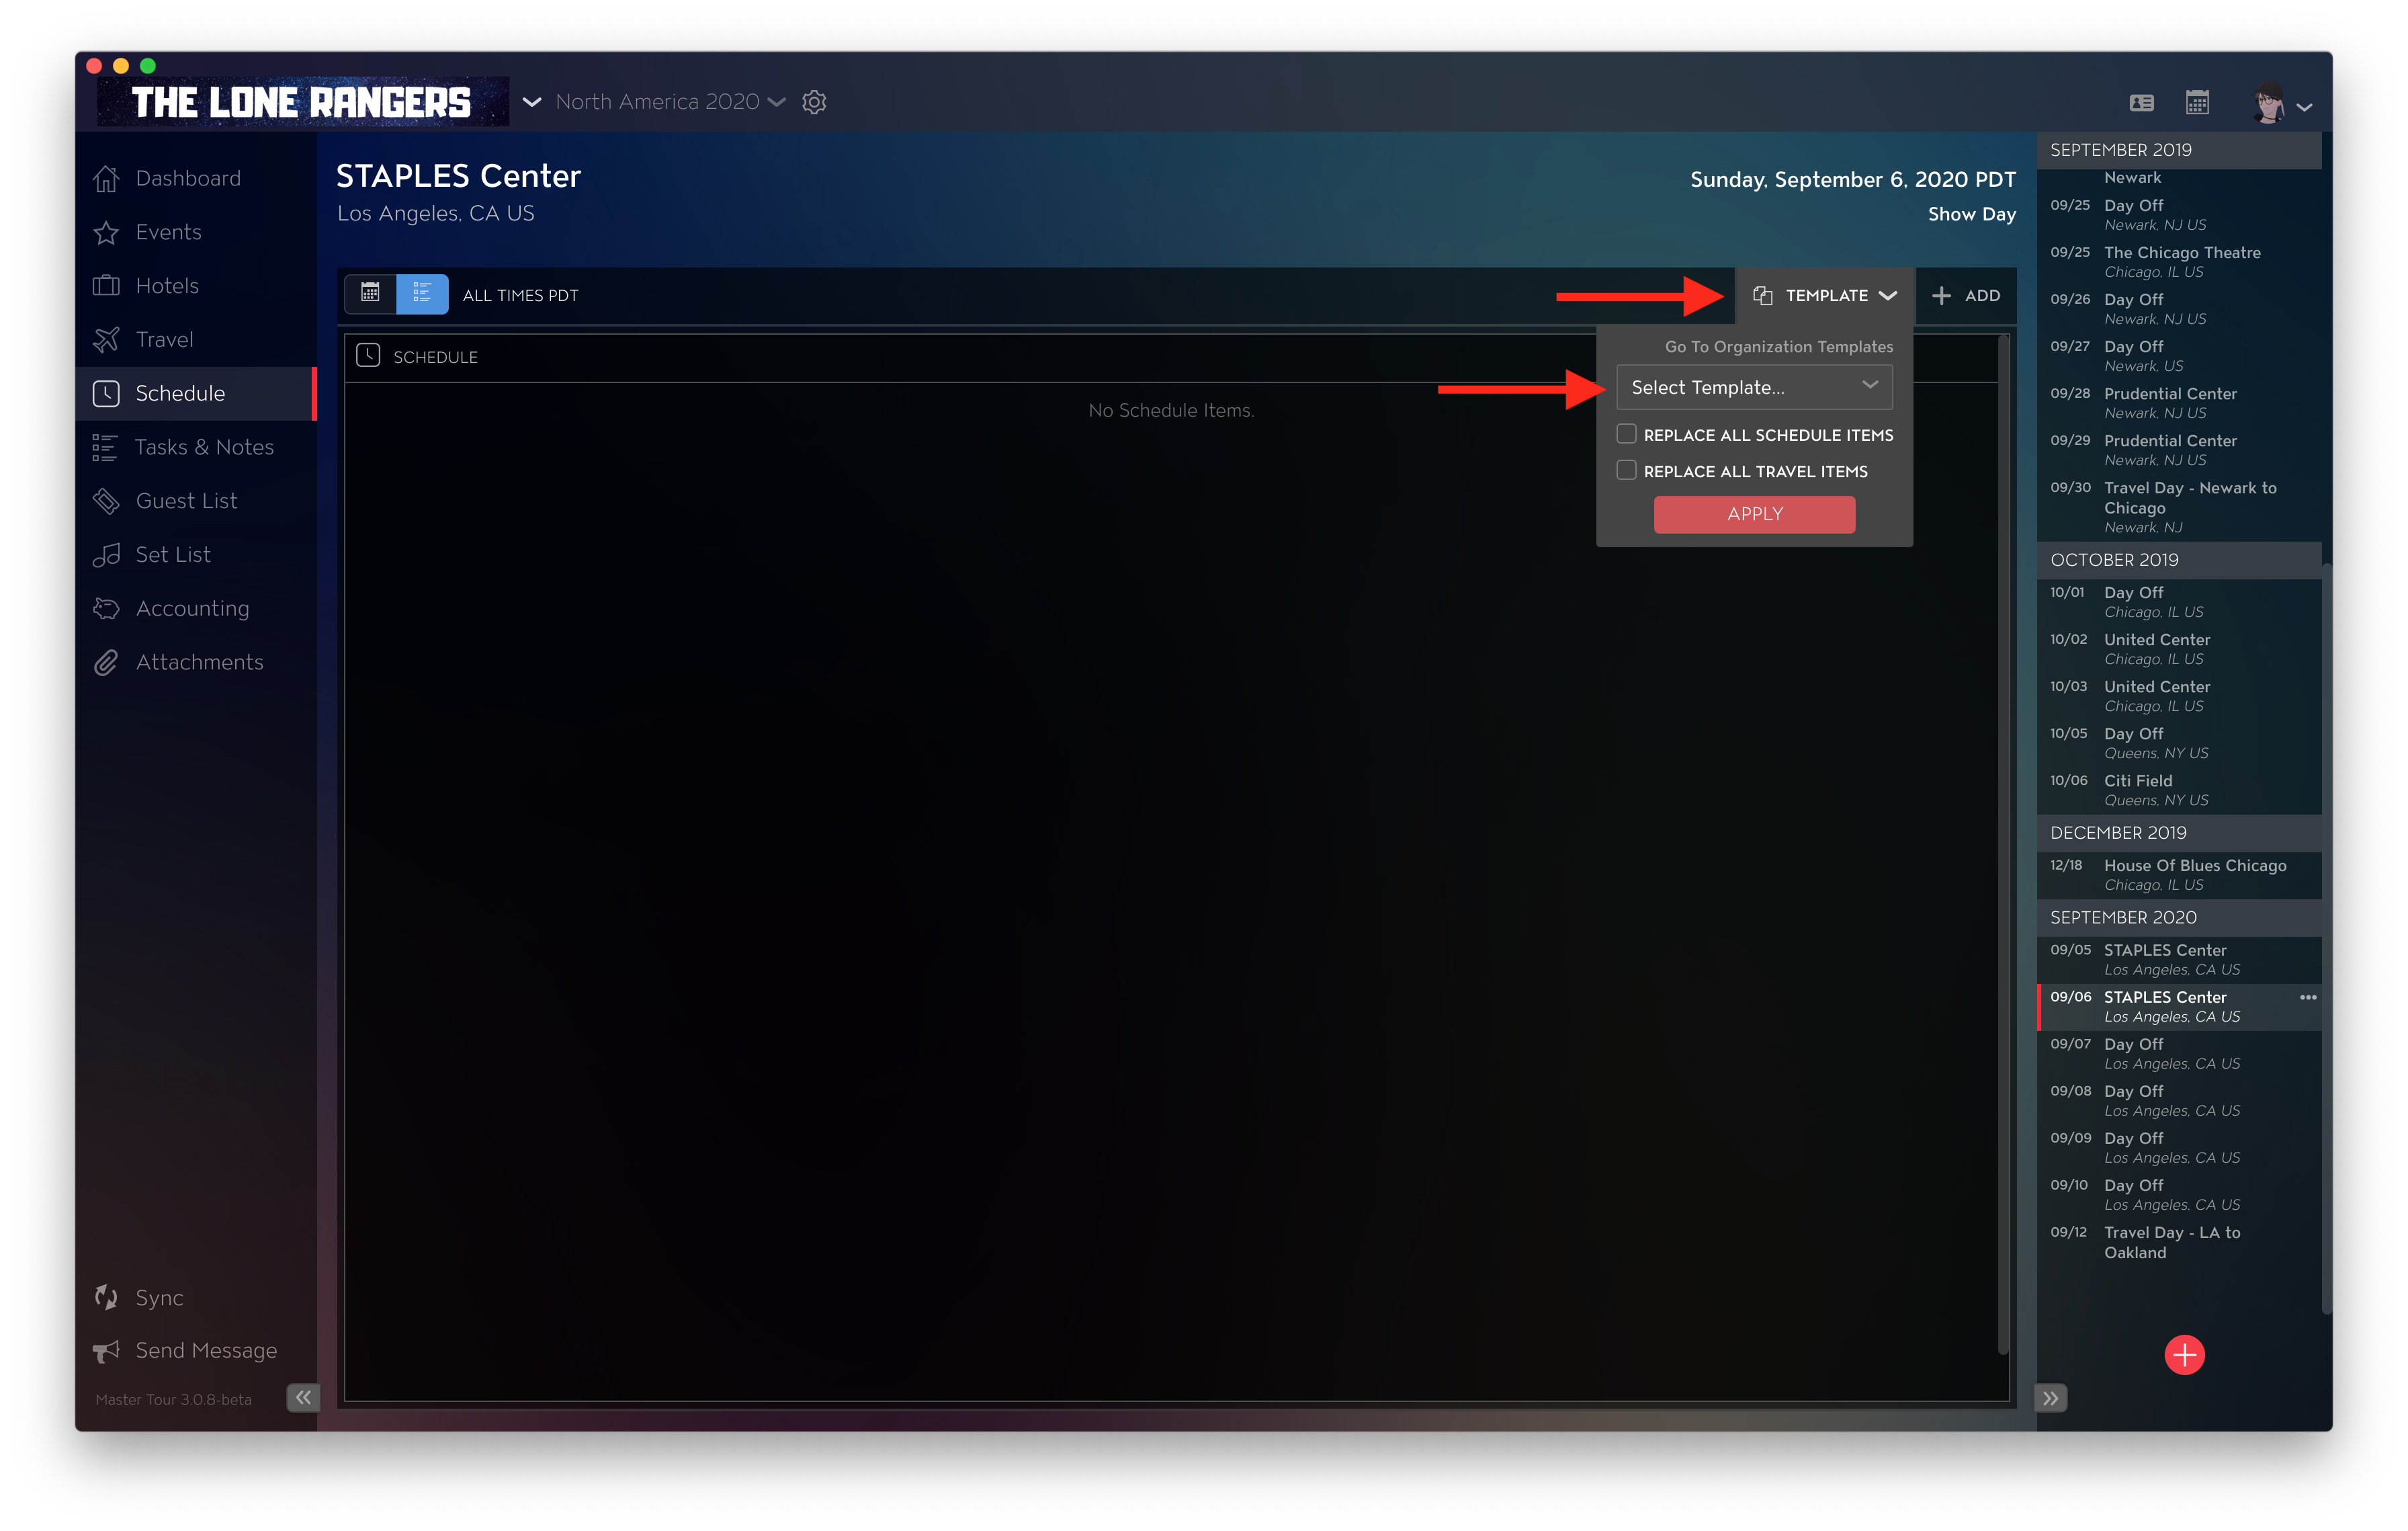
From here, click on Template at the top right then on Select Template and choose your desired Template.
Apply a Schedule Template on Top of an Existing Schedule
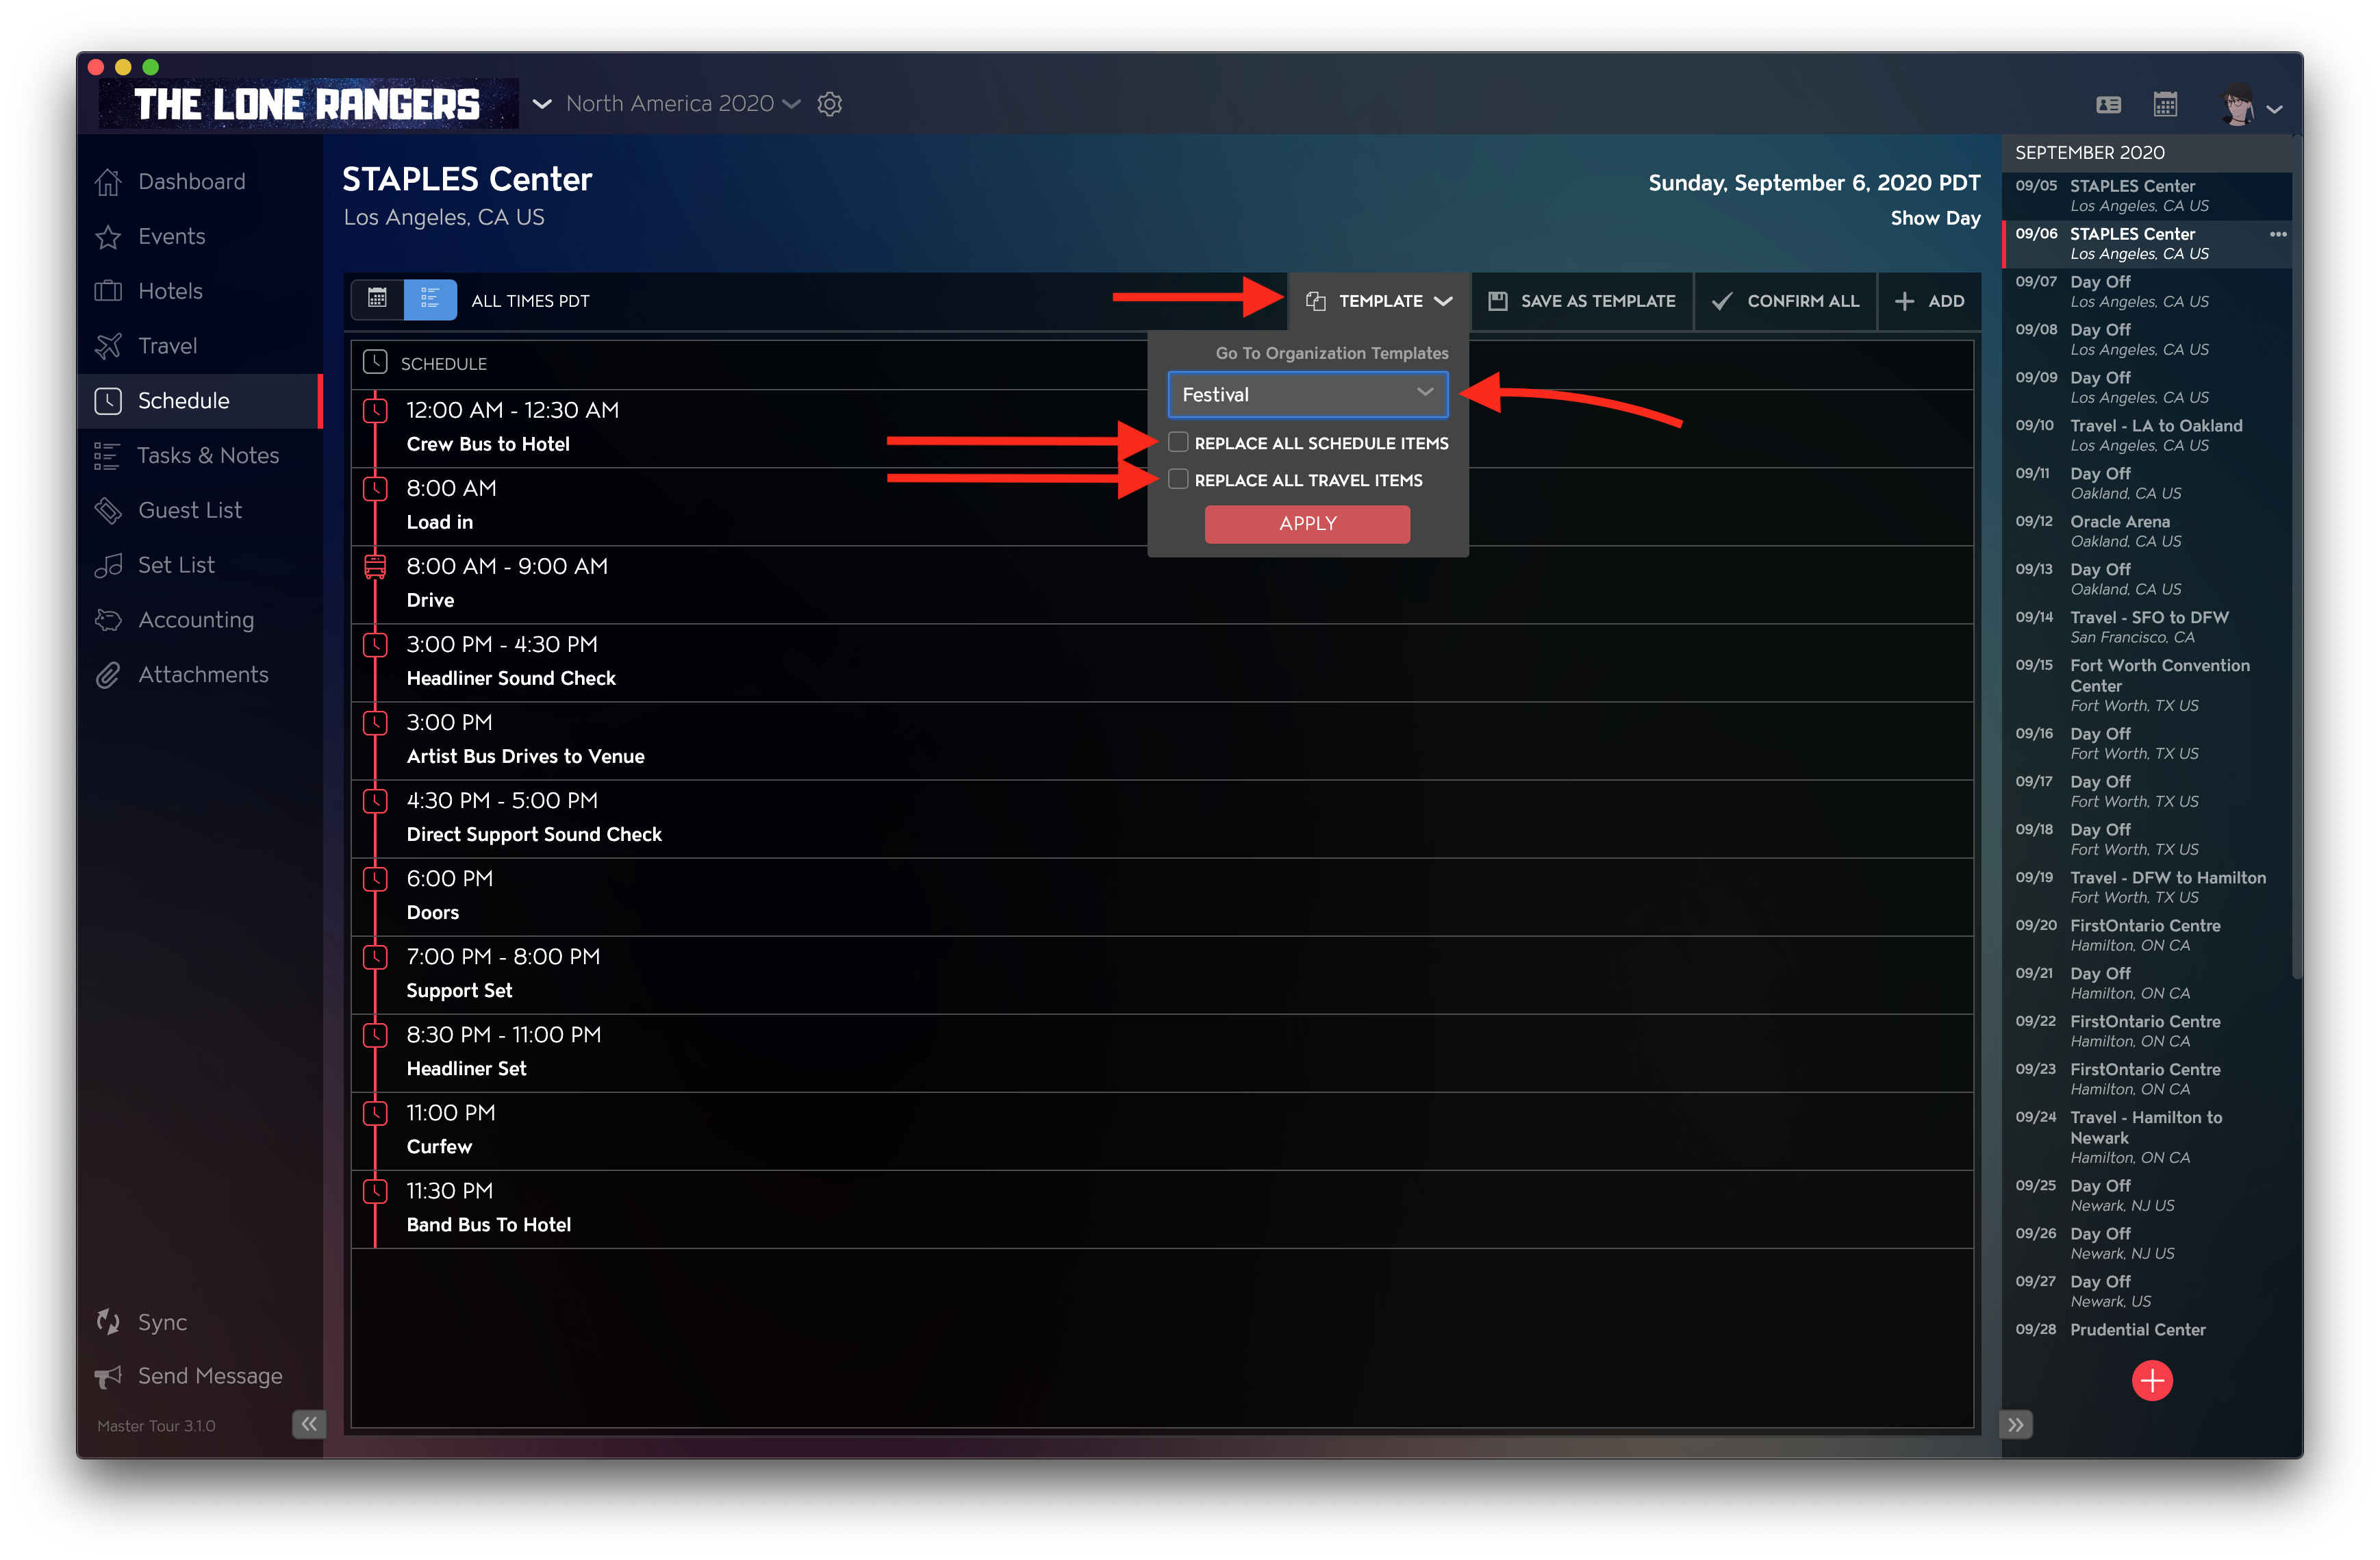
To apply a Schedule Template on top of an existing date's Schedule, click on Template at the top right, then on Select Template at the top right to load your Schedule Template alongside your currently placed schedule items. Once done, click on Apply.
Replace Existing Schedule/Travel Items
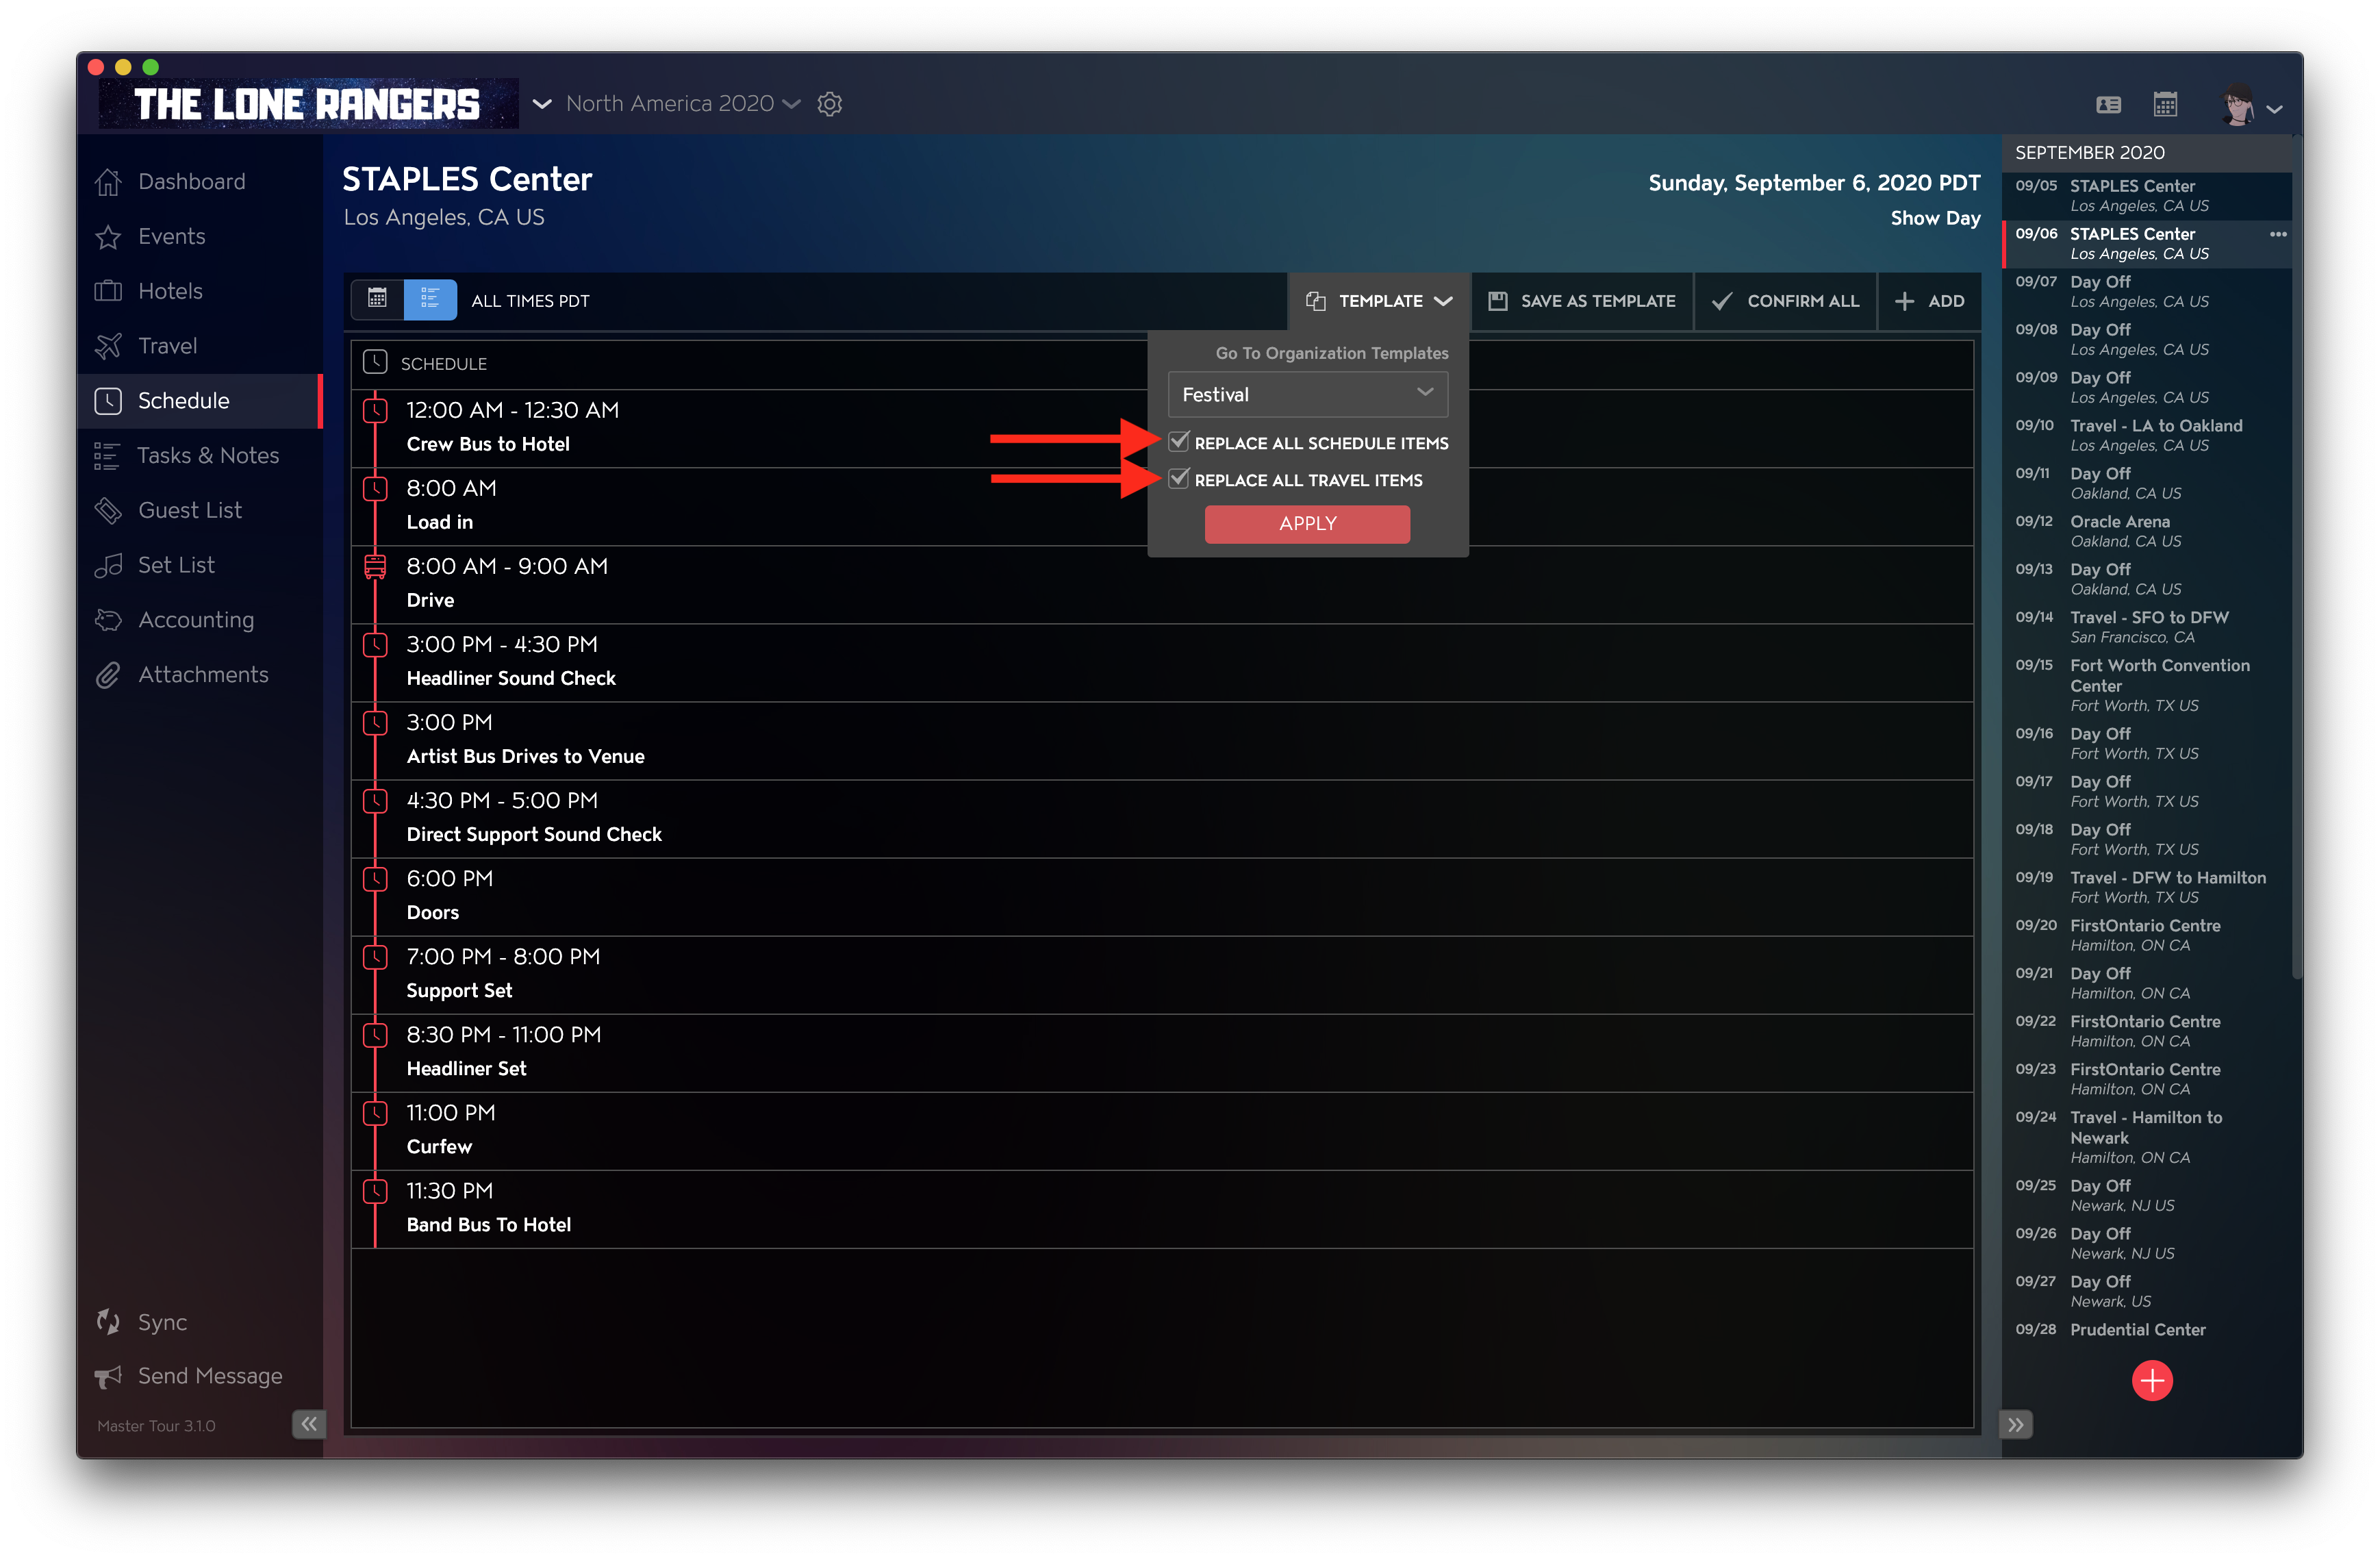
To replace Schedule Items, click on Template at the top right, then select your Template by clicking on Select Template once selected, check-in your desired options for replacing either Schedule or travel items, then click on Apply.
Apply A Schedule Template To A New Day
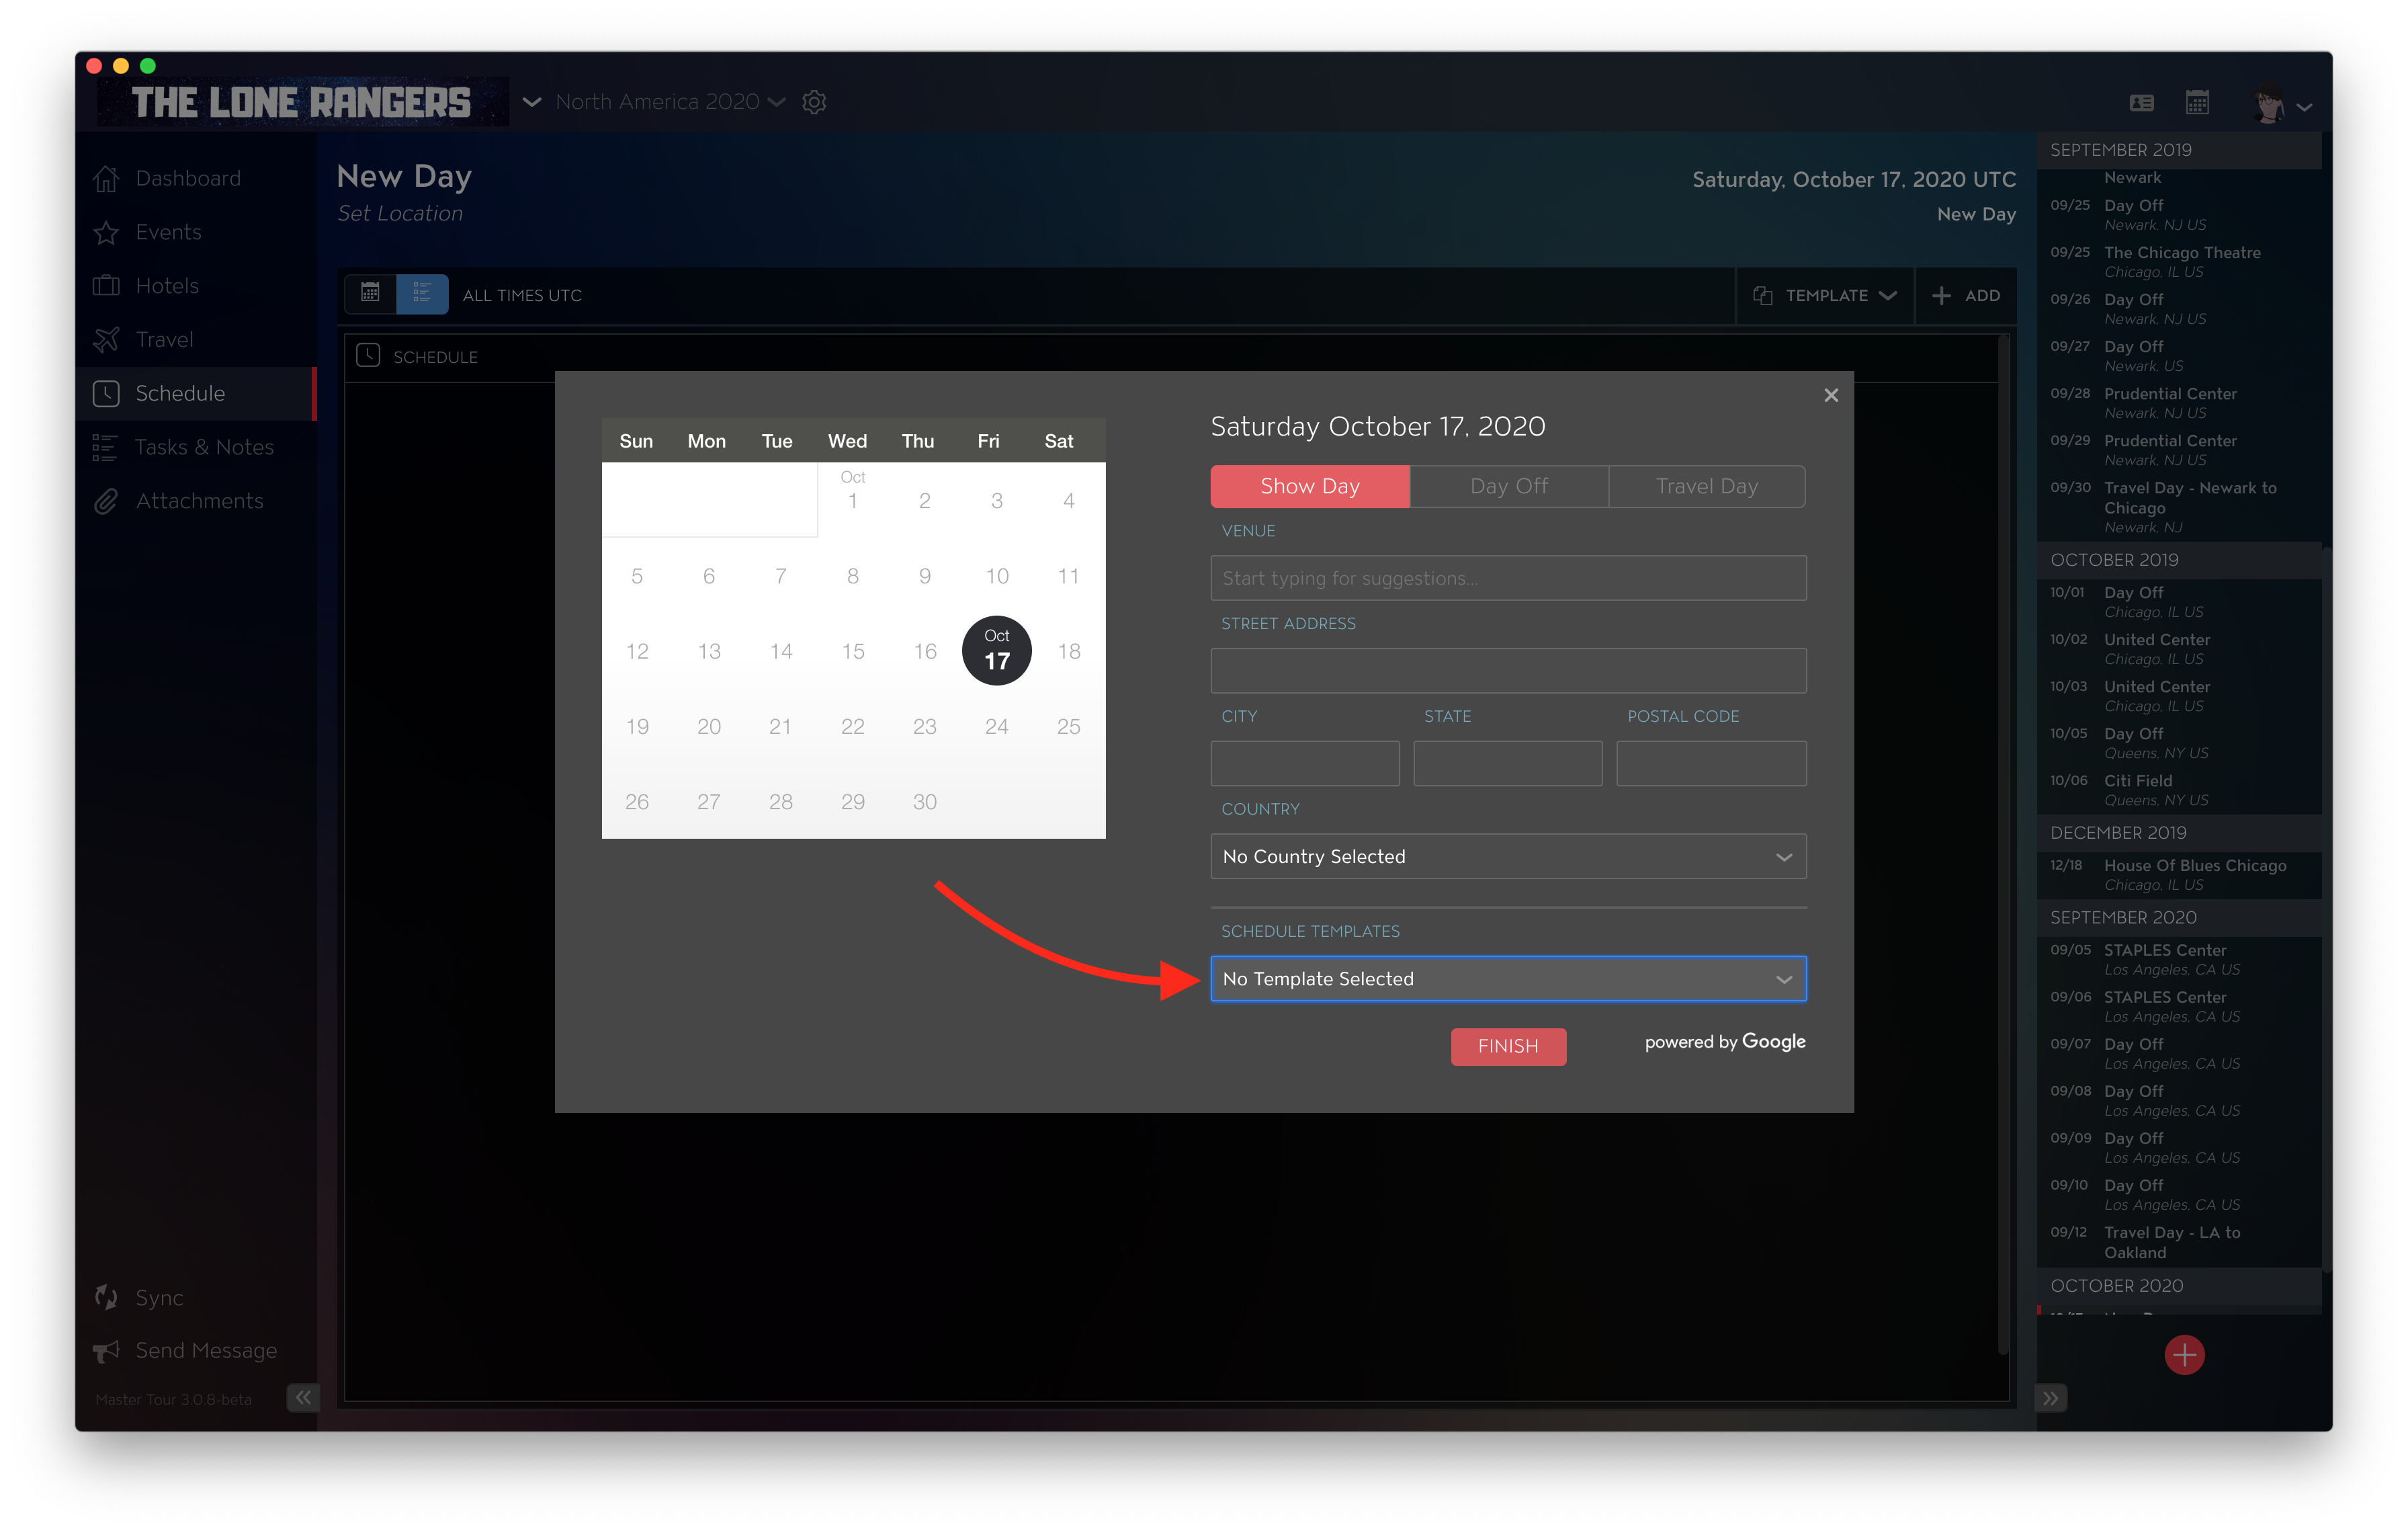
When adding new dates, you have the option to apply any of your Schedule Templates by clicking on the dropdown under Schedule Templates and selecting your desired Template.
Delete Schedule Templates
To delete Schedule Templates, click on the Gear icon at the top left then on Schedules on the left-hand side.
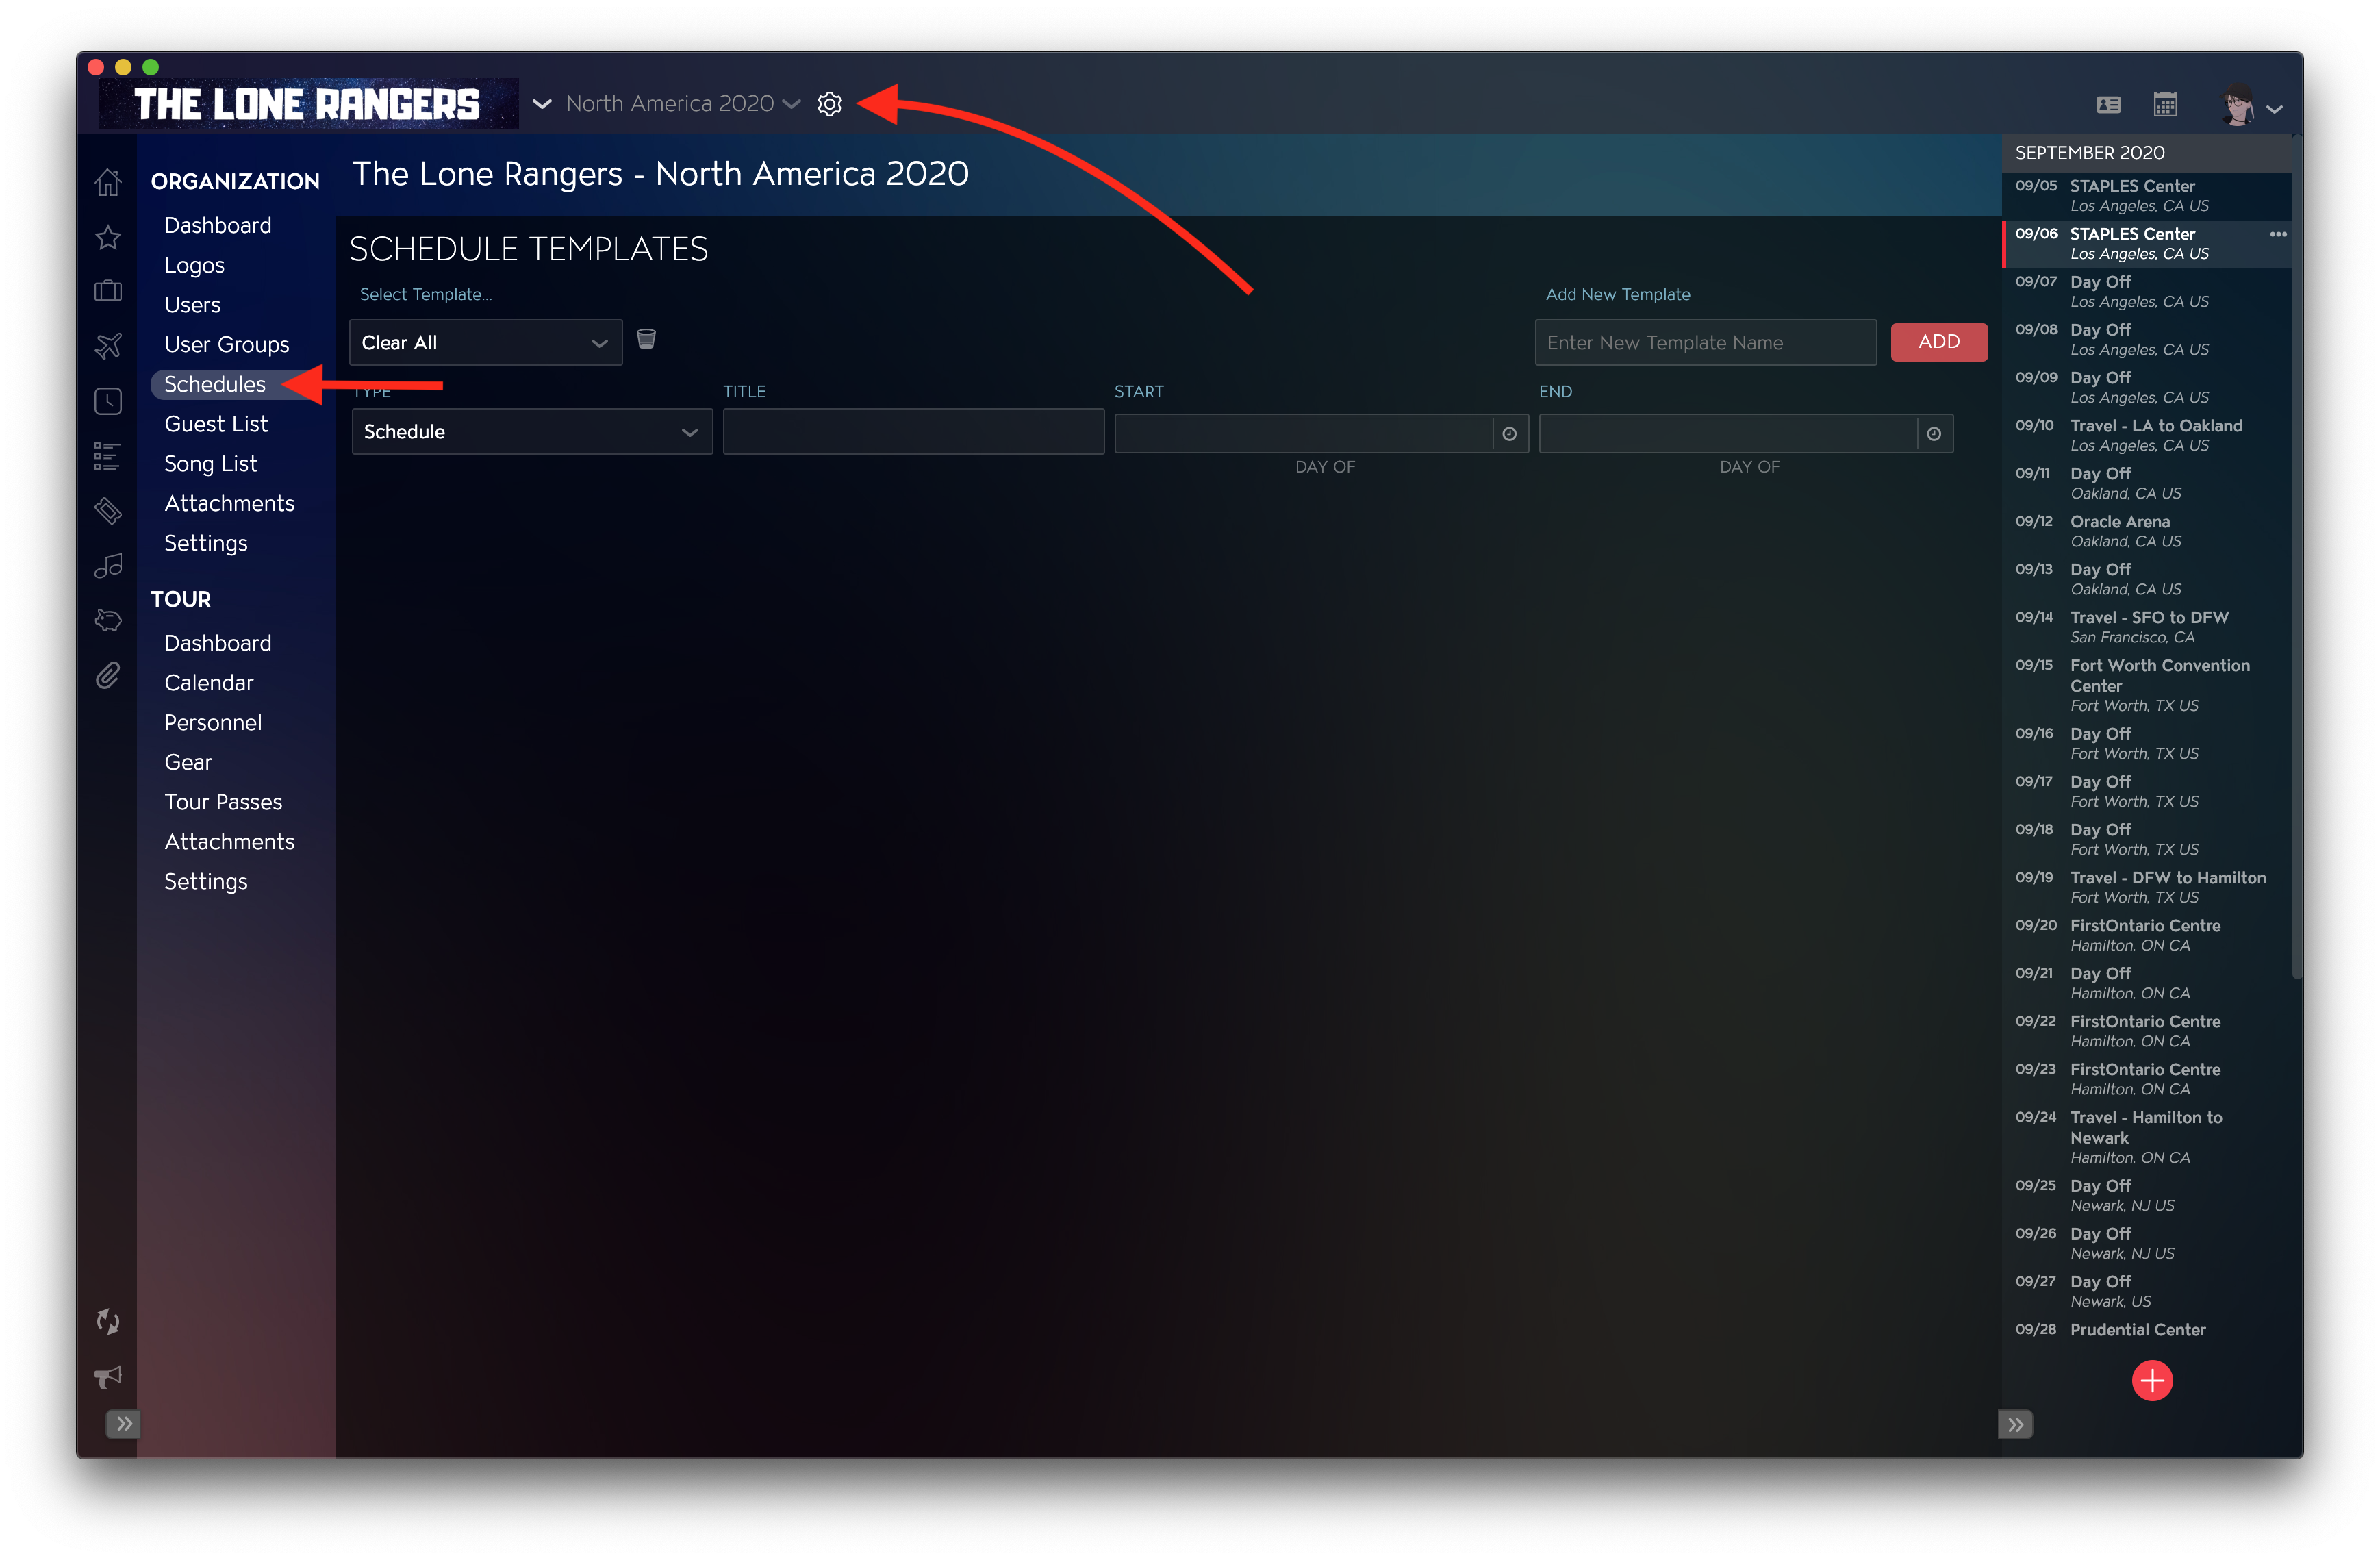
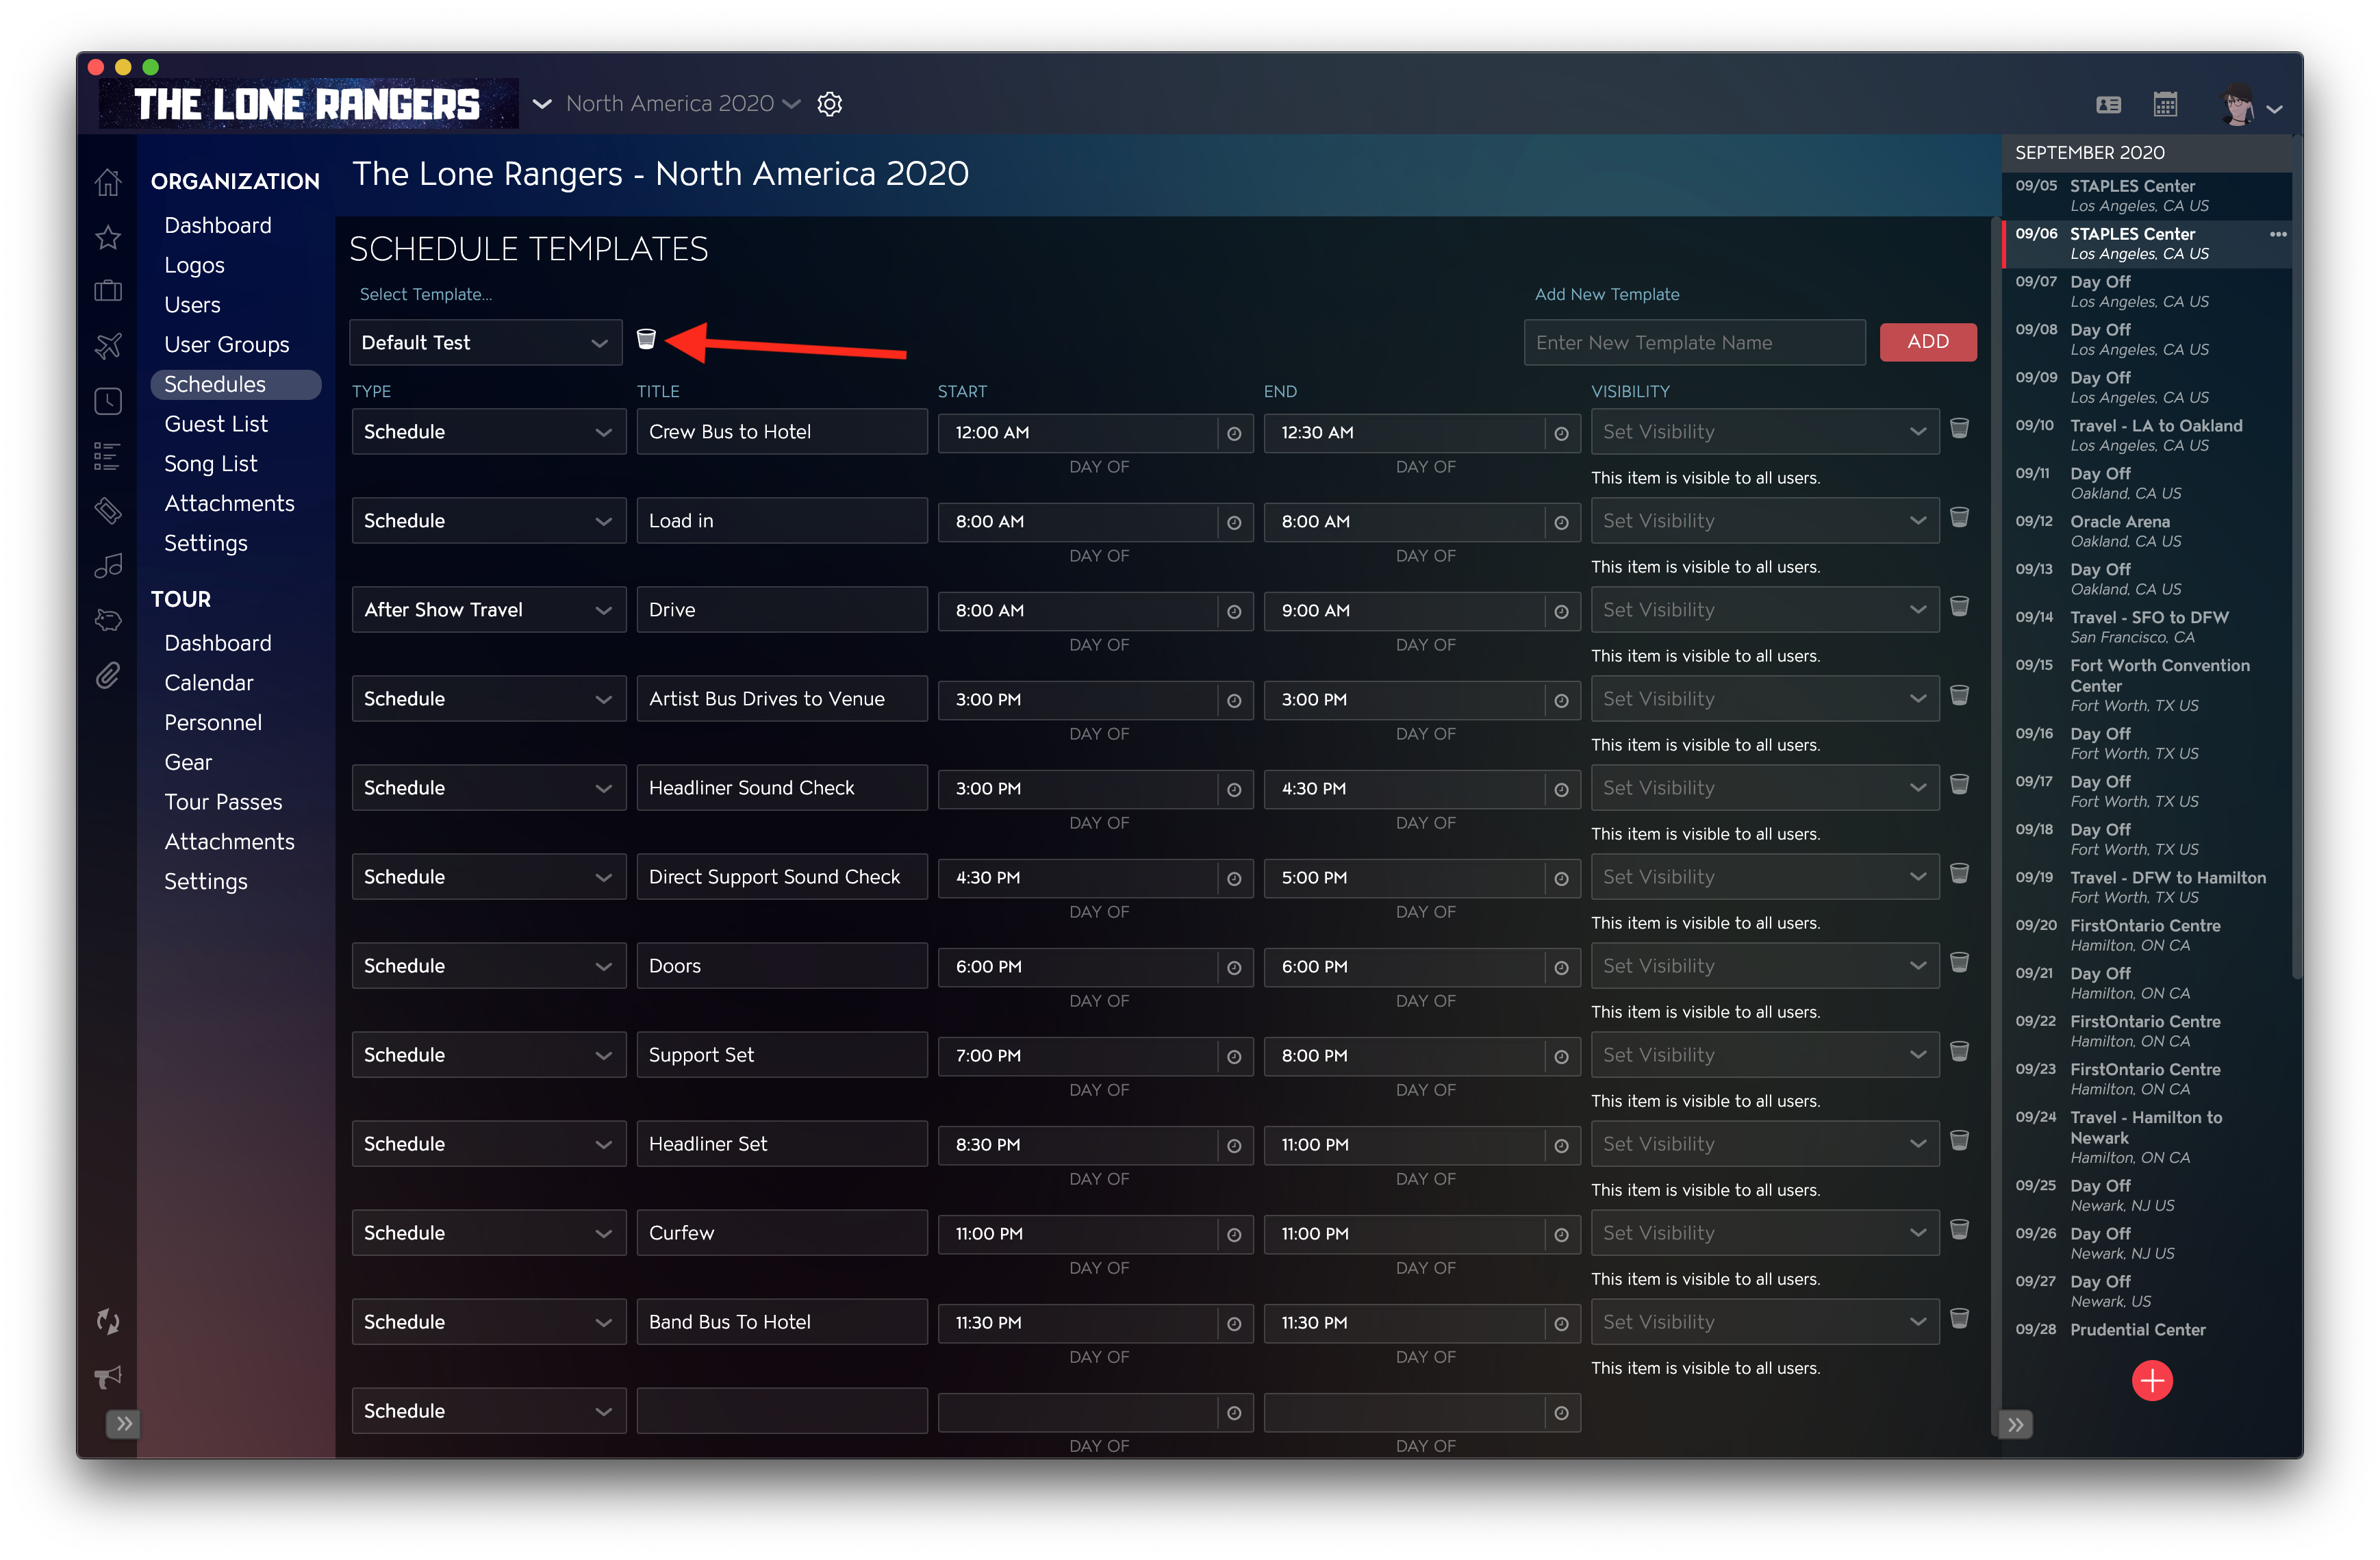
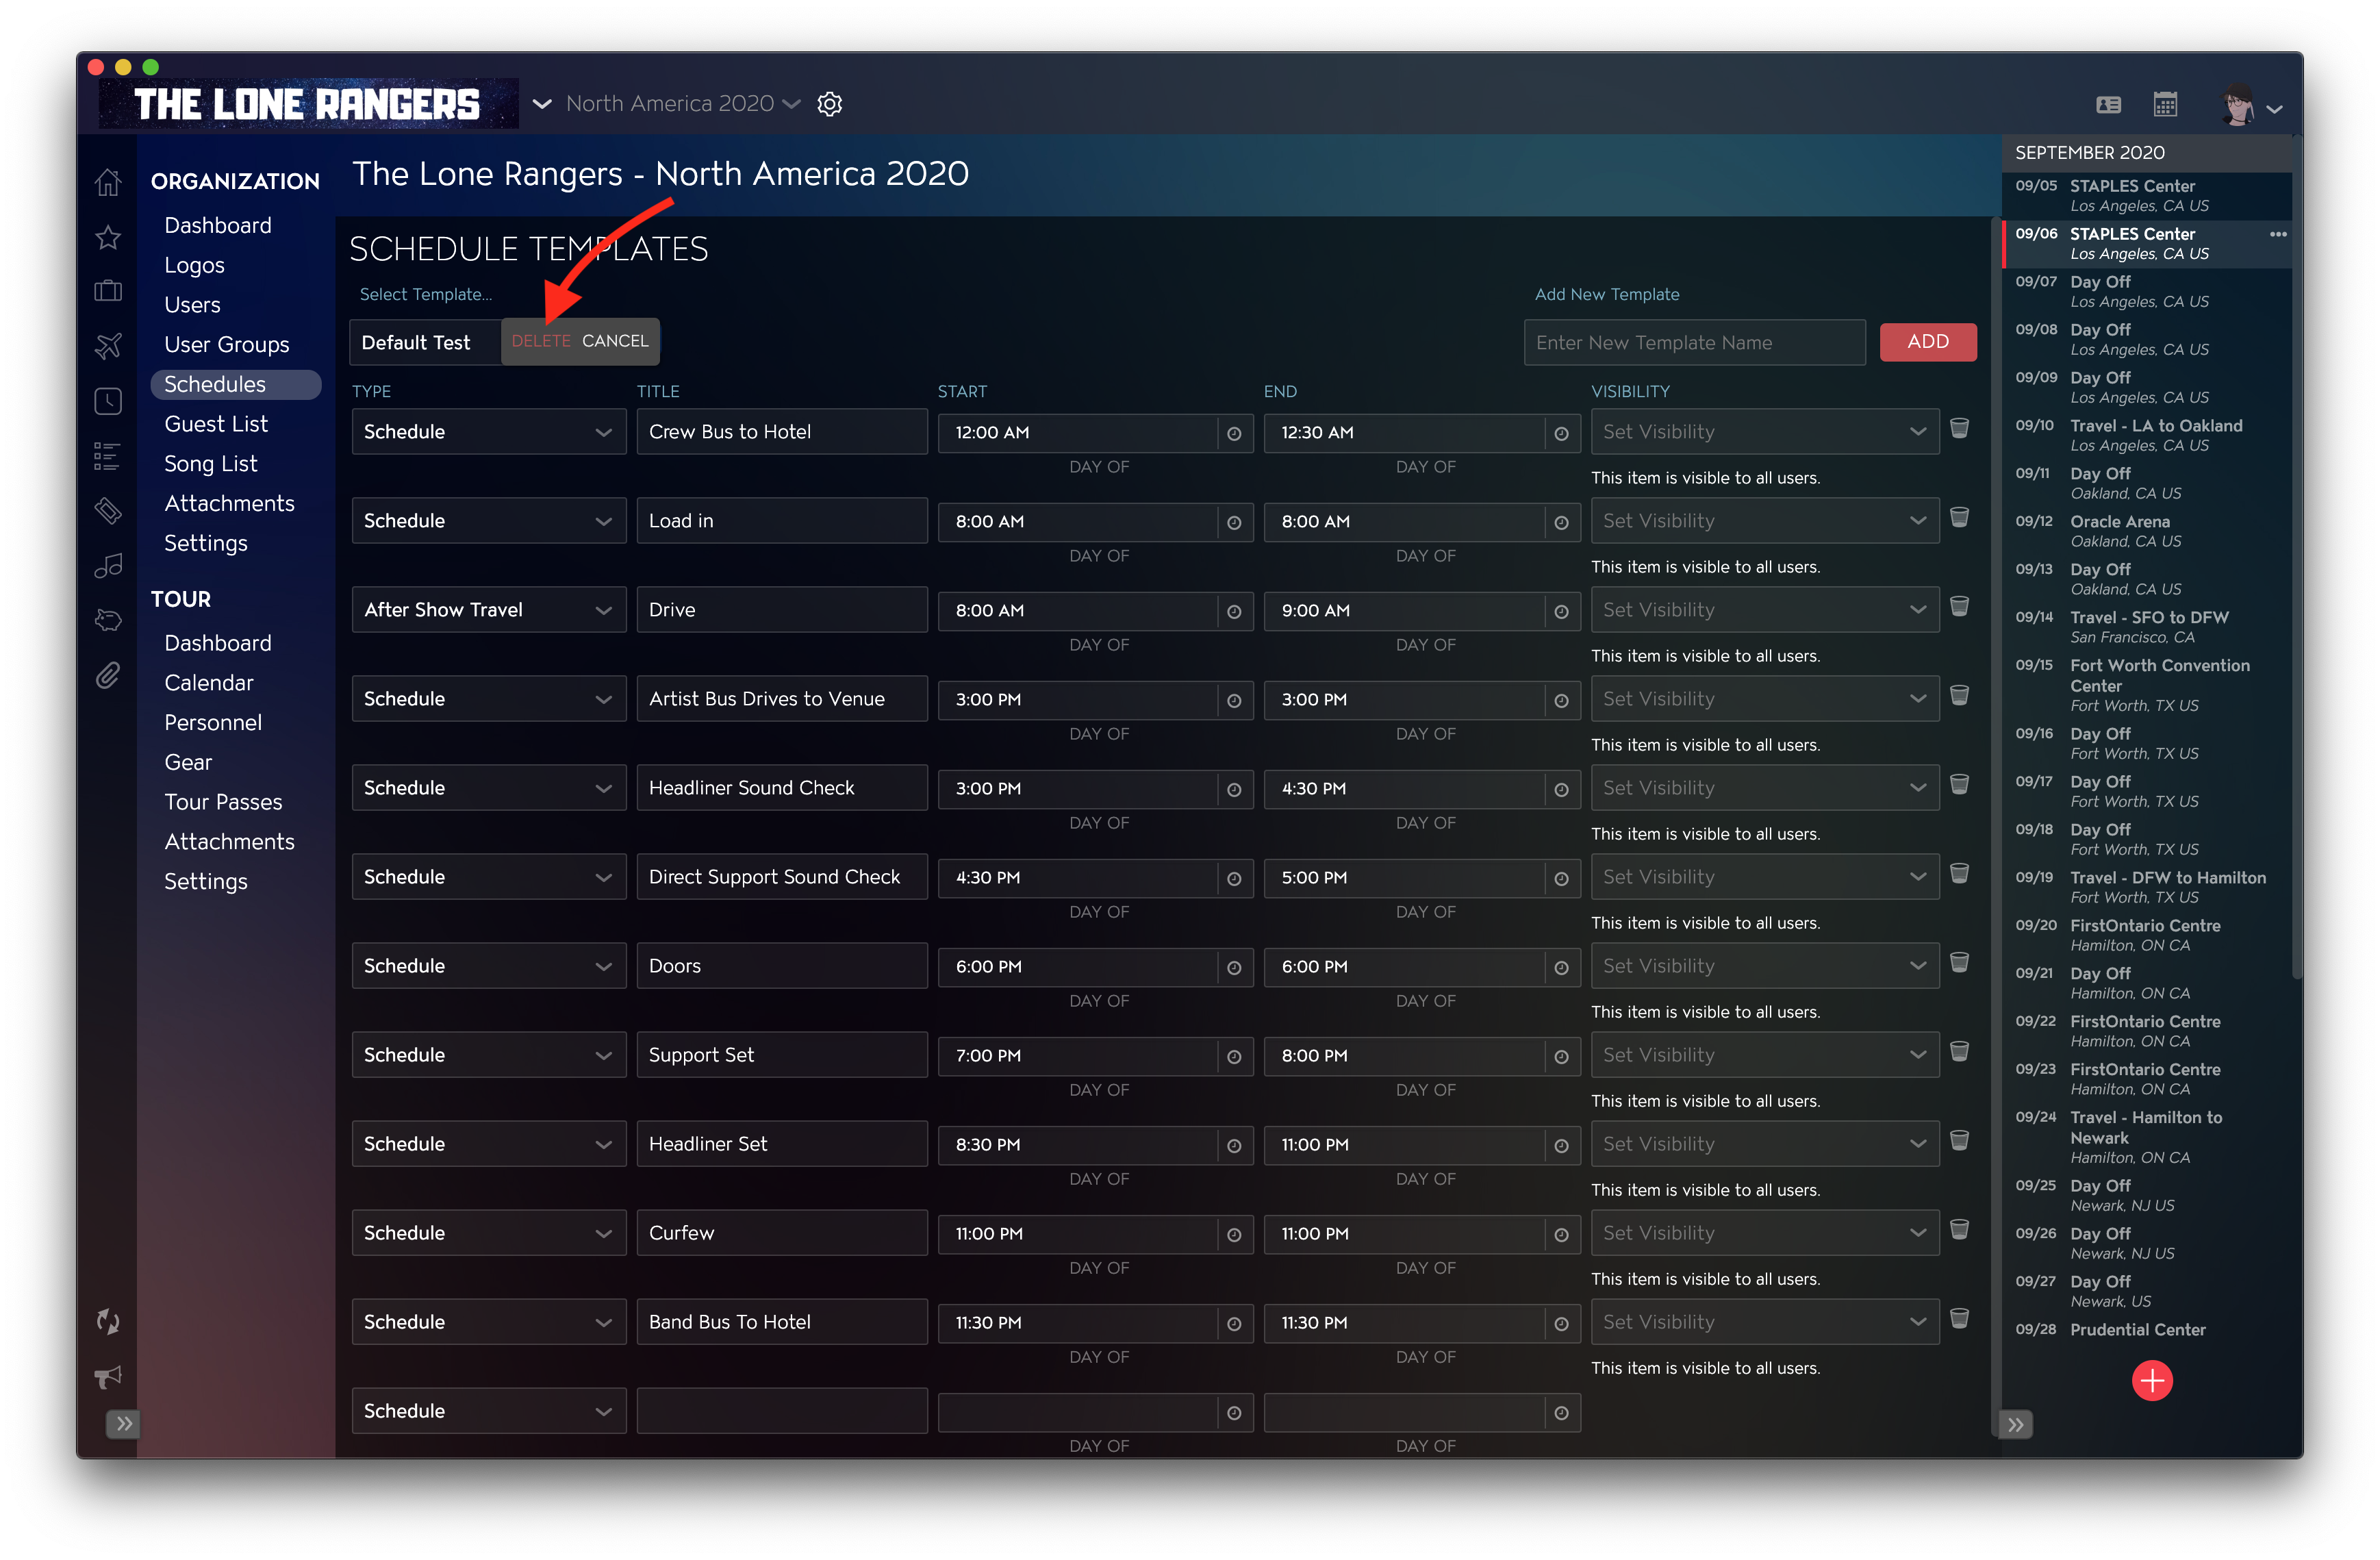
To delete a Schedule Template, select your desired Template by clicking on the dropdown box at the top left then clicking on the Trash icon followed by Delete to confirm your action.
Copy Schedule Templates to Another Organization
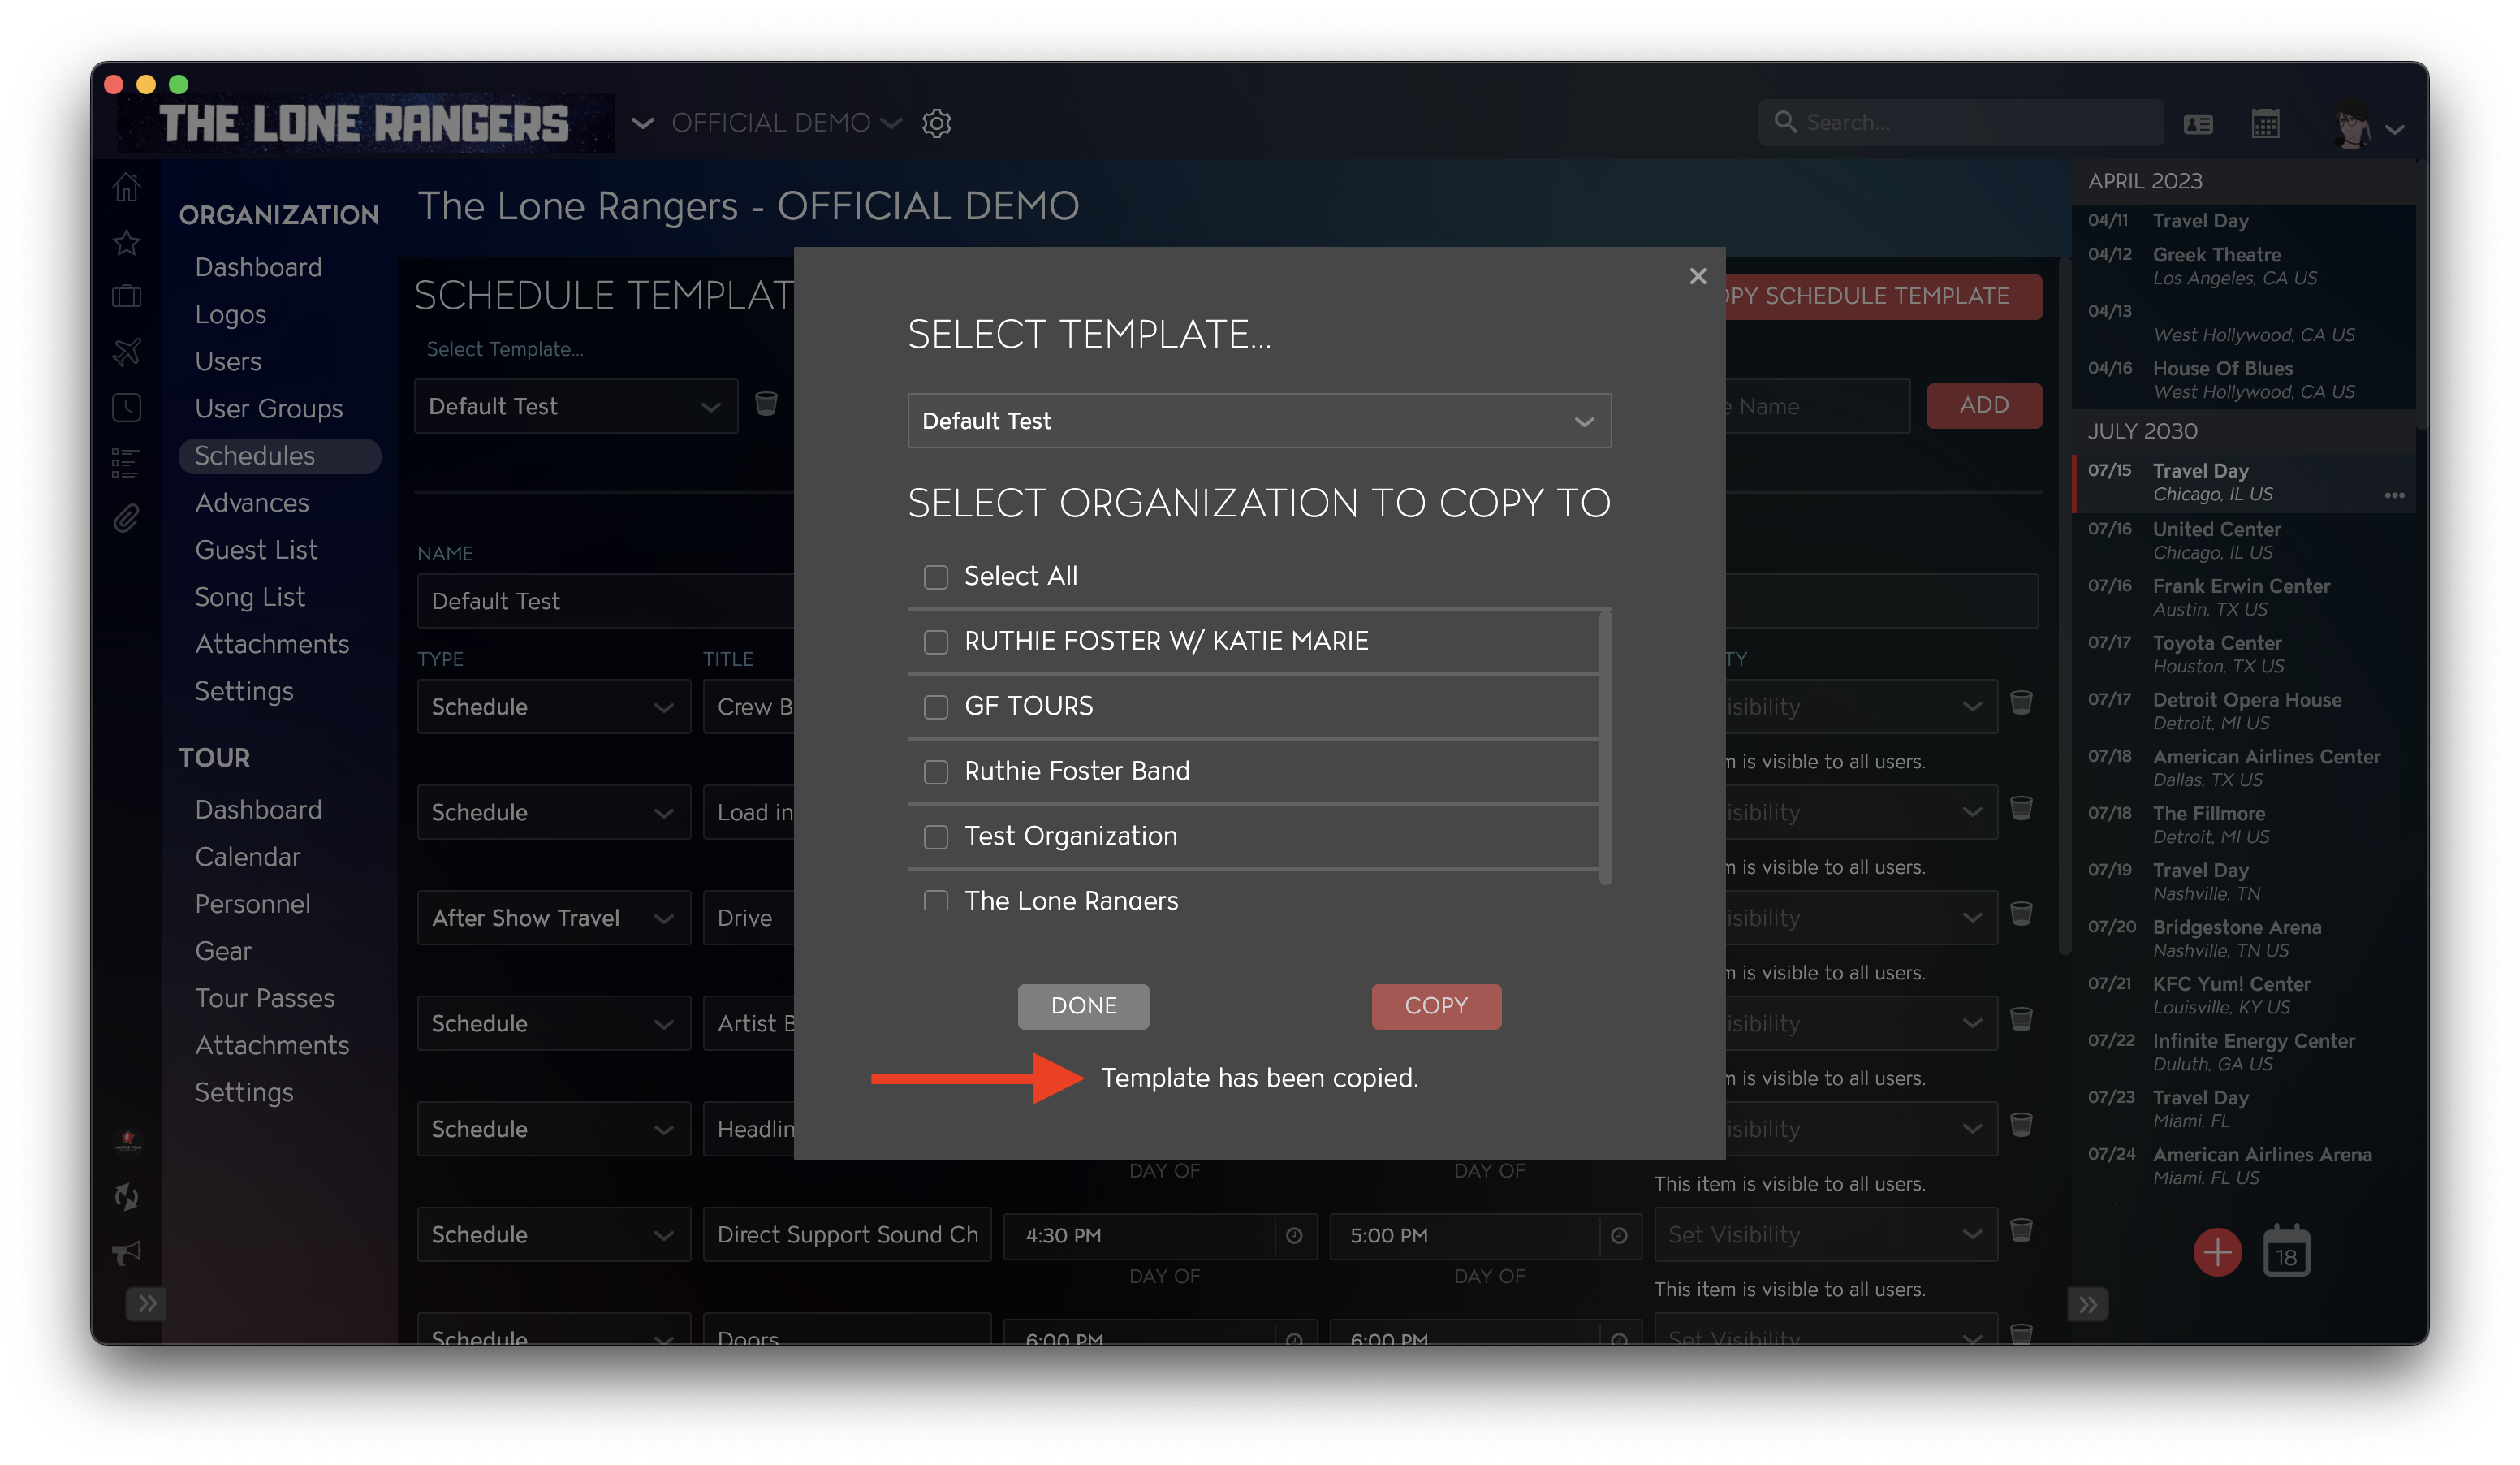
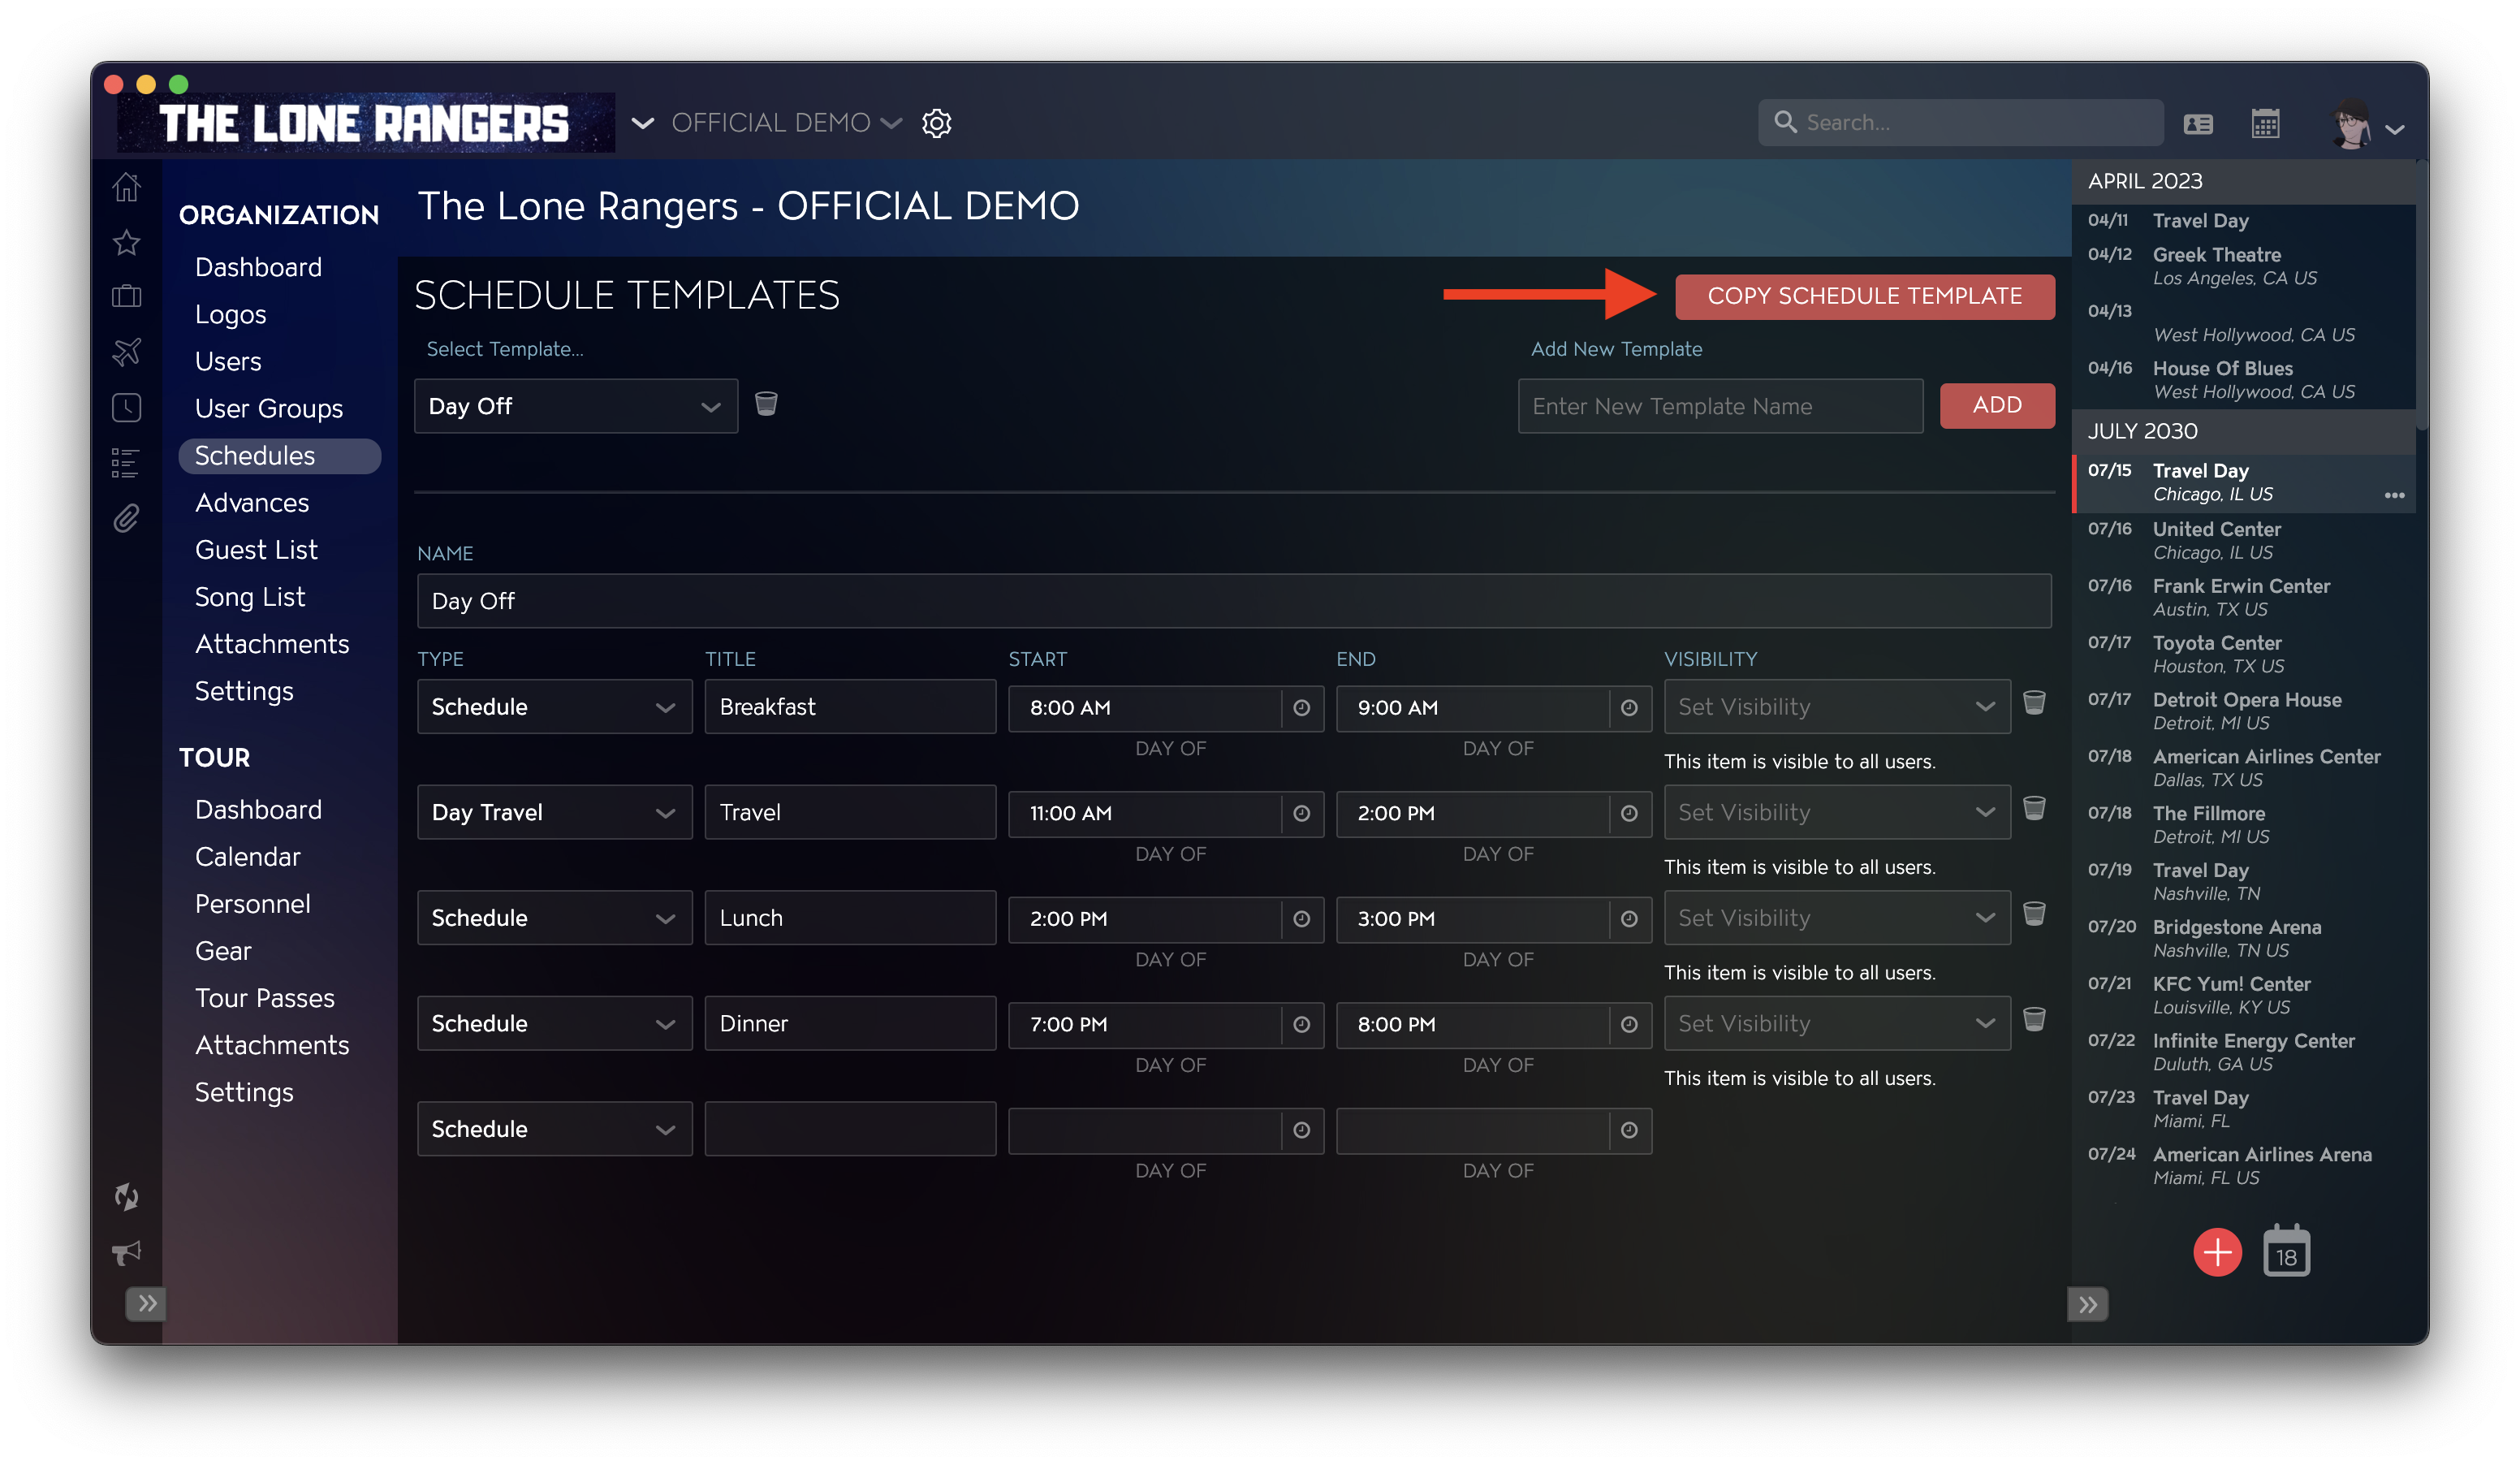
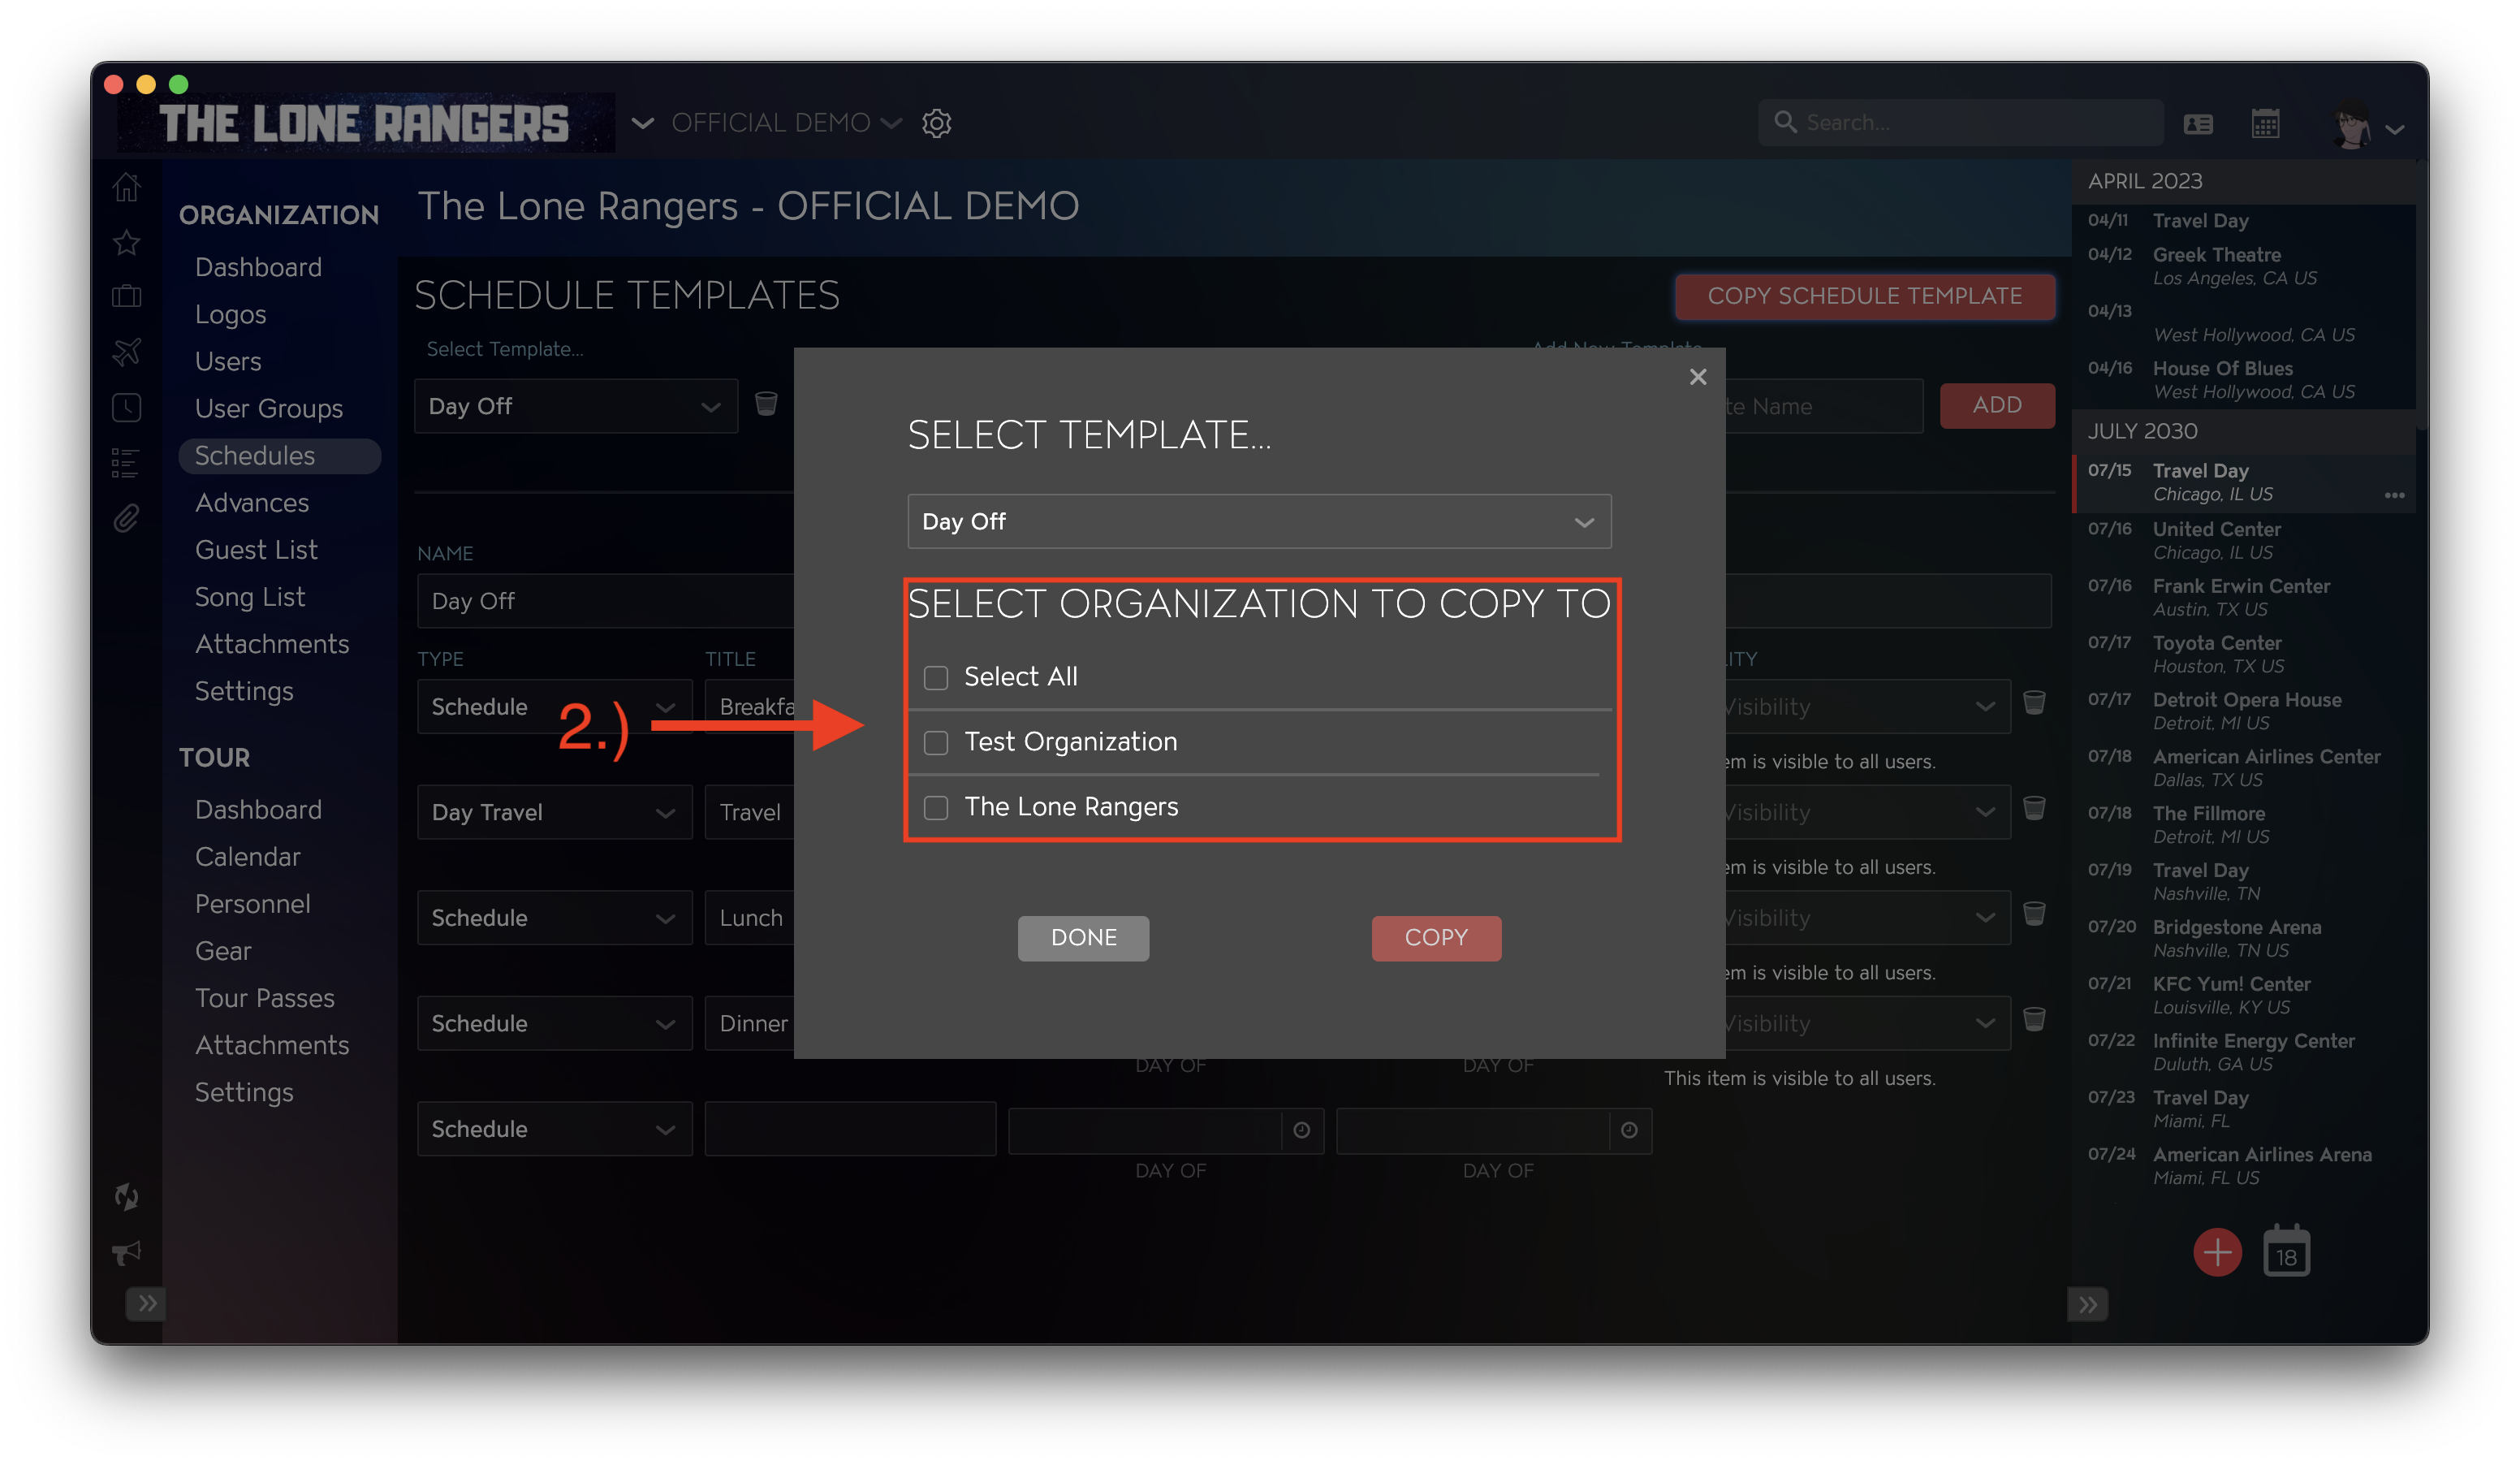
To copy an existing schedule template to another organization first click on COPY SCHEDULE TEMPLATE at the upper right corner within the Schedules settings menu.
1.) Select the template you'd like to copy.
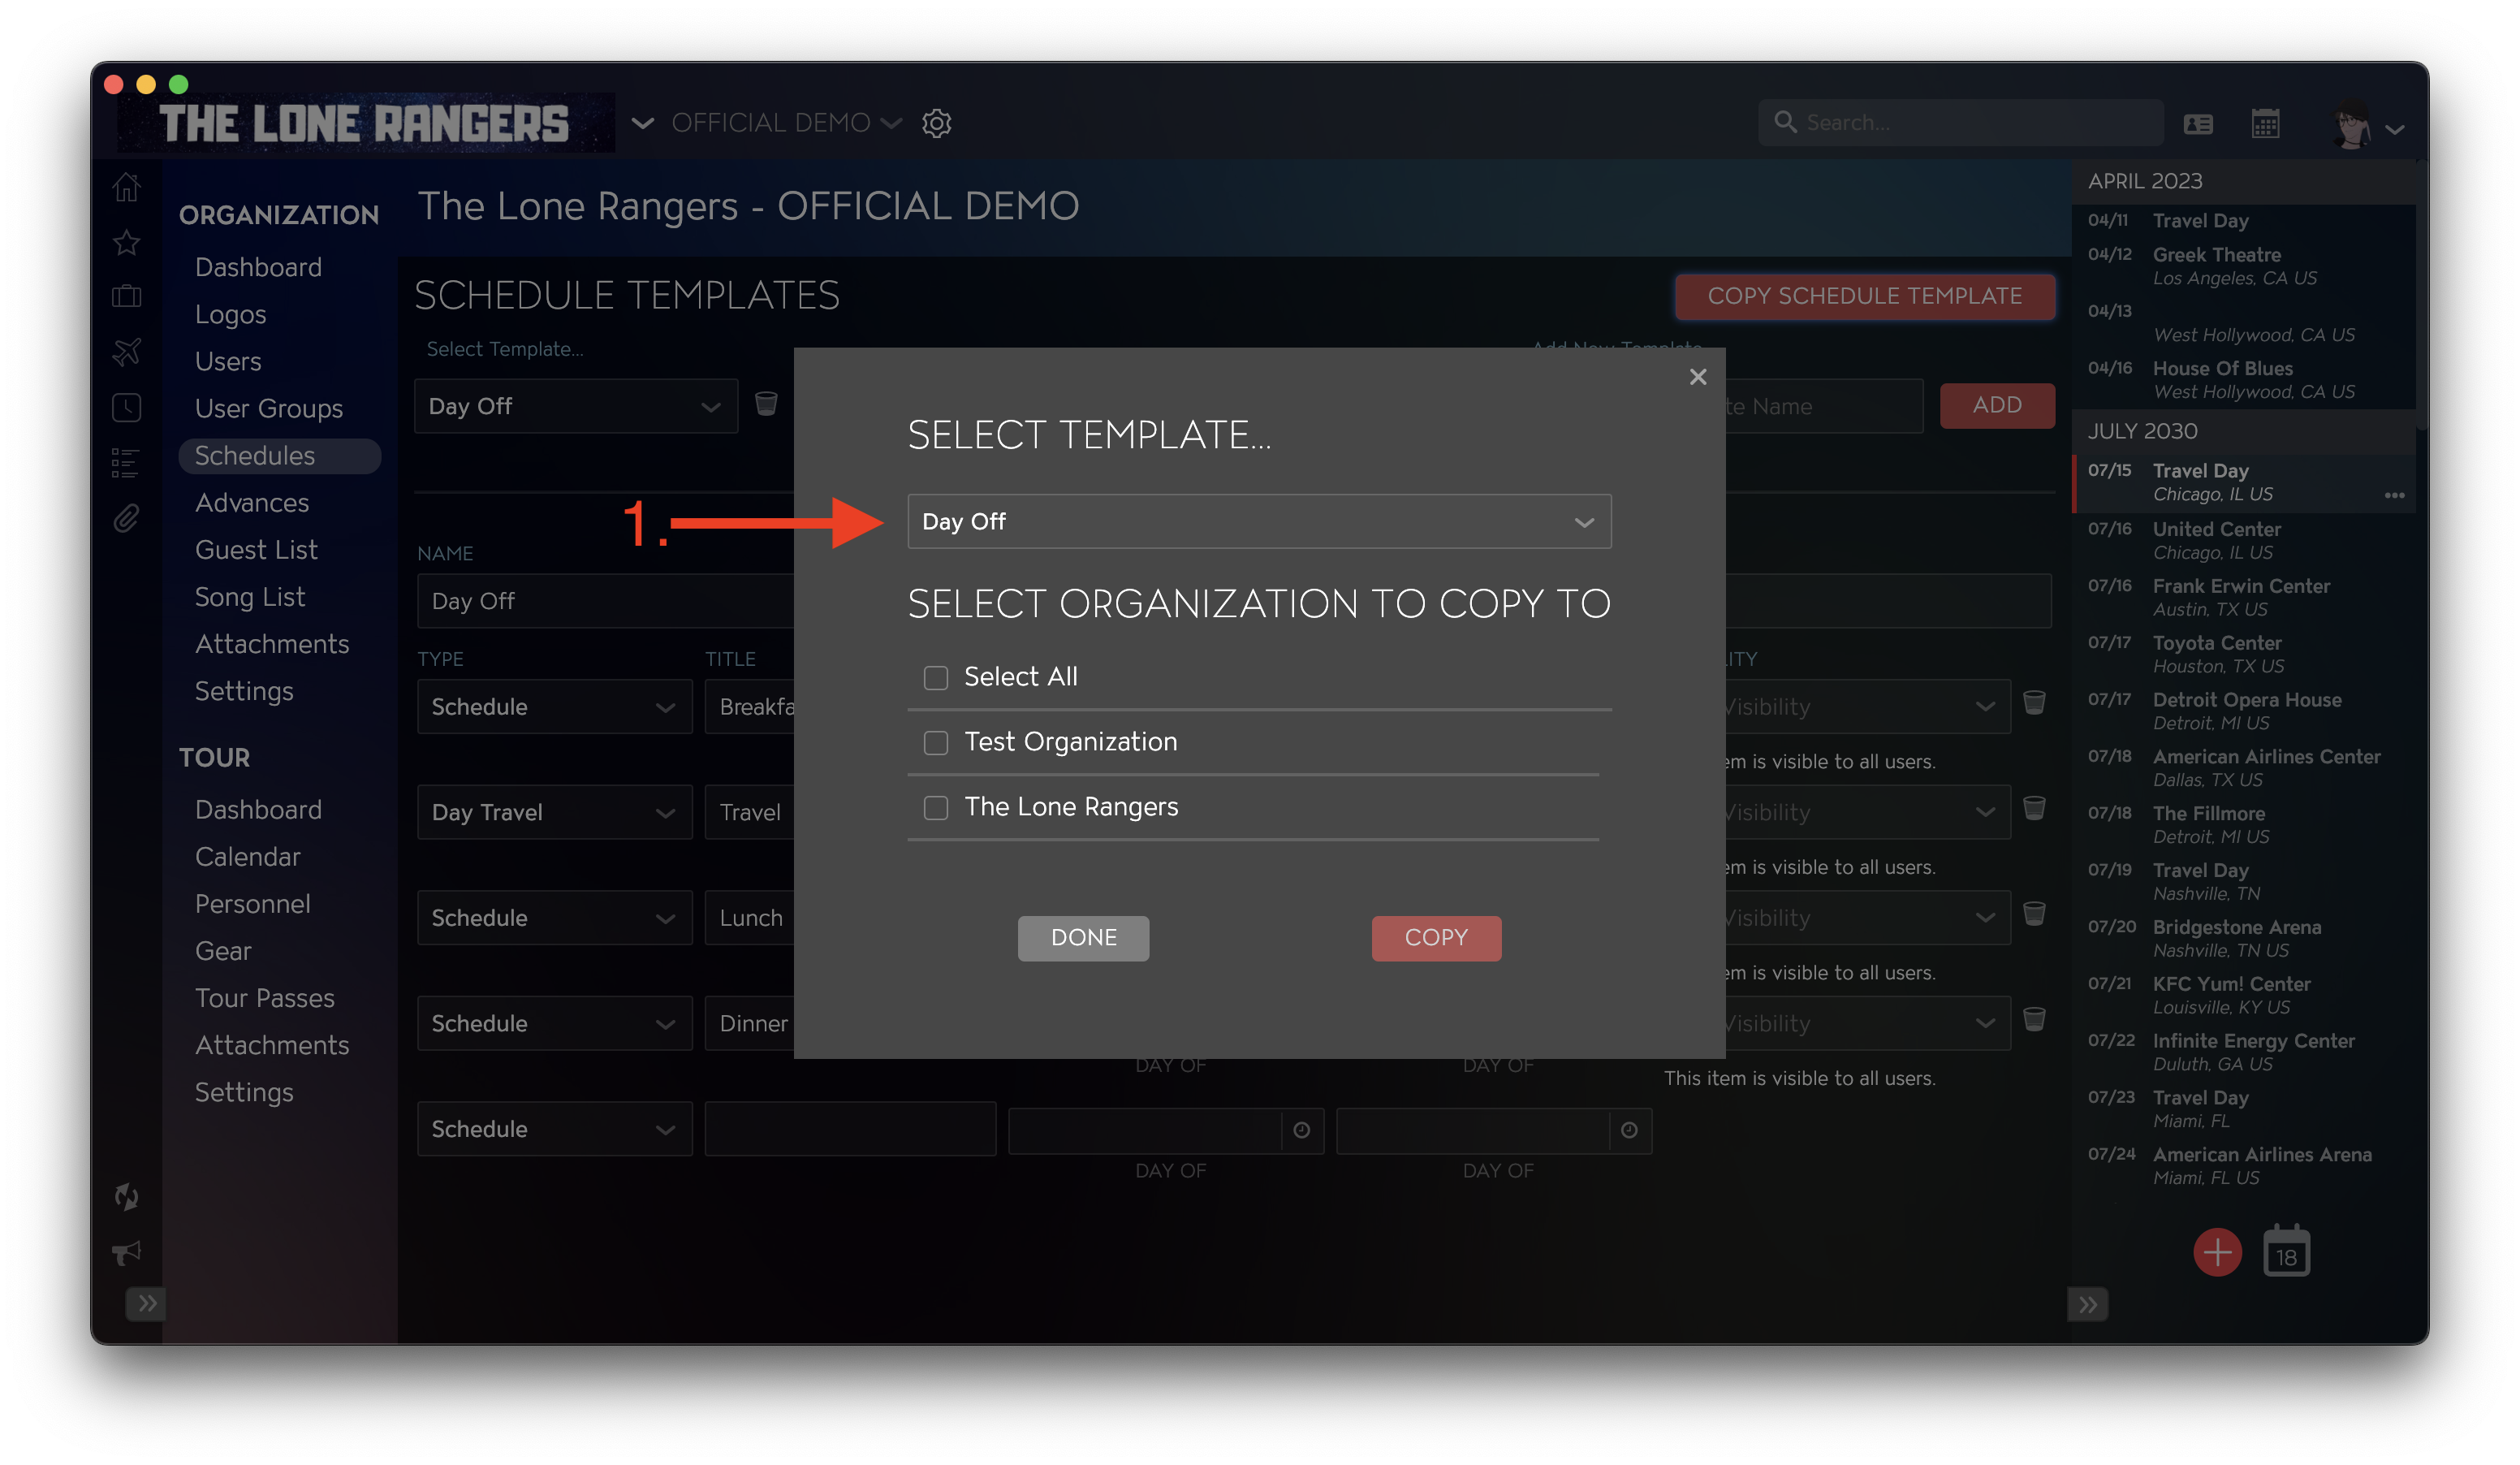
2.) Select which organization(s) you'd like to copy to.
3.) Click on the COPY button at the bottom right of the prompt.
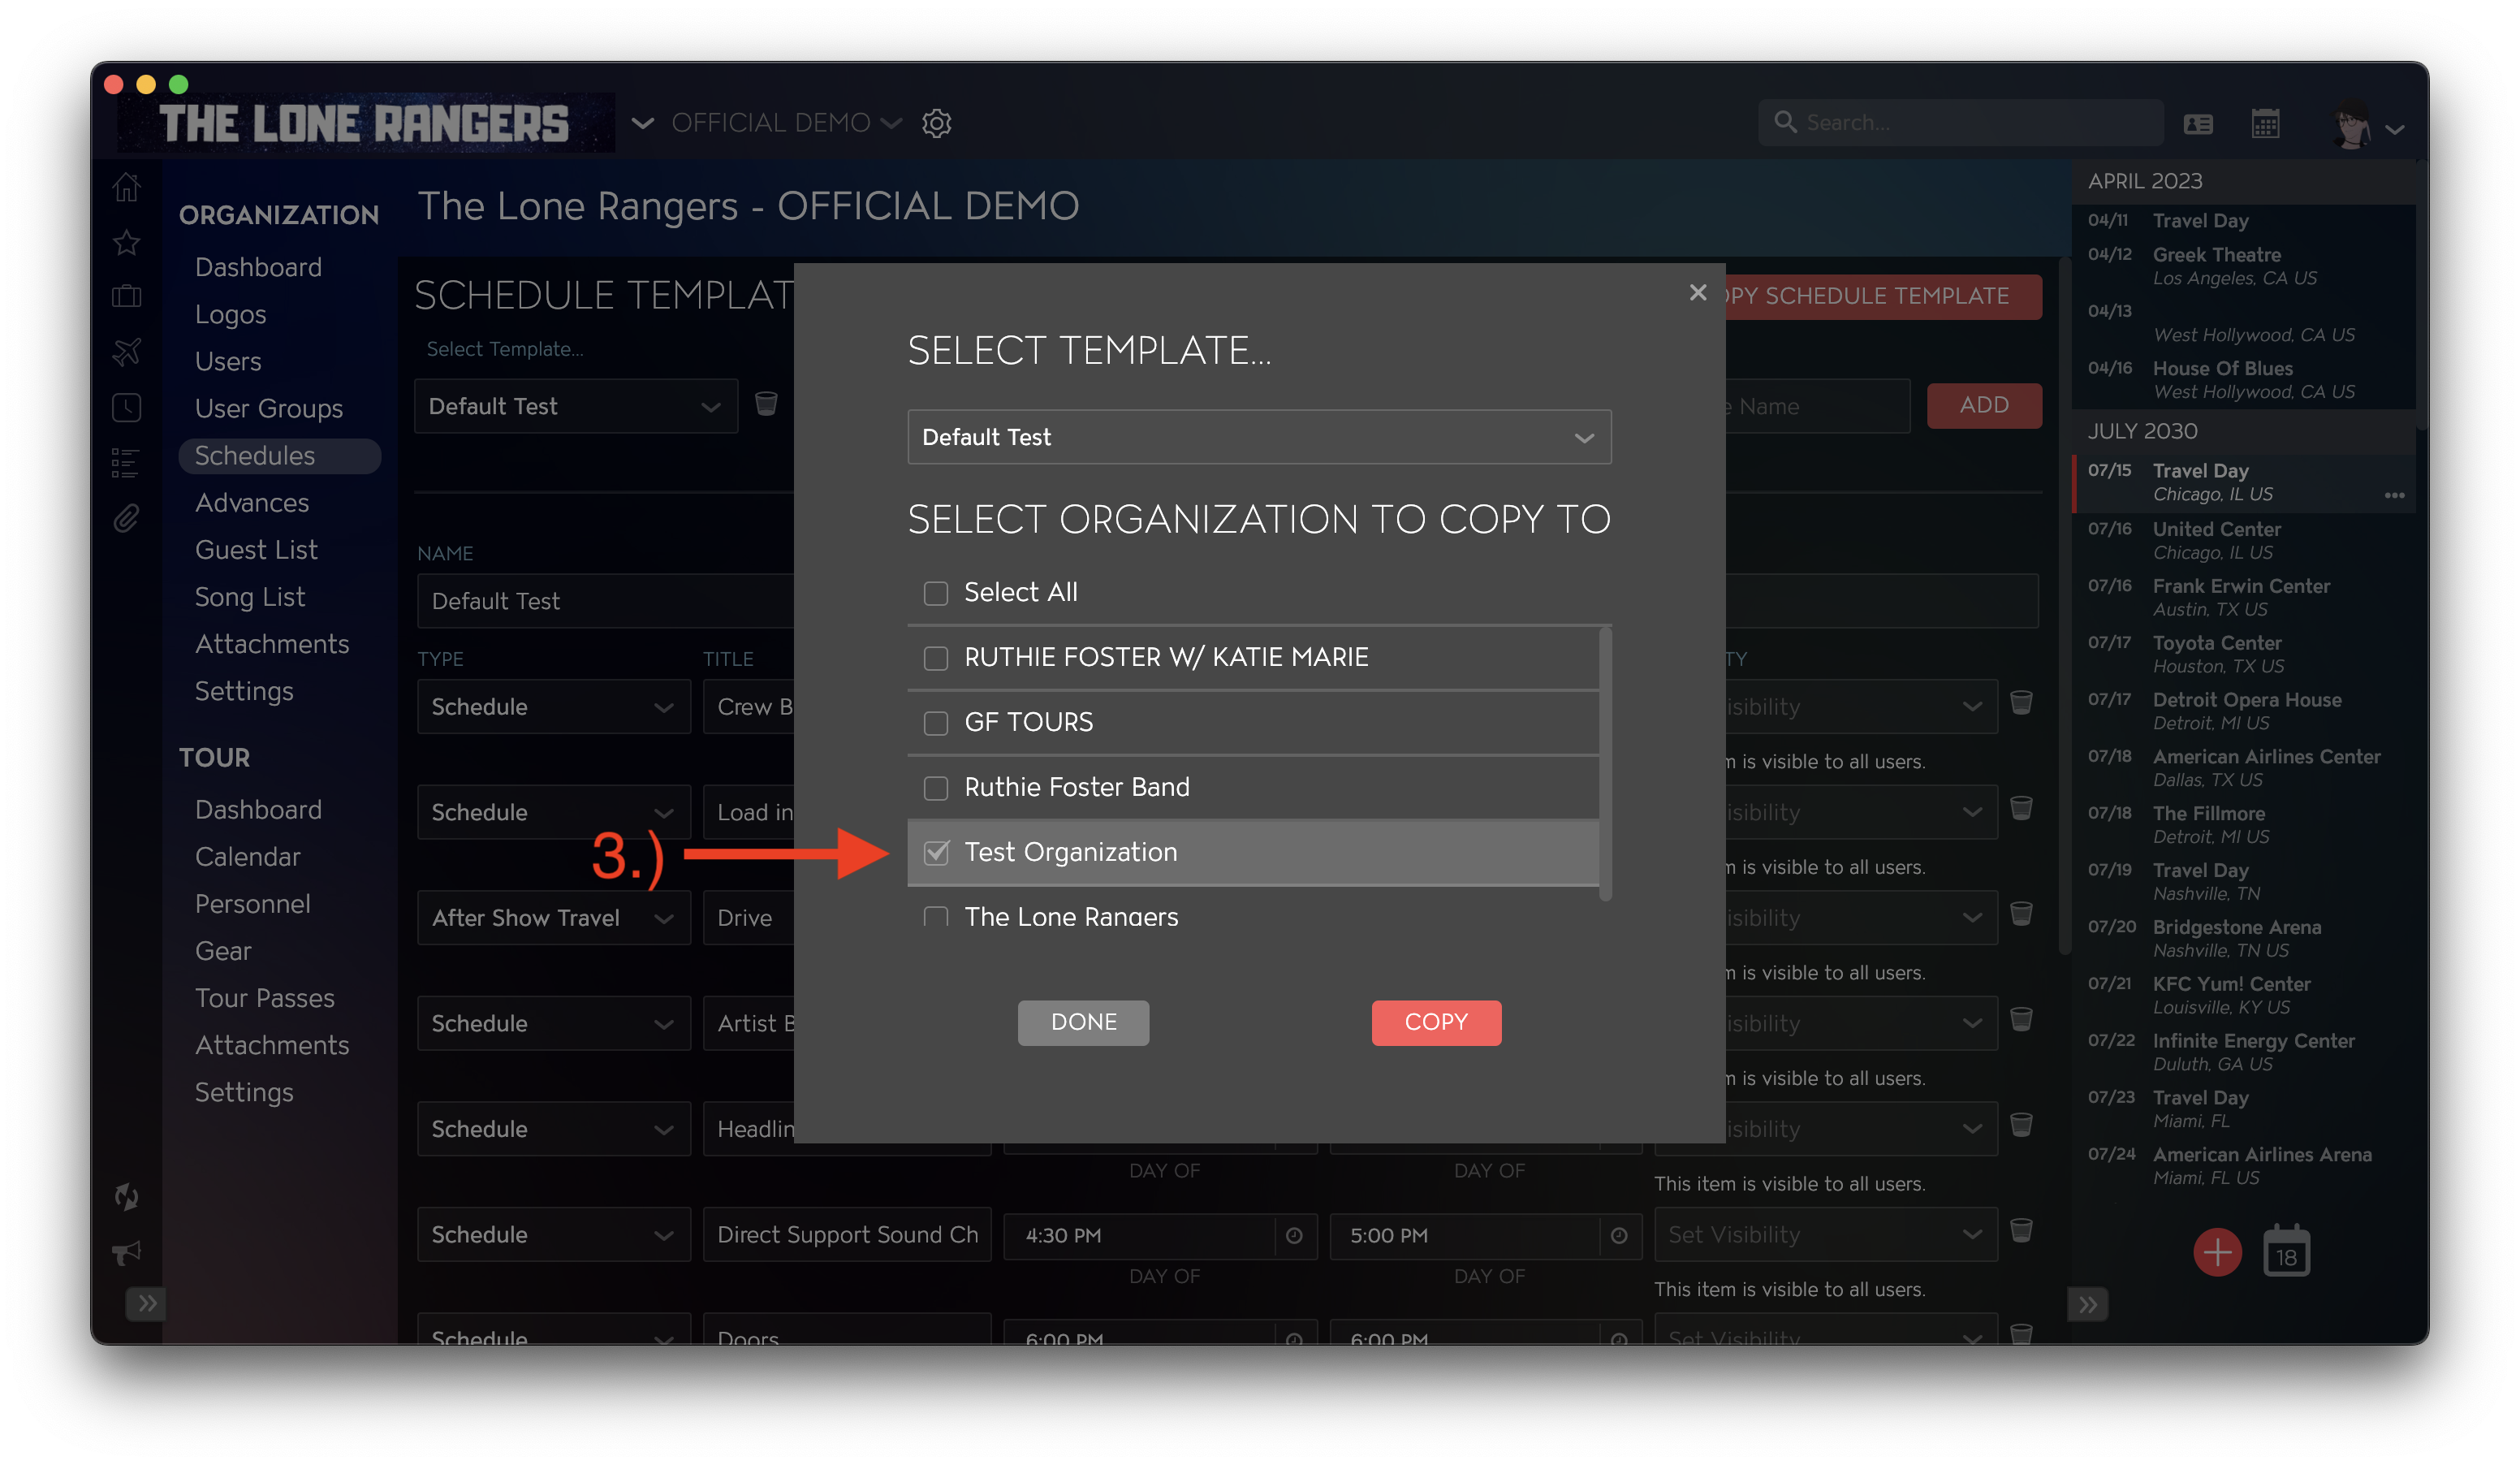
Once finished you will see a confirmation message that your schedule template has been successfully copied.